Destinations setup
Entity setup can be done by all users who have access to the Administration/Entities/Destinations tab.
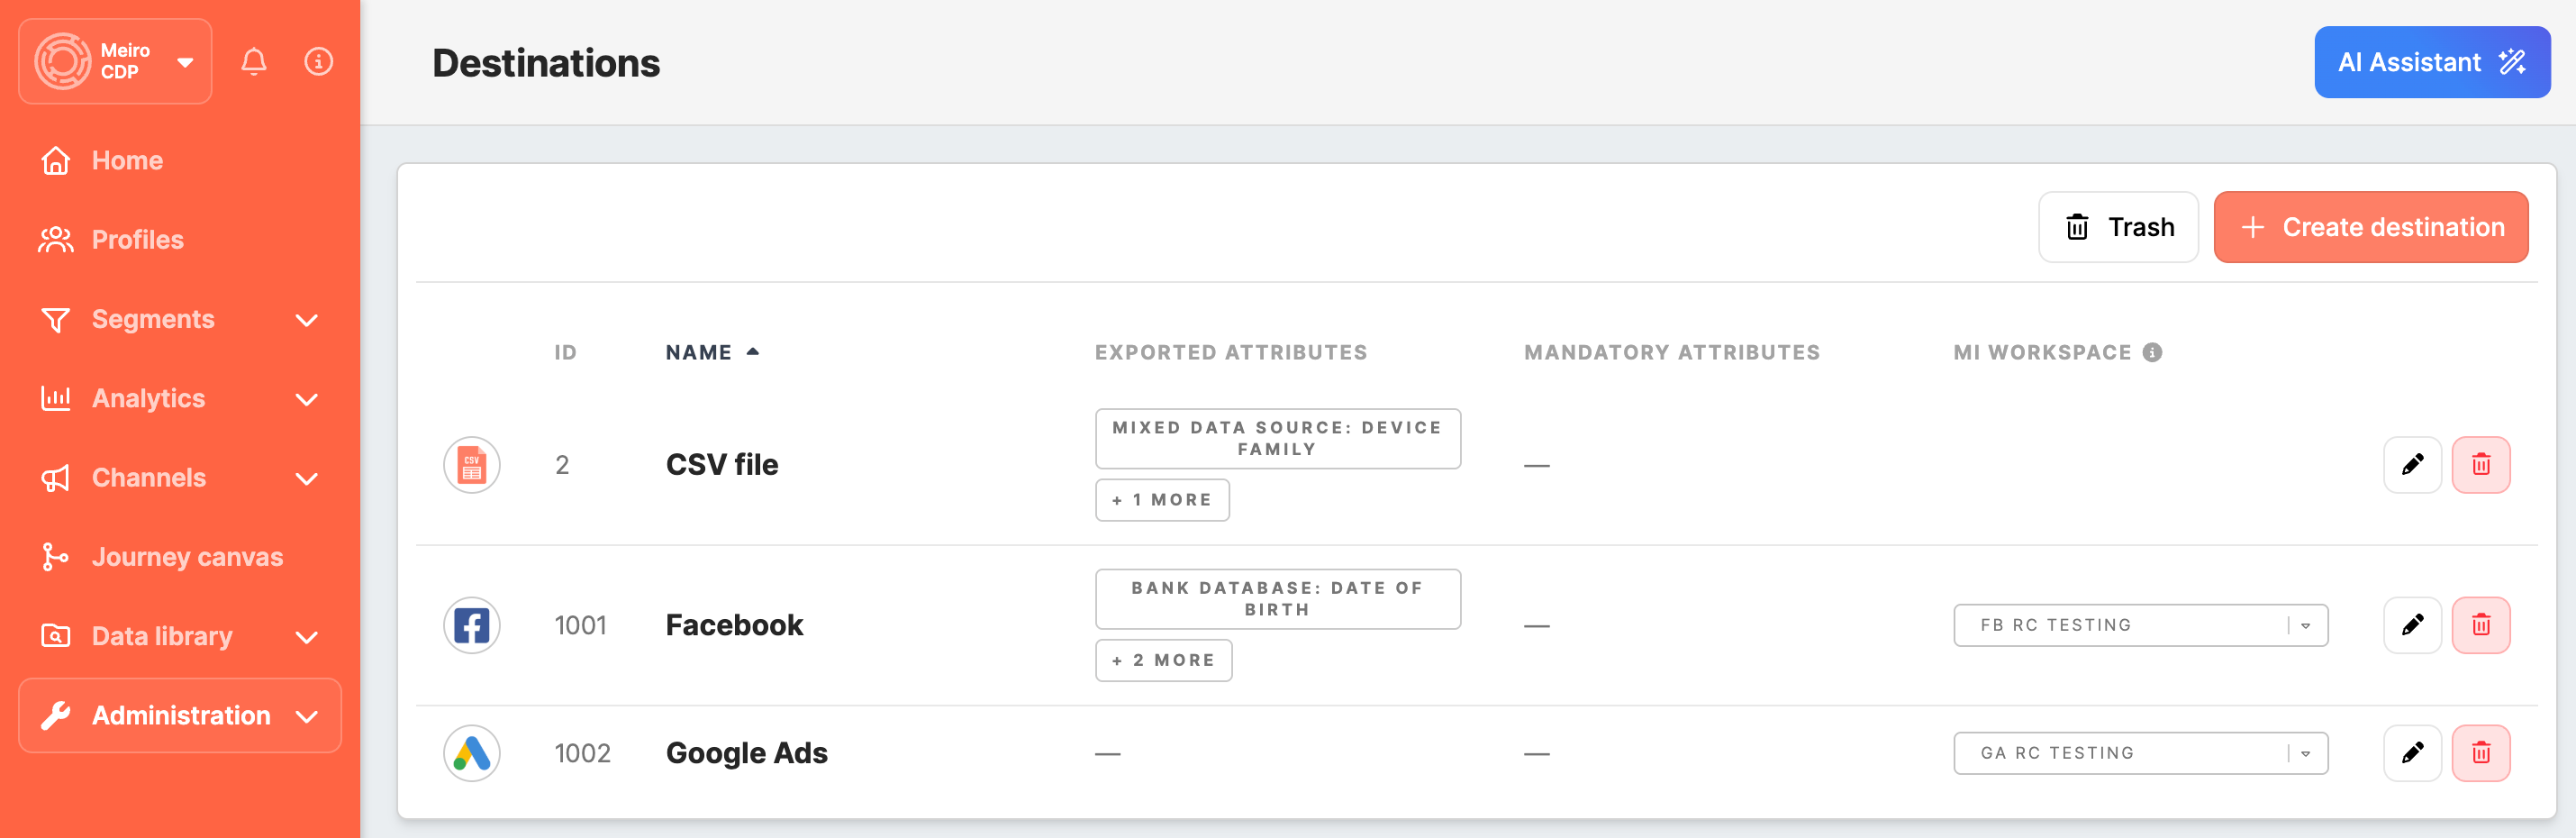
In the Administration/Entities/Destinations tab, it is possible to:
- Create a new destination directly in Meiro CDP
- Edit destination settings
- Delete destinations (if they are not used)
A list of destinations is visible to users in the Data library/Destinations tab.
|
Learn from this article |
1. Create a destination in Meiro Business Explorer
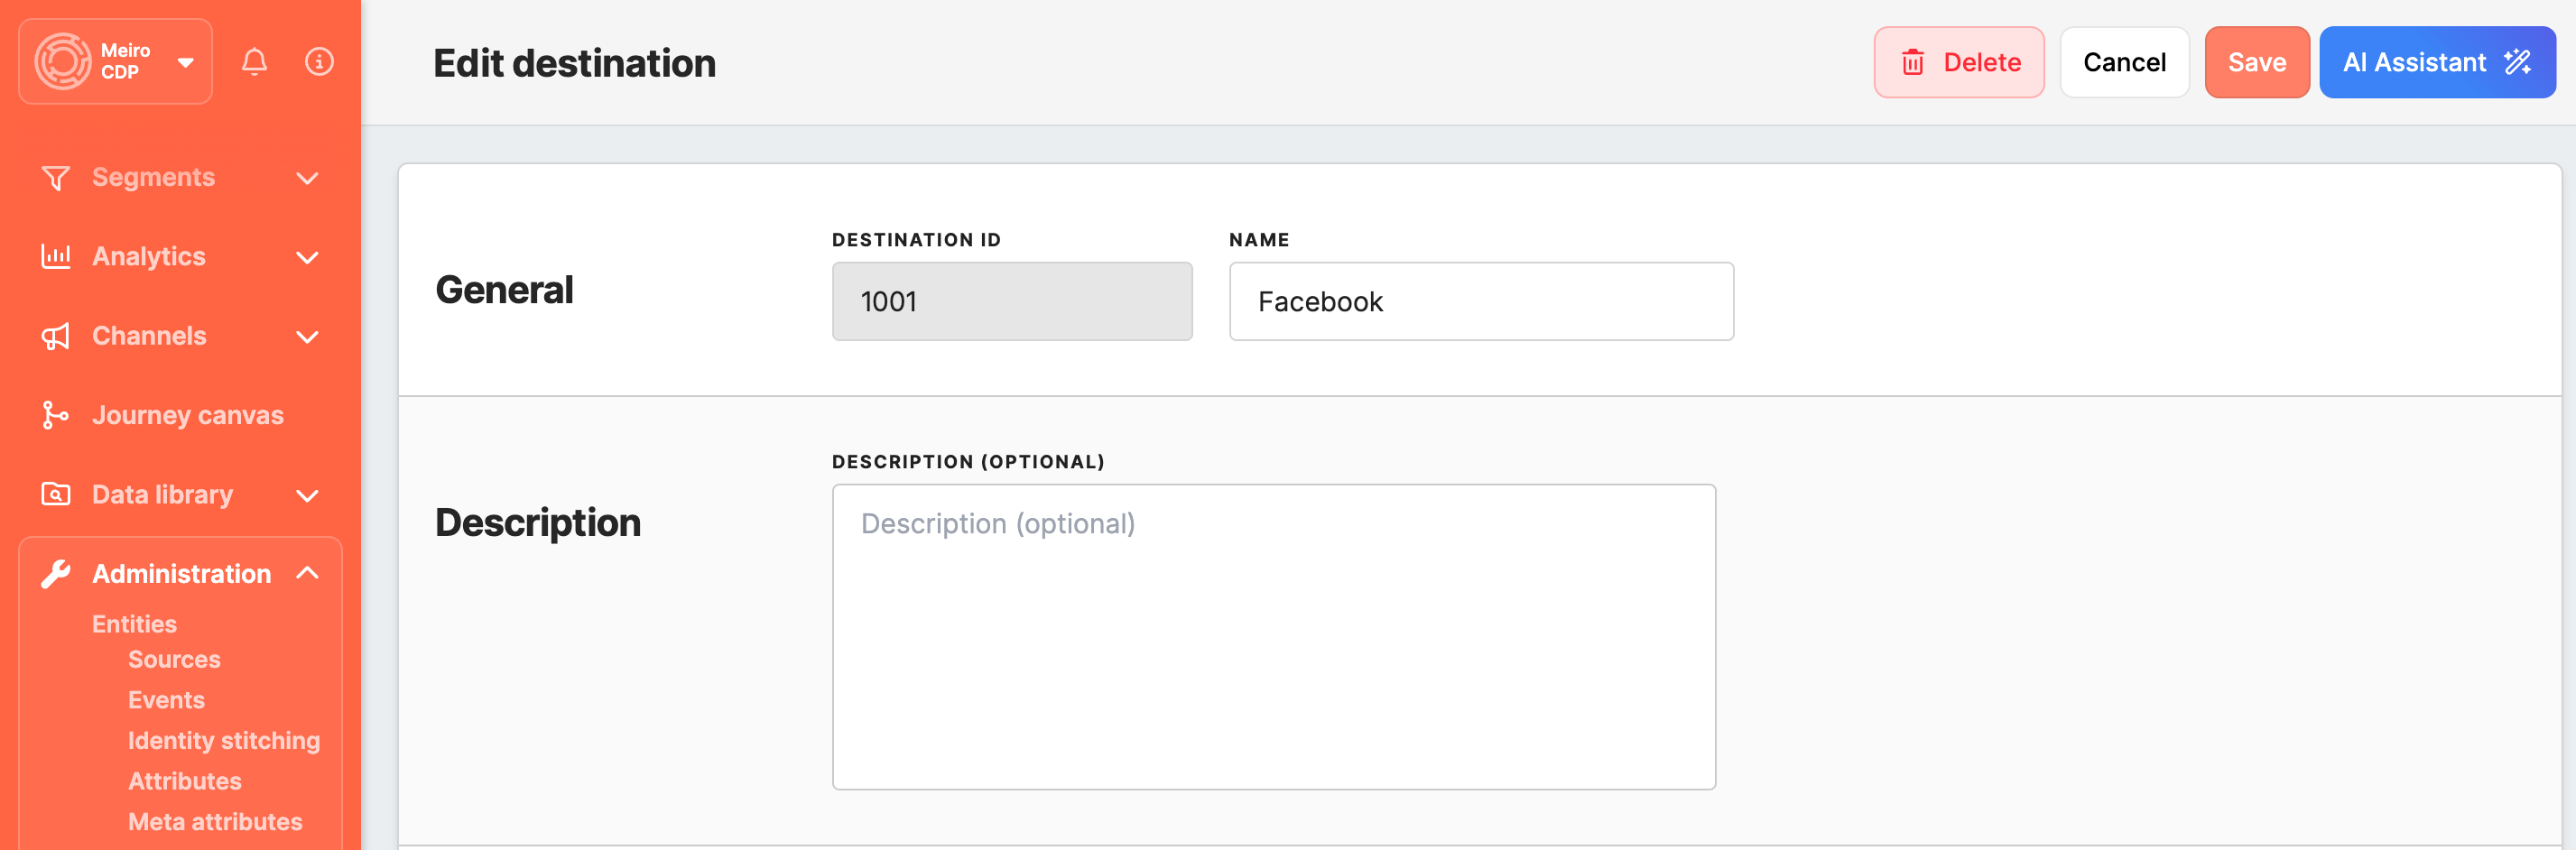
Go to Administration -> Entities -> Destinations and click + Create destination.
Fill out the destination form and click Save.
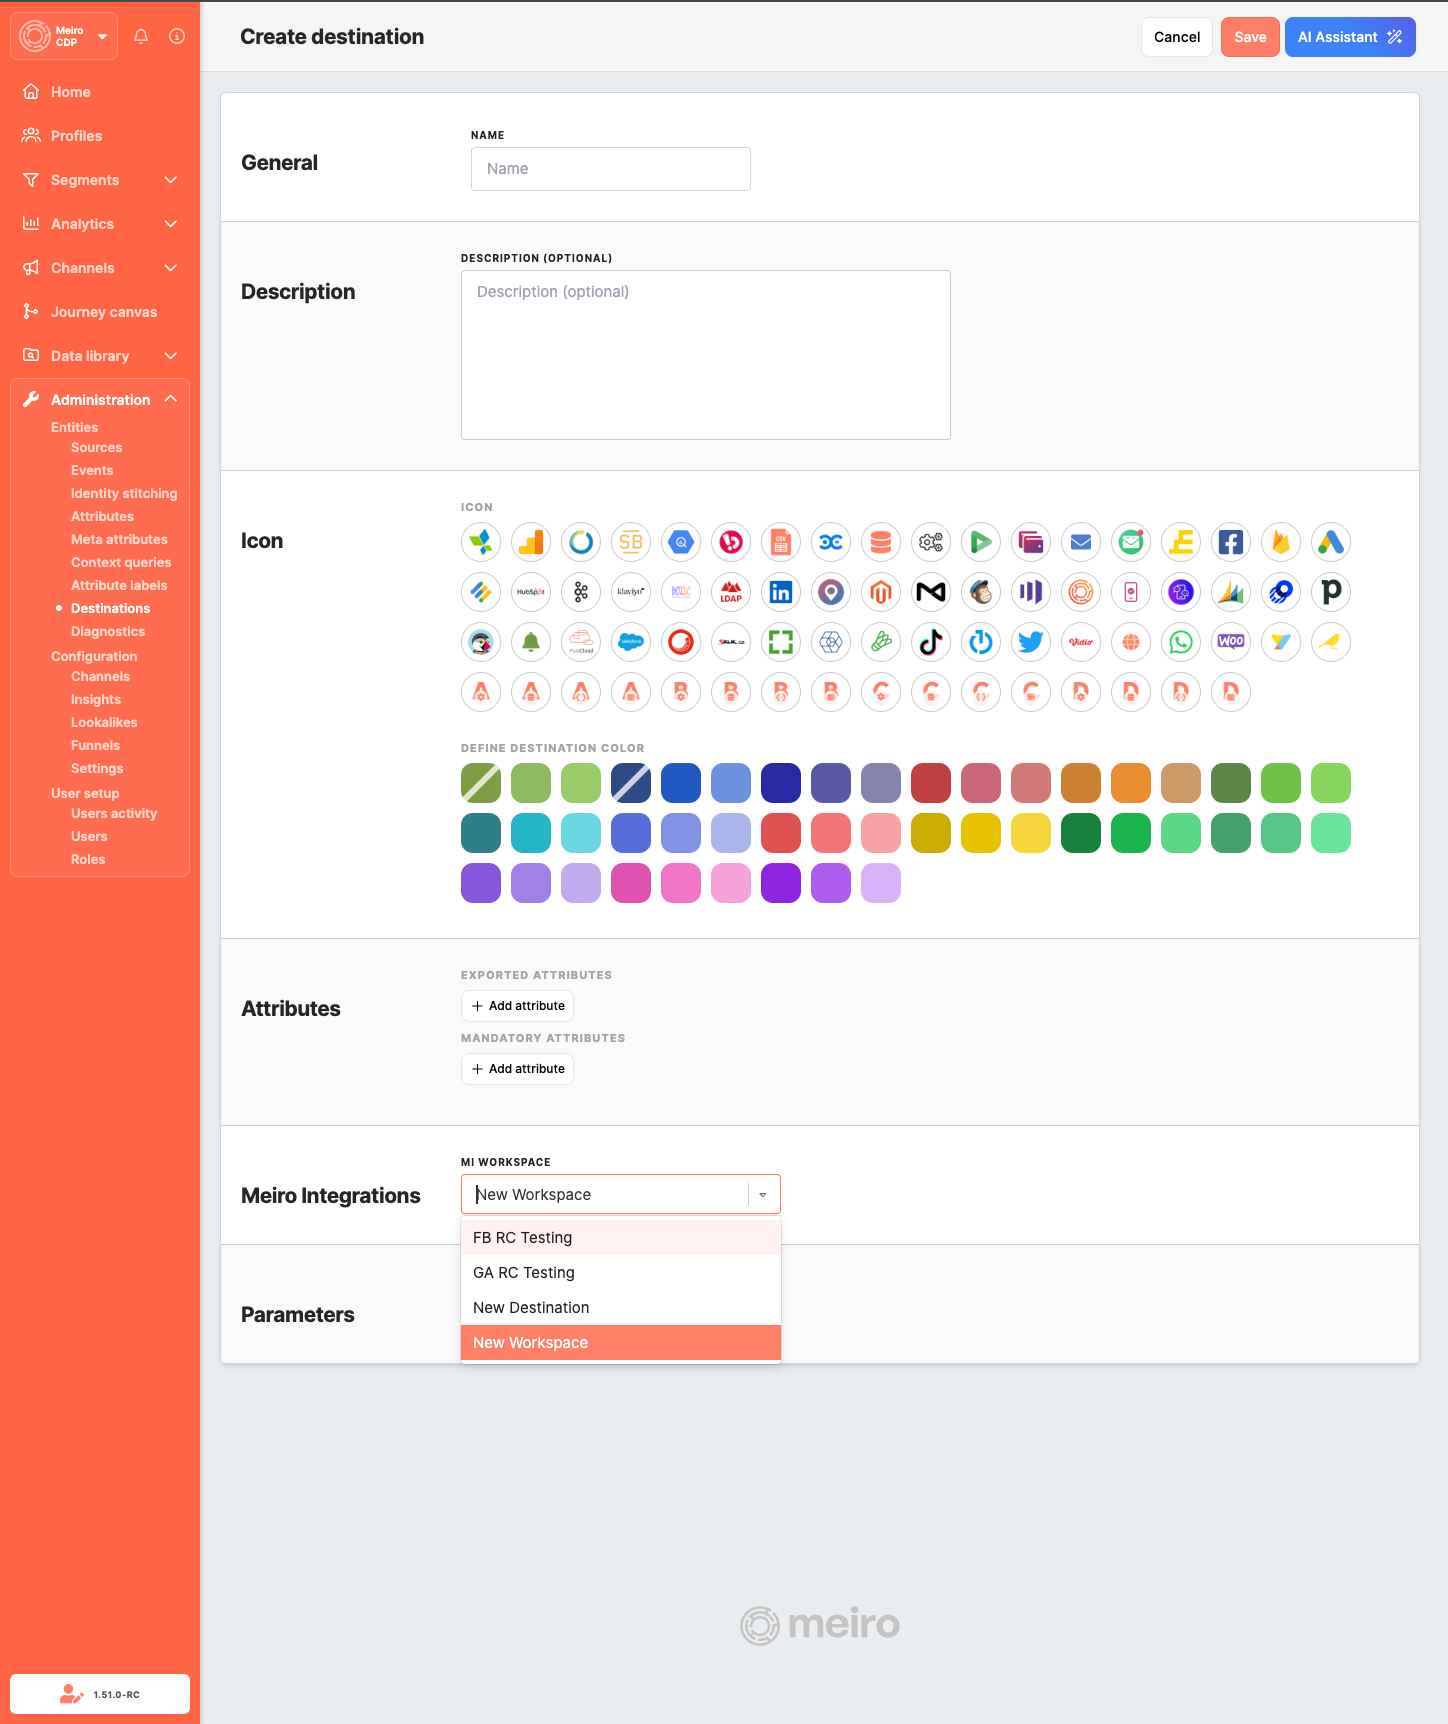
Destination form fields
|
General
|
Set destination Name. The destination ID is generated automatically after save and is not editable. |
|
Description
|
Add a description visible in Data library/Destinations. |
|
Icon
|
Choose destination icon and destination color visible across the product. |
|
Exported attributes
|
Exported attributes are attributes that will be exported to your chosen destination. This field is mandatory to fill. The default operator for exported attributes is "and".
Warning: If Exported attributes are not set, the export will be empty. |
|
Mandatory attributes
|
Mandatory attributes are required to export to the destination. This is not a mandatory field, but an additional attribute filter(s) on top of exported attributes. Export may sometimes contain only exported attributes, though. Operators "and"/ "or" are available to choose for Mandatory Attributes. |
|
Meiro Integrations workspace
|
MI workspace is applicable if an MI connection is defined. If your MI connection is defined, it is possible to select a Meiro Integrations workspace as a destination. MI workspace is not needed to be defined for CSV export. |
|
Parameters
|
Add destination parameters for export configuration. |
After saving, the new destination appears in the destinations list and can be used right away in:
- Segments -> Segment detail -> Exports tab
- Journey canvas -> Destination node
Meiro Integrations workspace
If MI connection is configured, select a workspace from the dropdown. You can choose an existing workspace option available for your tenant.
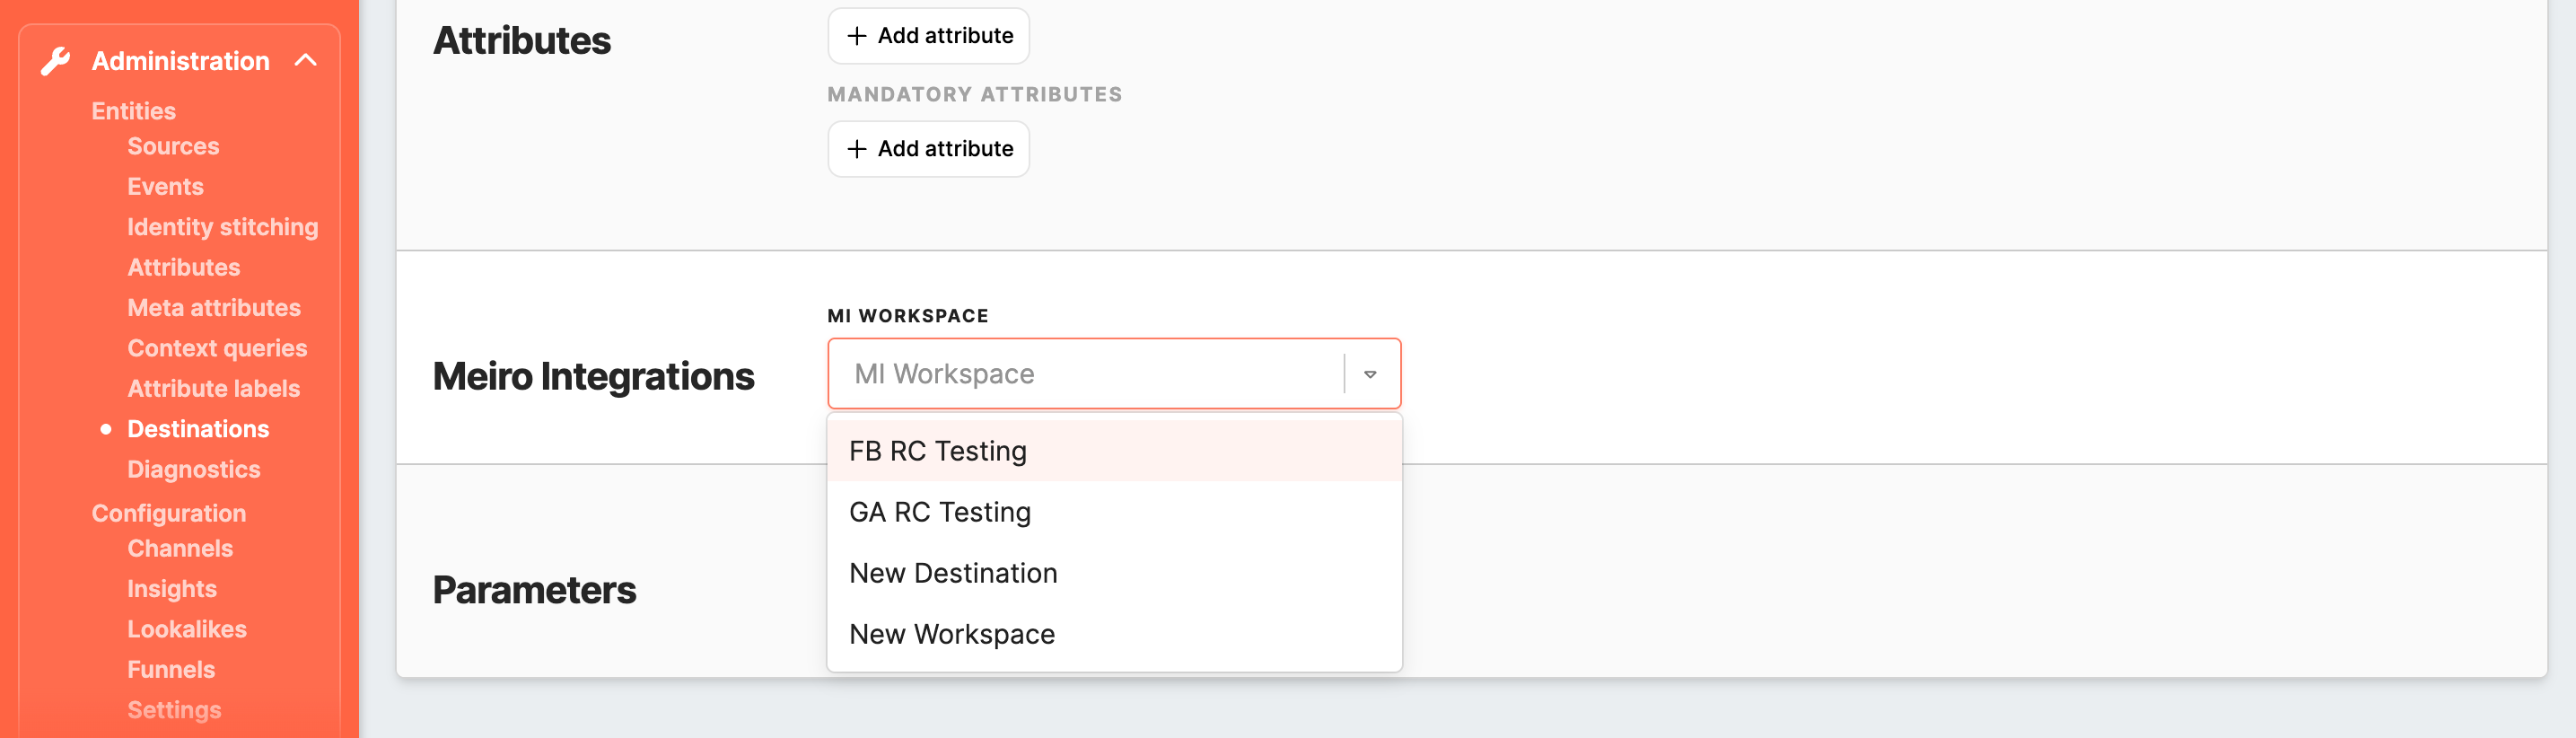
Remember: MI workspace is not required for CSV export.
Parameters
Use + Add parameter to define destination-specific export inputs.

For each parameter, define:
|
Meiro Integrations Key (required) |
The Meiro Integrations key is set up by analysts and needs to be the same as the workspace variables in Meiro Integrations. |
|
Name (required) |
Name of the parameter that will be visible in the Meiro Business Explorer for the export destination. |
|
Required field (optional) |
Mark the Required field to enable export without selecting parameters. Leave empty if you wish to export, even if parameters are not set. |
|
Value from (at least one is required) |
|
|
List
|
Checked enables selection from the drop-down list of values. |
|
User Input
|
Checked allows users to input any value. |
Remember: CSV export does not require setting up the Parameters section.
2. Edit destination
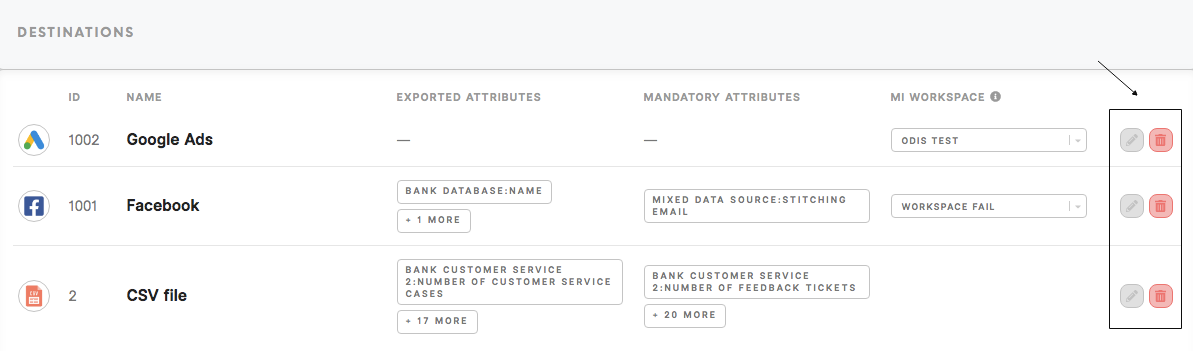
In the destination list, use the action buttons to edit destination settings.
3. Destination usage & validation
Destinations in Meiro CDP are protected to ensure they remain usable and do not cause issues in exports.
- A destination can be deleted only if nothing is using it
- If a destination is used, the system shows where it is used (segments and journeys)
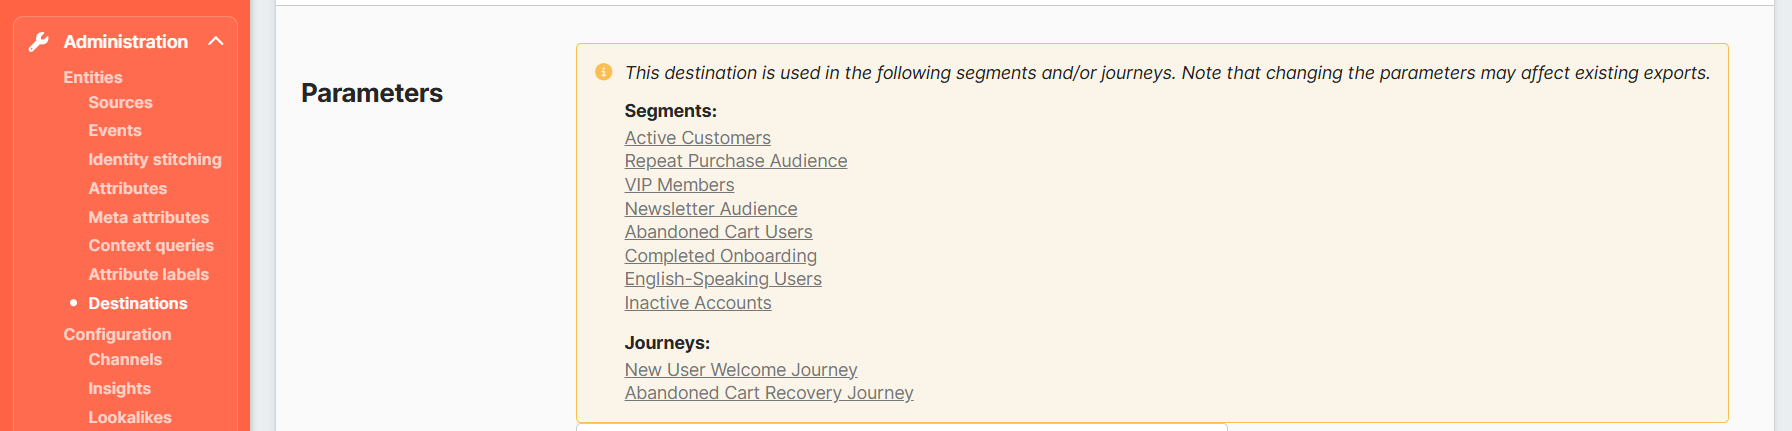
- If a segment or journey is restored from Trash and contains an export setup that no longer exists, the system removes that setup automatically

These checks help keep export settings clean, prevent broken configurations, and make destination management easier for administrators.
4. Delete destination
It is possible to delete the destination if needed, either:
1. directly from the destination list or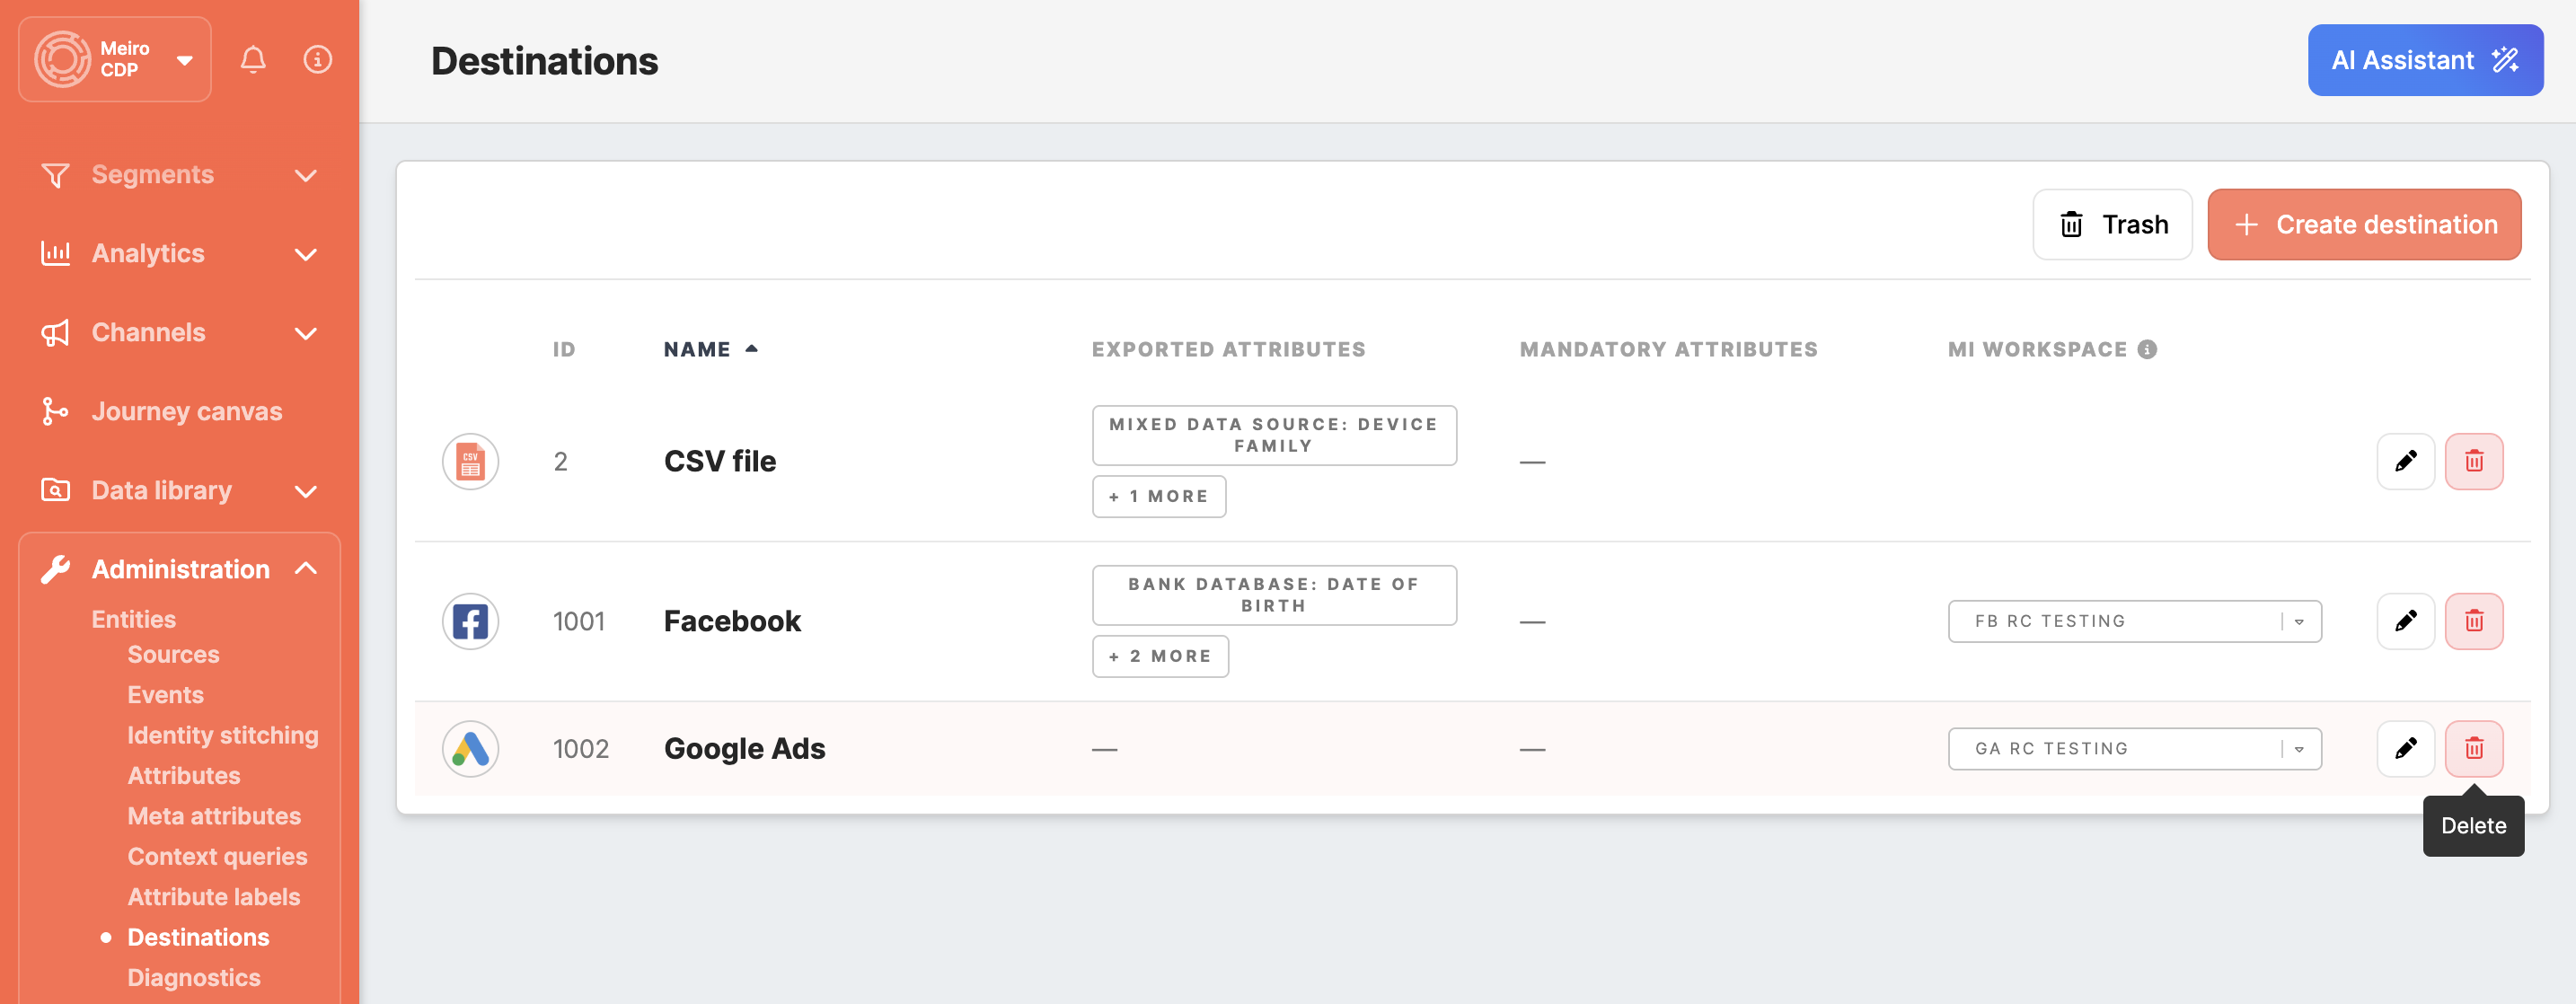
2. from the destination detail page
A destination can be deleted only when it is not used by any segment or journey. If the destination is used, deletion is blocked, and usage details are shown.
Learn more: How to restore deleted items
5. Tutorials
Once the destination is created, it can be used as an export destination in Segment exports or in Journey Canvas.
Set export destination to Google Analytics / Google Ads
Set export destination to Facebook Audience
Set up export destination: Trade Desk
No Comments