Journey Canvas creation: step-by-step
Creating a Journey Canvas allows you to design personalized and automated customer journeys tailored to specific triggers and conditions. Follow this step-by-step guide to create your first Journey Canvas effectively.
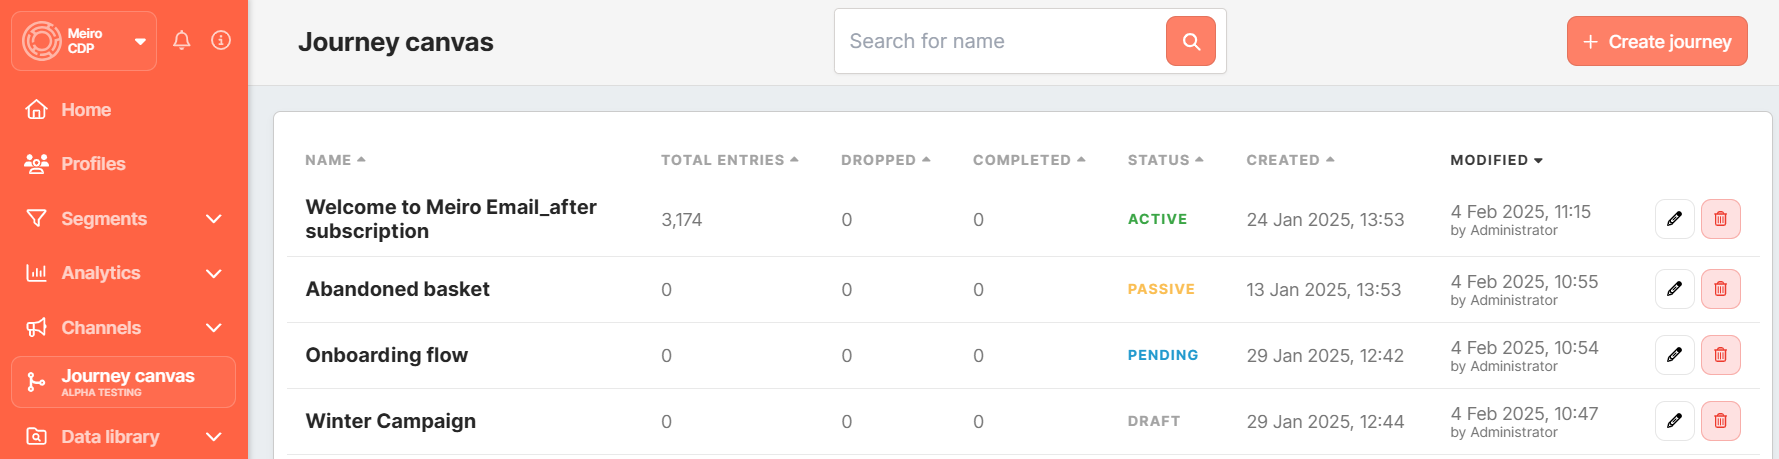
Creating Journey Canvas
You can create a journey through the Journey Canvas tab. Clicking on the 'Create Journey’ button on the top will bring you to Journey Canvas settings.
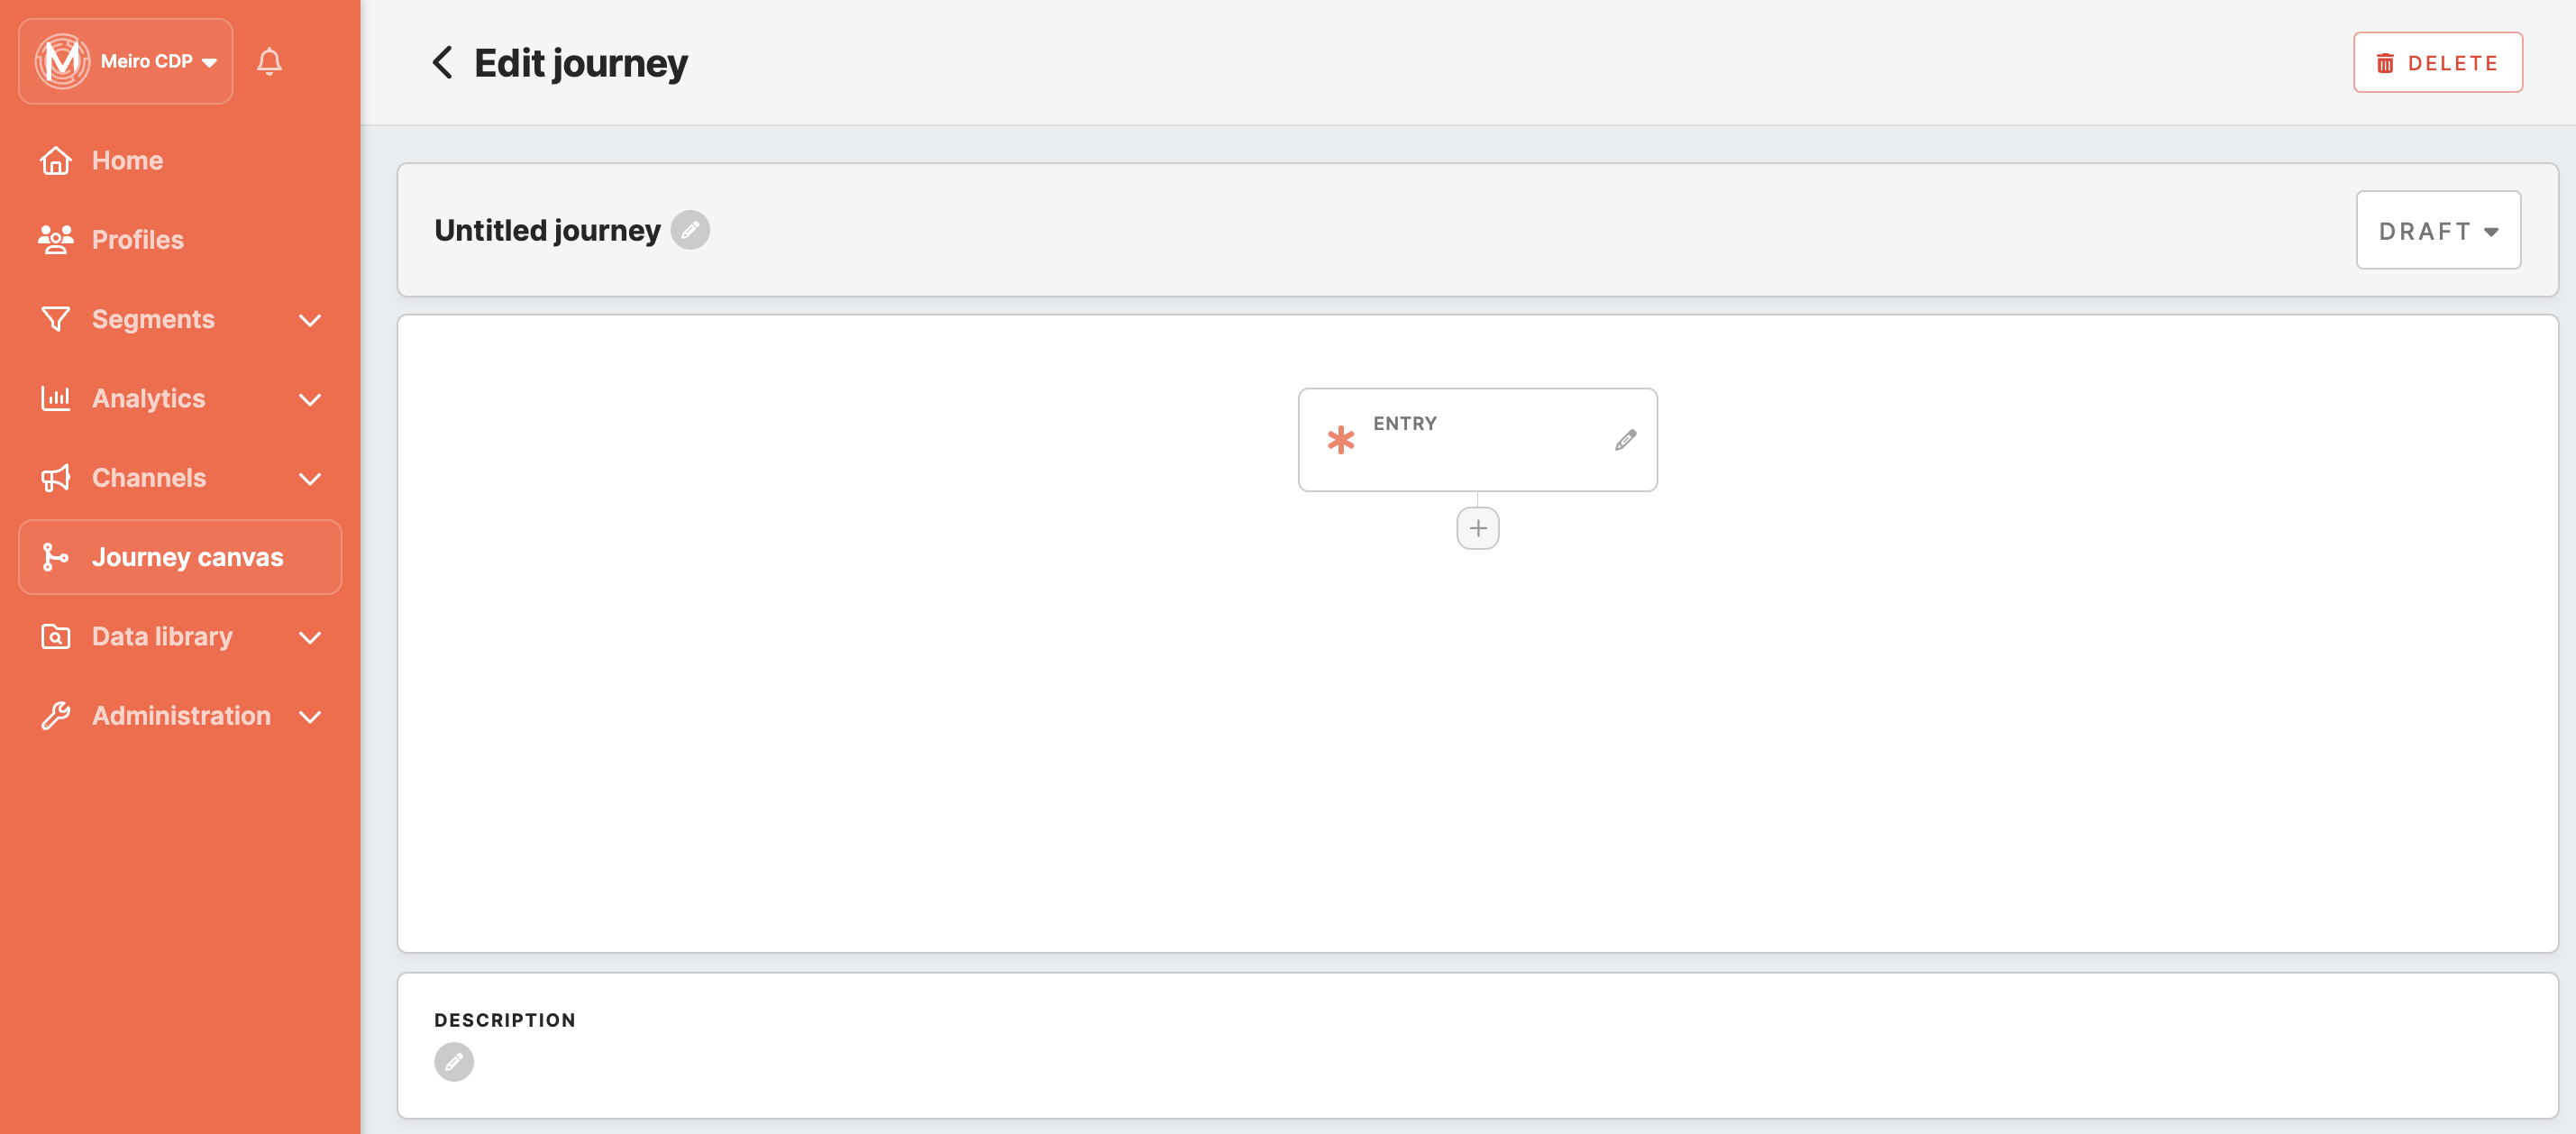
A new window with the journey settings will be opened:
|
Name |
The name under which the journey will be displayed in the Journey Canvas list. |
|
Status |
The "Status" indicates the current state of each Journey Canvas, helping you understand whether it's in draft mode, pending activation, or actively running, or finished:
|
|
Configurations |
A window that allows you to set the entry node and other nodes, defining the journey's flow and behaviour. |
|
Description |
A brief overview or description of each Journey Canvas, providing additional context to understand its purpose and objectives. |
Adding the entry condition
Setting up the entry condition is a crucial step in defining the starting point for your Journey Canvas. Depending on your trigger preference, you can choose between Segment Change or Event as your entry node. Below are the detailed steps and options for setting up each type of entry condition.

Entry via Event
Profiles will enter the journey when an event is received. Follow these steps to set up the entry condition using an event:
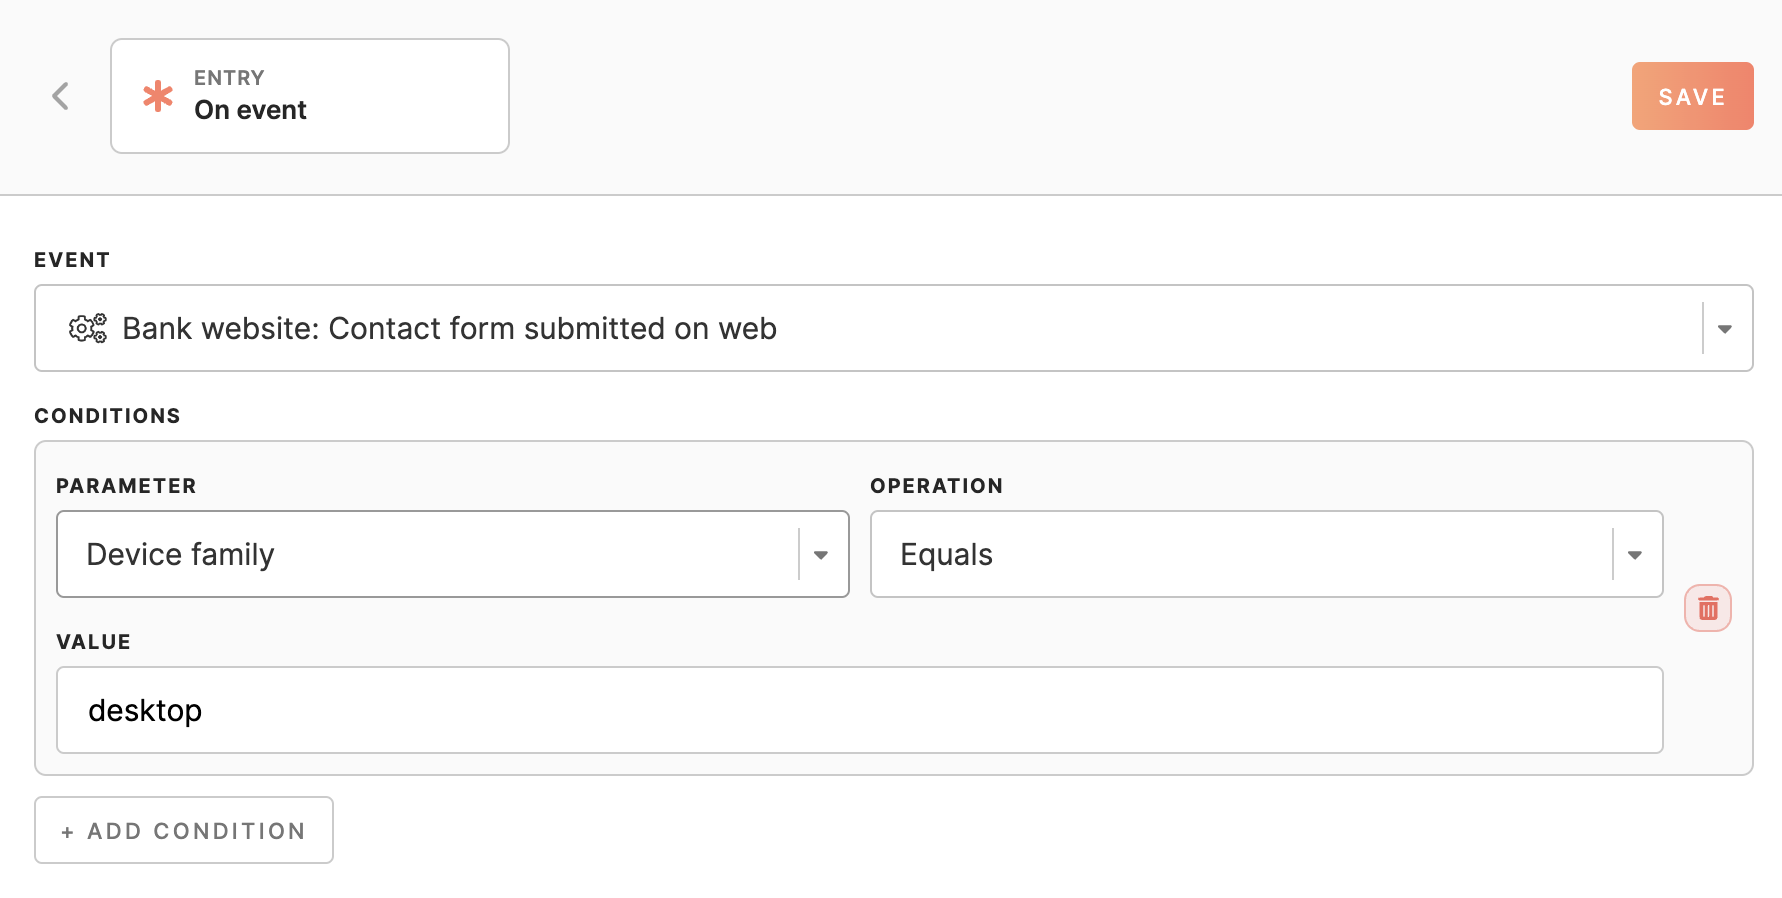
- Choose "Event" as the entry node type when setting up your Journey.
- A modal window will appear, displaying a list of available events from the Customer Data Platform (CDP). Select the desired event from the list that will trigger the journey.
- After selecting the event, you have the option to set conditions by providing parameters, operations, and values to specify the trigger criteria further:
- Parameter: Choose the specific parameter related to the selected event.
- Operation: Define the operation or comparison method (e.g., equals, contains, greater than).
- Value: Enter the value or criteria the parameter should meet to trigger the journey.
-
Click the “Save” button to apply changes to the entry node.
An event is an action performed by users across a website, app, or offline environment, such as transactions, page views, or opening applications. These events can include additional details like transaction amounts, the time and duration of page views, and application usage times. Tracking events helps to understand and analyze user behavior. A comprehensive list of all collected events can be found in the Data Library under the Events tab.
Entry via Segment
Profiles from a segment will enter the journey based on a schedule. Follow these steps to set up the entry condition using a segment:
-
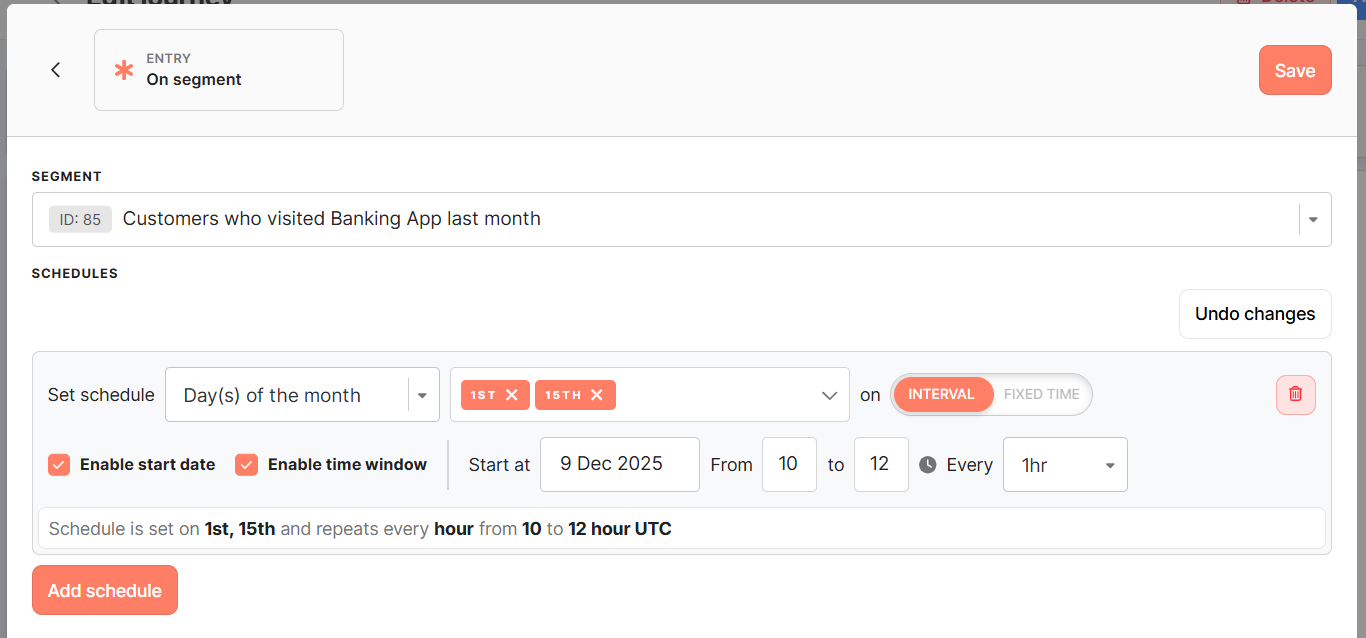
Select “On Segment” as the Entry Type
When adding an entry node, choose On Segment.
This option allows profiles from a chosen segment to enter the Journey according to a defined schedule. -
Choose the Segment
A modal window will open, displaying all available segments. Select the segment whose profiles should be evaluated for entry.
-
Configure the Schedule
After selecting the segment, define how often the system should evaluate it.
The scheduler allows you to set up recurrence using different timing options. You can add one or more schedules as needed.-
Days of the week
Run the schedule on selected weekdays.
Example: every Monday and Wednesday.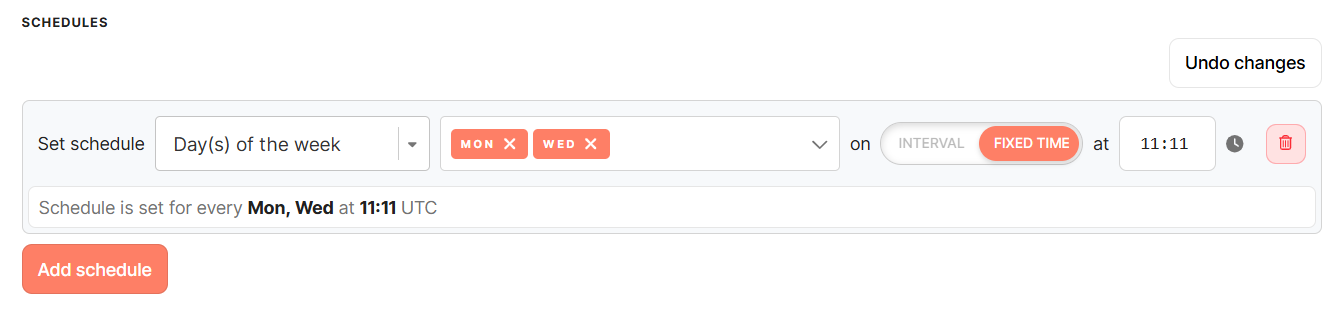
-
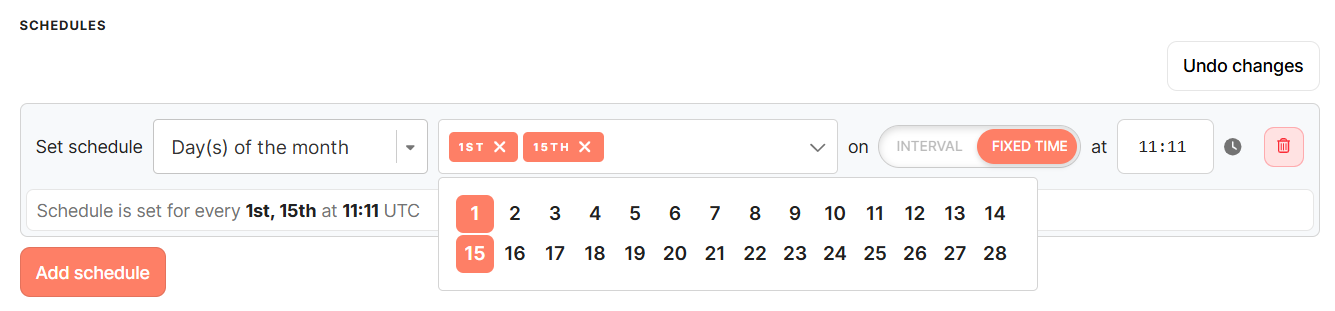
Days of the month (1–28)
Run the schedule on specific days of the month.
Example: on the 1st and 15th.
-
Fixed time
Specify an exact time for the run.
Example: 10:00 UTC. -
Intervals
Run at regular intervals, optionally within a defined time window.
Examples:Every 30 minutes
Every 1 hour between 08:00–18:00 UTC
-
Start date (optional)
Define when the schedule should begin.
-
Multiple schedules
You can add more than one schedule.
Each schedule is evaluated independently, and any matching profiles at that time will enter the Journey.
-
-
Save the Entry Node
After setting up the schedule, click Save to apply the configuration and return to the Journey Canvas.
Profiles that match the segment conditions at the scheduled times will automatically enter the Journey.

By following these steps and options, you can effectively set up the entry condition for your Journey Canvas using either Event or Segment as the trigger. Once the entry node is set, you can proceed to add other steps to describe the flow of the journey.
Available step types
Once you’ve created an entry condition, you can add steps to your Journey.
Journeys offers the following steps:
Learn more: View the Journey step types documentation for more details on each available node.
Copying a Journey Canvas
You can create a new journey from scratch or reuse an existing one as a starting point.
To create a journey, navigate to the Journey Canvas tab and click the Create Journey button. This opens the Journey settings window, where you can define the journey name, entry conditions, and overall configuration.
Alternatively, you can copy an existing Journey Canvas to save time and reuse proven logic.
To copy a journey:
-
Open an existing journey from the Journey Canvas list
-
Use the Copy option
-
A new journey will be created as a duplicate of the original one
The copied journey preserves the same structure, including the entry setup, all nodes used in the flow, and their individual settings. This allows you to quickly create variations of existing journeys without manually rebuilding the entire flow.
After copying, you can update the journey name, adjust conditions, or modify individual steps before activating it.
Navigating the Journey Canvas
The Journey Canvas includes intuitive navigation tools to help you efficiently explore and manage your workflows. Use zoom controls to adjust your view - zoom in for finer details or zoom out for a broader perspective. The center button instantly resets the view to display the entire journey, ensuring you never lose track of the bigger picture. Additionally, the minimap provides a real-time overview, allowing you to easily navigate larger journeys.
Activating a Journey
After defining the flow, you can proceed to activate the Journey. To do this, navigate to the Journey detail page, click the Status button, and select 'Activate' from the dropdown menu to change the Journey's status to active.
Journey Schedule Settings
Before activating the Journey, you have the option to set the start and end dates to control its lifecycle. Here are the available settings:
- Start:
- Start now - select this option to activate the Journey immediately upon activating.
- Start at - choose a specific date and time when the Journey should be activated. This allows you to schedule the Journey to start at a future date and time.
- End:
- Never end - select this option if you want the Journey to remain active until being manually stopped.
- End at — specify an end date and time for the Journey. It will be automatically switched to passive mode at the scheduled time.
Click the “Activate” button to finalize the publishing process.
Working with an activated Journey
You may find that you need to make changes to a published Journey, like adding new steps or pausing entry to the Journey. This section explains how to pause, resume, and archive a Journey.
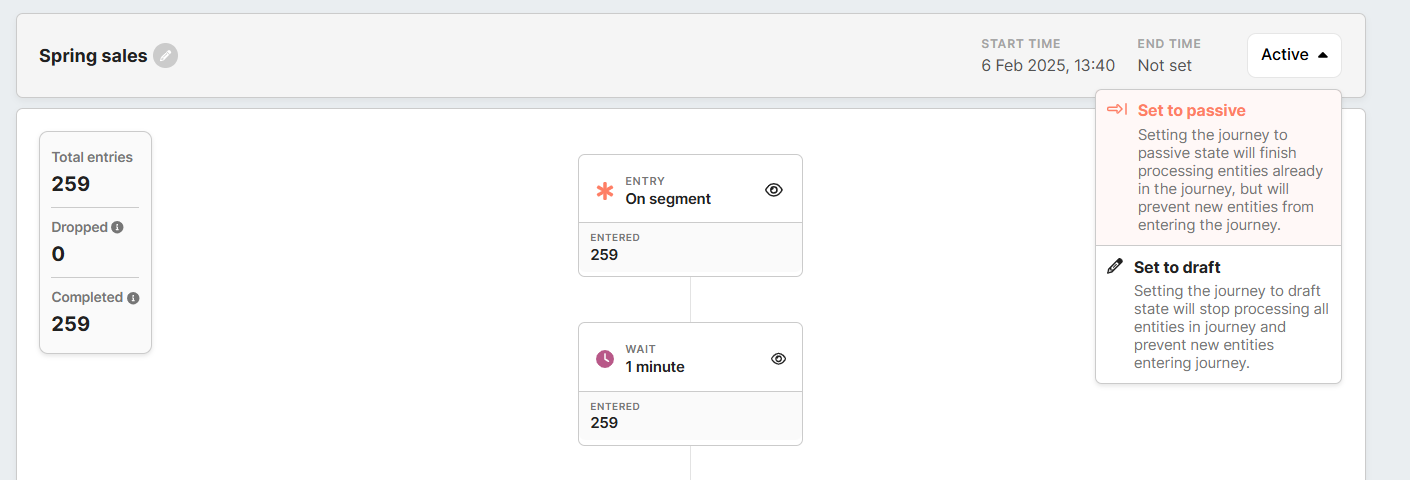
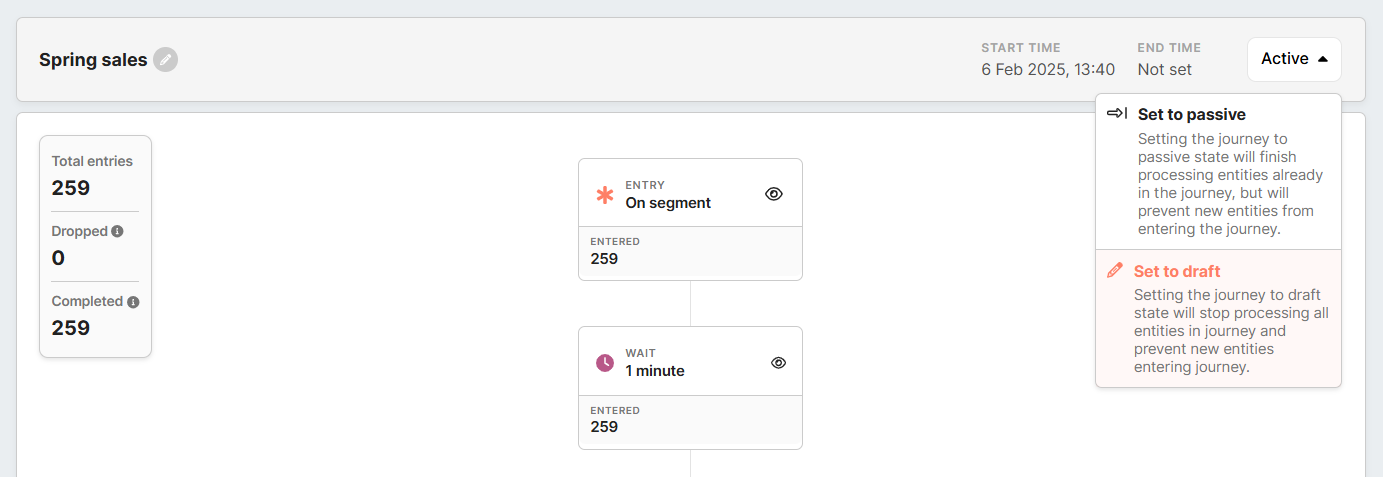
Breaking a Journey
Breaking an active journey prevents new users from joining the journey; however, it will finish processing entities already in the journey. Follow these steps to stop a Journey:
- Go to the Journey detail page you want to pause.
- From the dropdown menu, select ‘Set to passive’ status.
You can restart a new user journey at any time by changing the status from passive to draft and activating the journey again.
Archiving a Journey
Set to draft status if you want to end a Journey but preserve its data. Setting the journey to a draft state will stop processing all entities in the journey and prevent new entities from entering the journey.
Journey Behavior Rules
Once a journey is active, the following rules apply to how customer entities interact with it:
-
Single Entry at a Time
A customer entity can only be present in a given journey once at any time.-
Example: If an entity is currently in a wait node, and the entry condition (segment or event) triggers again, the entity will not re-enter.
-
This prevents customers from being stuck in loops where they never progress.
-
-
Multiple Journeys
A customer entity can be in multiple different journeys simultaneously, but never more than once in the same journey. -
Re-Entry After Completion
Once an entity finishes or drops out of a journey, it becomes eligible to enter the same journey again if the entry condition is met in the future. -
Segment Snapshot
When a journey uses a segment as its entry condition, the segment is only evaluated at the scheduled entry time.-
Entities that qualify at that moment are added.
-
After entry, the journey does not re-check segment membership; the entity continues through the journey regardless of any later changes.
-
-
Identity Resolution and Merging
If two different customer entities are present in the same journey and later merge into one identity:-
The entity that is further along in the journey remains.
-
The less advanced entity is logged and removed.
-
Statistics
Within the Journey Canvas, you have access to both node-specific and general statistics to track the progress and engagement of customer entities throughout the entire journey.
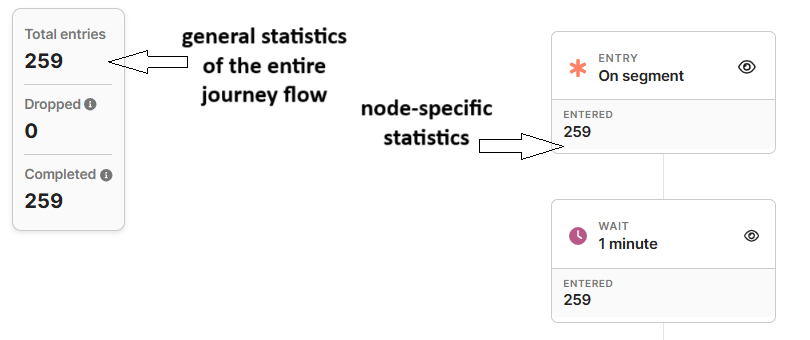
- Entered: reflects the total number of customer entities that have entered the first node within the journey, providing an overview of overall engagement volume.
- Dropped: represents the number of customer entities that have exited the journey prematurely or failed to progress beyond certain stages. Understanding dropout rates helps identify potential issues or areas for improvement in the journey flow.
- Completed: indicates the number of customer entities that have successfully fulfilled the objectives or actions associated with the entire journey. It serves as a measure of overall journey effectiveness and successful customer engagement.
Remember: The statistics are updated every 15 minutes to ensure current and accurate data.
No Comments