Journeys Step Types
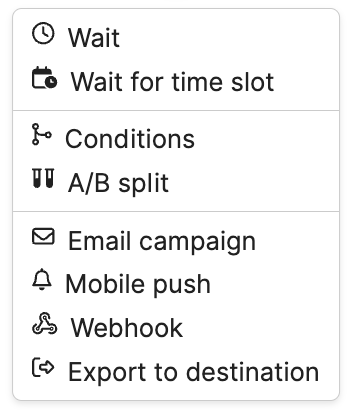
In a Journey Canvas, various steps (nodes) can be added to create a dynamic and engaging customer journey. These steps allow you to define the flow, conditions, and actions customer entities will go through as they progress along the journey. Below are the key steps or nodes that you can use to build out your Journey Canvas effectively.
Wait node
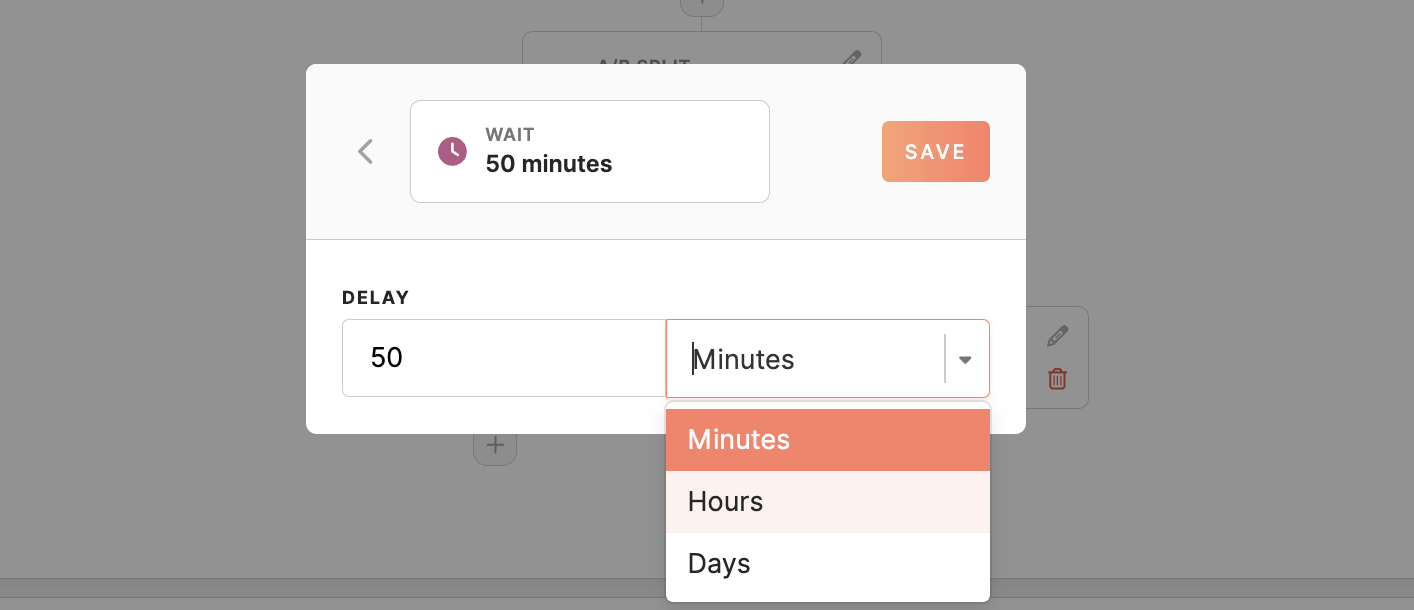
A waiting node creates intervals in the customer journey, allowing them to pause for a defined duration before progressing to the next step. The waiting period begins when the customer entity arrives at the waiting area.
You can specify the delay in minutes, hours, or days, allowing you to control the timing between two actions.
Remember: If a profile is already in a journey (e.g., waiting at a wait node), it will not re-enter the same journey even if it meets the entry conditions again. Journeys take a segment snapshot at entry time, and membership is not re-checked while progressing through the journey.
Learn more about Journey Behavior Rule here.
Wait for time slot node
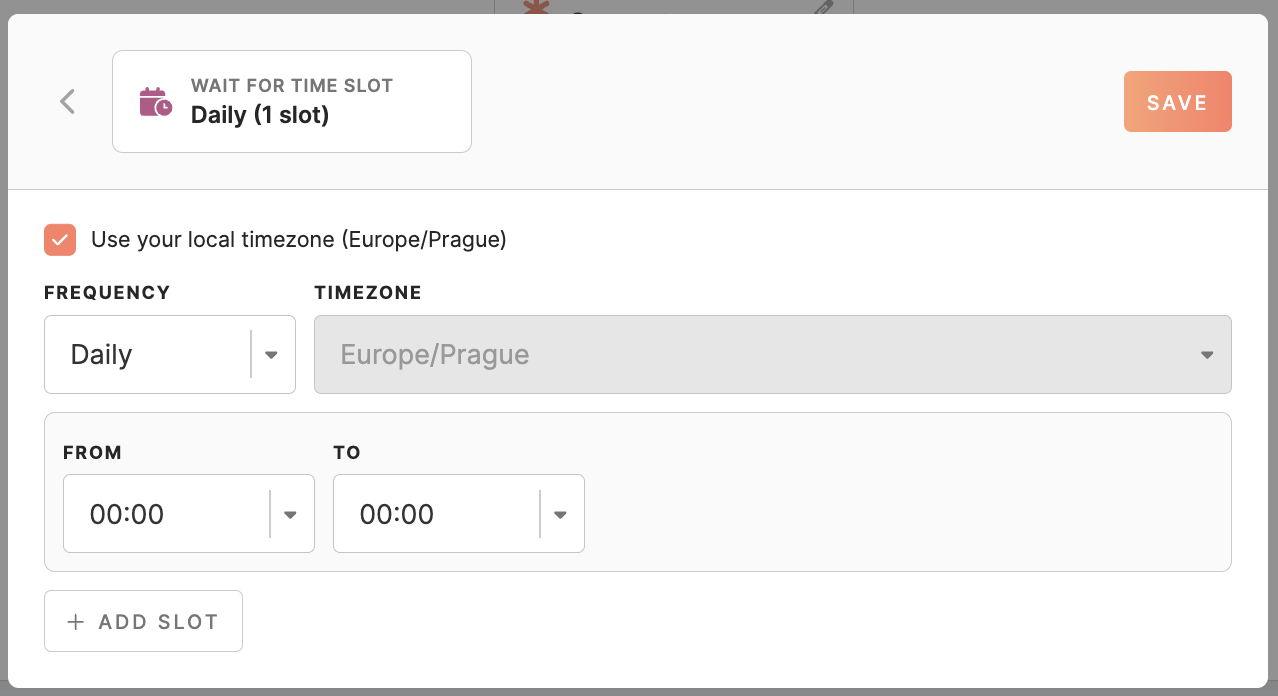
Similar to the 'Wait' node, this node introduces a delay but in a more structured manner, using slots. These slots can be set to trigger at different frequencies: daily, weekly, or monthly. You can also use the checkbox to wait for the time slot in your local time zone or select any other.
-
- For daily slots, you only need to specify the start and end times.
- For weekly slots, in addition to the start and end times, you can select specific weekdays (Monday-Sunday) when the slot should be active.
- For monthly slots, you can set the start and end times, specific days of the month (1-30), and the last day of the month.
Only when the timeslot comes into place, then the customer entities will be processed by the journey.
Example:
Consider a banking application that sends out investment recommendations every Friday evening, as they've observed that their users are most receptive to financial information at that time. In this scenario, the journey can include a 'wait' element before sending out the investment recommendations via notification or email. The 'wait for time slot' node is set to hold customer entities until Friday between 6:00 PM and 7:00 PM. Customers will only proceed to receive the investment recommendations if it's Friday and the time falls within the specified slot. If a user interacts with the app on a different day or time, they will be held in the 'wait' element until the next Friday between 6:00 PM and 7:00 PM.
Condition node
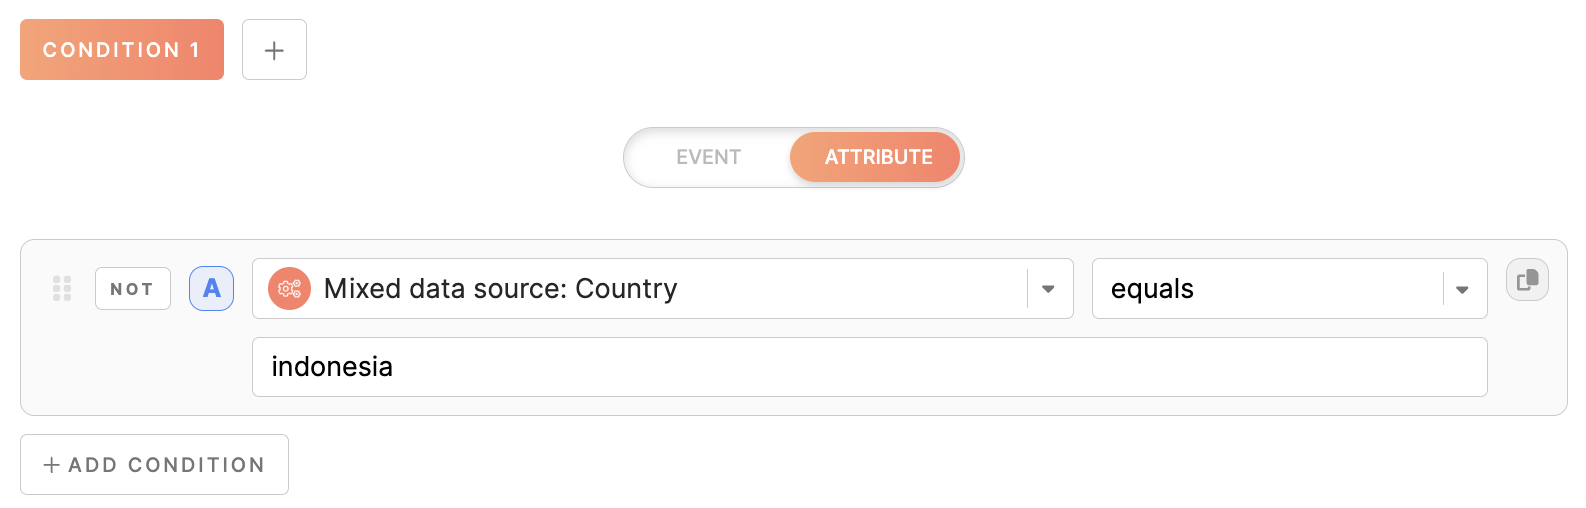
The condition node allows you to establish criteria that profiles need to meet to advance through specific paths in the journey. It categorizes customer entities into different paths based on whether they do or do not match certain attributes or events. The condition node assesses these criteria and directs the entities to subsequent actions accordingly.
In order to customize the flow of the journey, you can create up to four conditions based on attributes or events. To add another path after the conditional check, simply click on the + button. Each tab represents a different condition path. The first matching logic will be applied, with priority given to conditions based on their order.
Additionally, there will always be a default path named "not matching," which directs users who do not meet the criteria of the condition paths.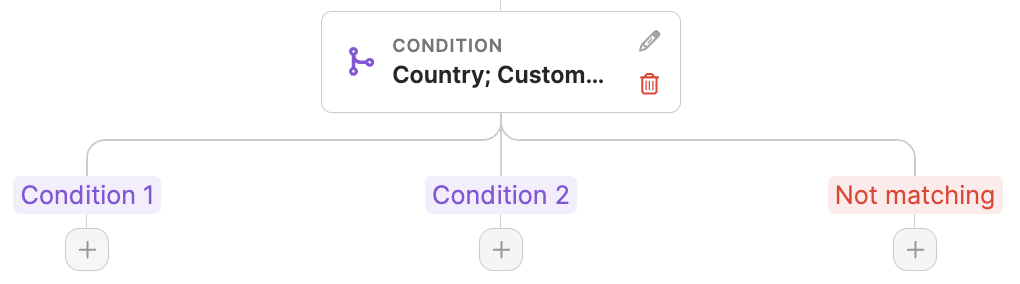
When an entity enters the condition node, it is evaluated against each defined condition in order of priority. If it matches Condition 1, which has the highest priority, it proceeds along the corresponding path. If it does not match Condition 1, it is then evaluated against Condition 2, and so on, until it matches a condition and follows the associated path. If there is no element following a path after the condition node, customer entities will follow that path and complete their journey, marking it as complete.
If the entity does not meet the criteria for any condition path, it is automatically directed to the 'not matching' path.
Remember: each customer profile can only follow one condition path.
Example:
Consider a scenario where in the first condition tab, you select the attribute "preferred product category" with the value "Electronics." In the second tab, you choose the same attribute but with the value "Clothing." When a customer profile reaches the conditions node, it will first check if their preferred product category is Electronics. If it is, they will follow the path of Electronics. If not, the system will then check if their preferred category is Clothing. If it is, they will follow the path of Clothing. If neither condition is met, the user will be directed along the path for not matching conditions.
Conditions based on attributes
The attribute condition works exactly like segment conditions, allowing you to set specific criteria based on profile attributes.
Conditions based on events
The structure is straightforward, and you can choose between and/or operators for your conditions. You can specify how far back in history the system should look for an event using the "in the last" option.

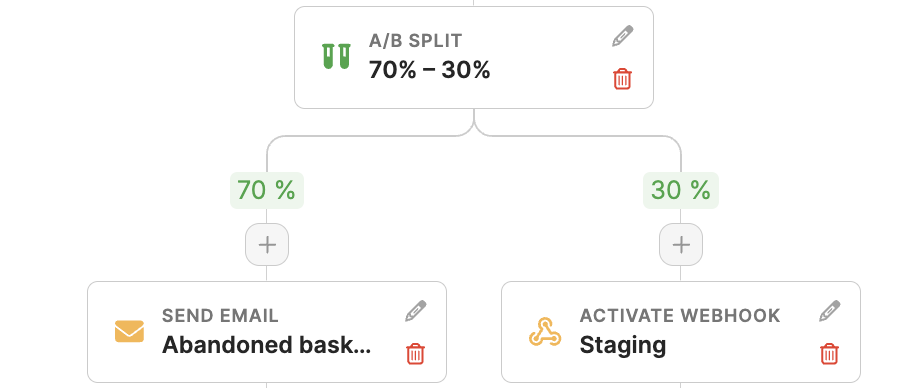
A/B Split node
With an A/B Split node, you can split a branch into up to 5 branches totaling 100%. This feature is particularly useful for A/B test campaigns or evaluating the effectiveness of different channels like emails versus push notifications.
The A/B split is an approximation and does not guarantee an exact split or order of operations.
Remember: The A/B Split node distributes profiles approximately according to the configured percentages, but small sample sizes can result in variations (e.g., a 50/50 split might yield 22/17). This is expected due to statistical variance. As the sample size grows, the distribution becomes more accurate and closely matches the intended split.
Email and Mobile Push Campaigns Node
You can add Email and Push Notification nodes to activate these channels based on their relevance to the journey flow. These nodes allow you to communicate with customer profiles via email or push notifications at specific points in the journey.

When sending an email or mobile push campaign, customer entities will receive a message only if they comply with the requirements of the channel:
- For email: The campaign will be sent to profiles with known emails, where consent has been given, and emails are not blocked.
- For mobile push: The campaign will be sent to profiles with known registration tokens that align with the app and operating system specified in the Mobile Push campaign selected in the journey. The profiles must also have a true "registered" dimension in the Mobile Push Subscription system attribute.
Remember: you can still control the frequency cap by defining it in the global or local frequency caps of the selected campaigns. Learn more in our articles on how to set frequencies in emails and mobile pushes.
Webhook node
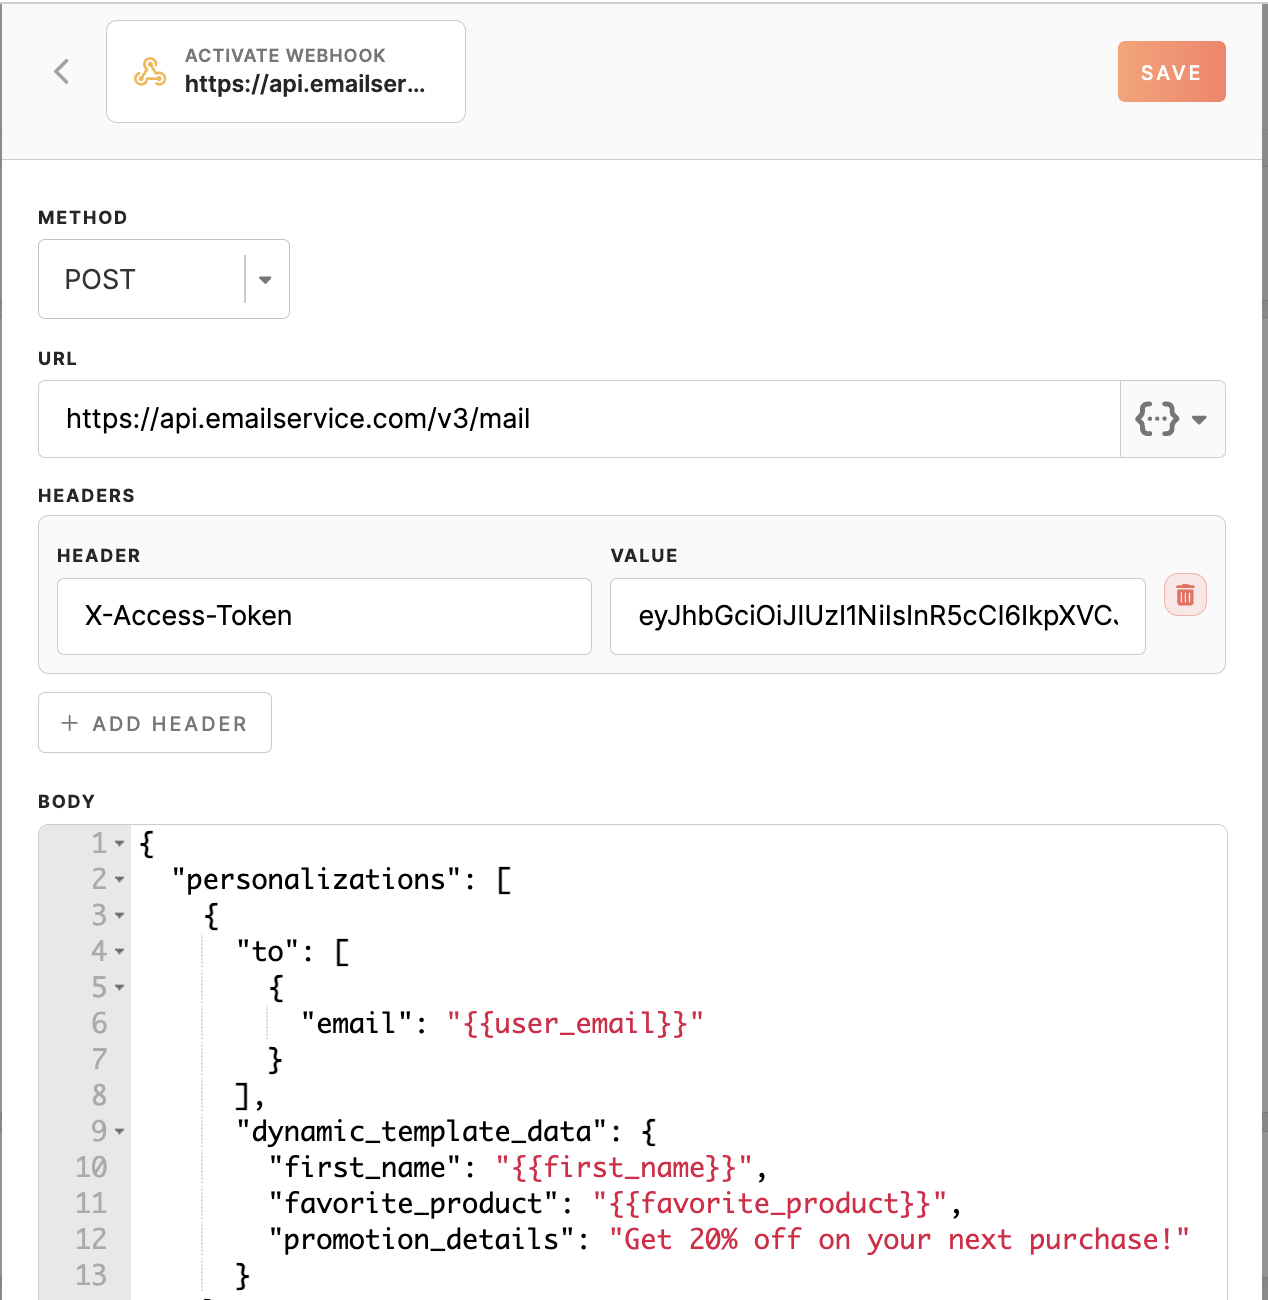
The Webhook node facilitates integration with external systems or services to enhance the personalization and automation of the user journey. You can define the URL, method, and headers for the webhook request and use attribute replacements to send personalized content from Meiro Events in real time.
- Method: Determine the HTTP method to use for the request. Most commonly, you'll use POST to send data to the external system, but you can also choose other methods like GET, PUT, or DELETE, depending on the requirements.
- URL: Input the endpoint URL provided by the external system or service. This URL specifies where the webhook data should be sent.
- Headers: You can include custom headers in your webhook request. These headers can provide additional information or authentication details required by the receiving system.
- Body: Compose the body of your webhook request. This payload contains the actual data you want to send to the external system. It's where you define the message or information to be processed by the receiving endpoint.
Attribute Replacements
Webhooks support dynamic content by replacing attributes within the URL, headers, and body. Use the attribute picker to select the desired value easily. When you include {{favorite_product}} in your webhook configuration, the system automatically replaces it with the user's actual favorite product when the webhook is triggered. This ensures personalized and relevant content reaches your users, enhancing engagement and user experience.
Test Activation Feature
You can test the activation by choosing the customer profile ID. The activation test will use the current setup form (not the saved one). The results will show whether the webhook configuration is correct and working as expected.
Possible Test Results:
- 200 (OK): The test was successful, and the webhook was triggered correctly.
- 404 (Not Found): The specified customer profile ID does not exist.
- 425 (Too Early): The channels are currently under heavy load, and the test cannot be performed now. Try again later.
By mastering the Webhook node in your Journey Canvas, you unlock the potential to integrate with external systems seamlessly, automate personalized messaging, and enhance the overall user experience.
Remember: You can search within the code editor by pressing CTRL+F (Windows/Linux) or CMD+F (Mac) to locate or replace text quickly.
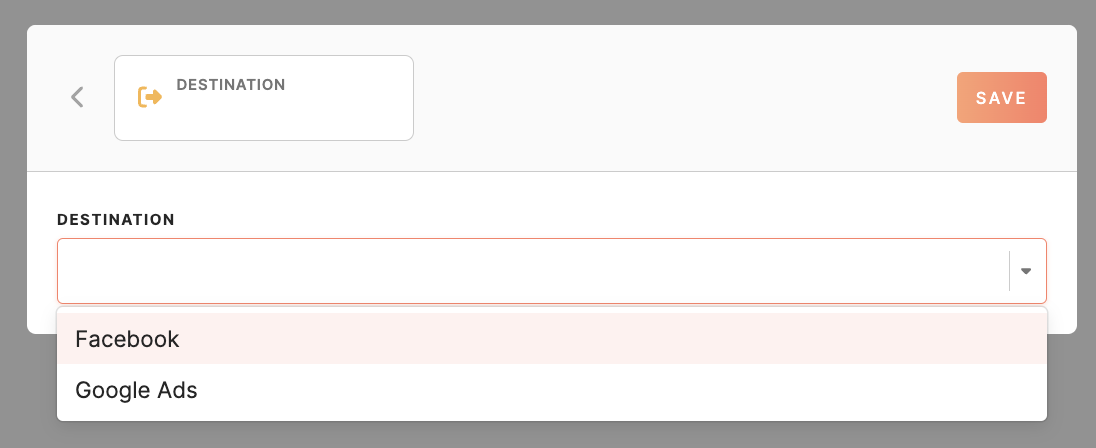
Destination
Once you add a node to the JC, you will see a dropdown menu containing a list of destinations available in CDP, with the exclusion of CSV.
After you select the needed destination, a list of parameters specific to that destination will be shown. To monitor the status of the export, you can access Grafana or MI workspace. You will receive an alert in the MI workspace if the export fails.

No Comments