Attributes setup
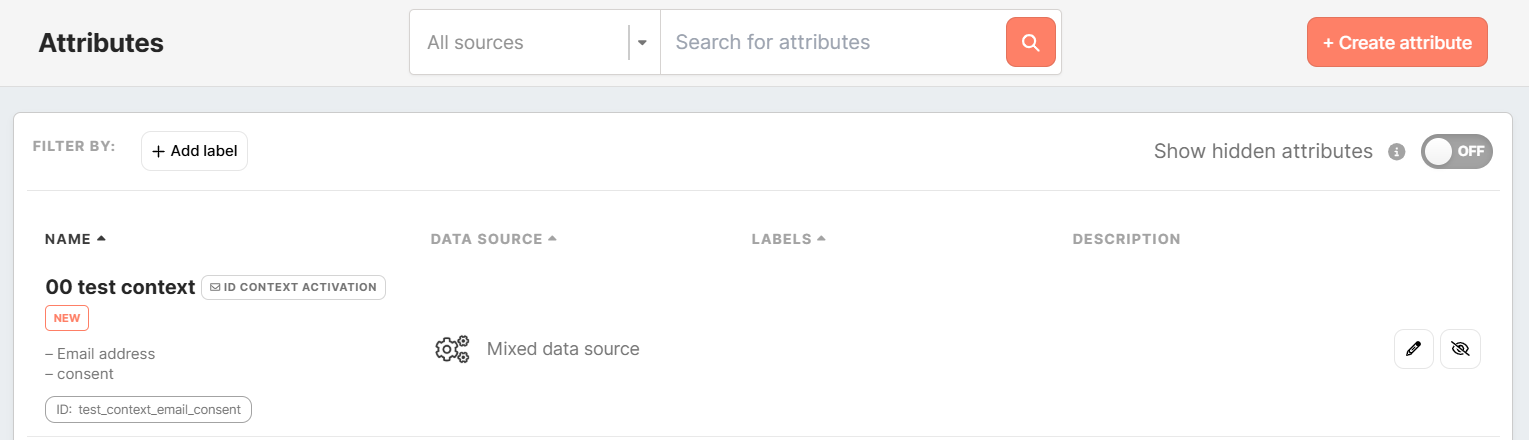
The CDP technical consultant usually sets up attributes. You can view and manage them in the Administration tab under Entities/Attributes. Users can explore all available attributes in the Data Library under the Attributes tab.
Some attributes are system-defined and cannot be edited or hidden, though you can still assign labels for organization.
What Are Attributes?
Attributes are pieces of information that describe customers or entities in your database. They help you organize, segment, and personalize customer interactions. Each attribute can hold either:
-
Single value(e.g., a customer’s name) -
Multiple values(e.g., a list of recent purchases)
For example, an attribute like Last Purchase Date stores the most recent date a customer made a purchase. This allows you to target them with follow-up campaigns at the right time.
Attributes can be classified as:
-
Basic (e.g., a number or text string)
-
Compound (e.g., multiple related data points in a structured format)
By defining attributes strategically, you can create targeted campaigns, enhance customer experiences, and gain deeper insights into your audience.
How to Create an Attribute
To create a new attribute, follow these steps:
Select Attribute Type
If you have channels activated, you can choose an attribute type from the modal:
-
Custom Attribute – Define customer profile characteristics for segmentation, analysis, and activation.
-
Email Context Attribute – Manage email-specific context attributes to personalize messaging and ensure emails reach the intended recipients.
-
Mobile Push Context Attribute – Define device-specific attributes to control push notifications for different devices.
- WhatsApp Context Attribute - Define phone number-specific attributes to control message delivery and personalization for profiles with multiple phone numbers.
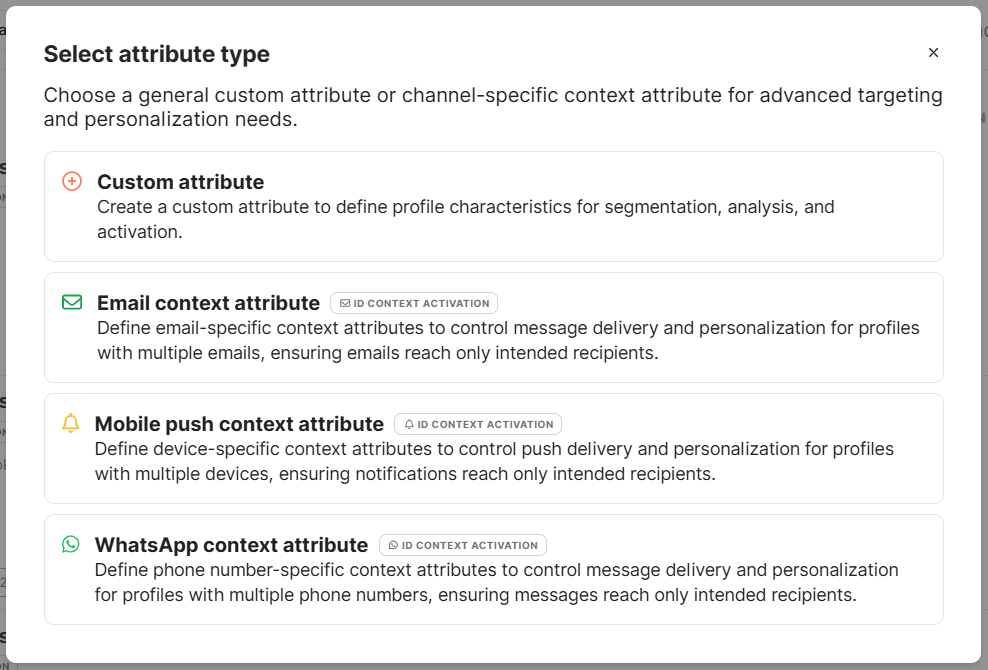
Remember: If channels are not activated, only Custom Attributes can be created. In this case, clicking + Create Attribute will open the form without a modal.
Click Continue and fill out the form.
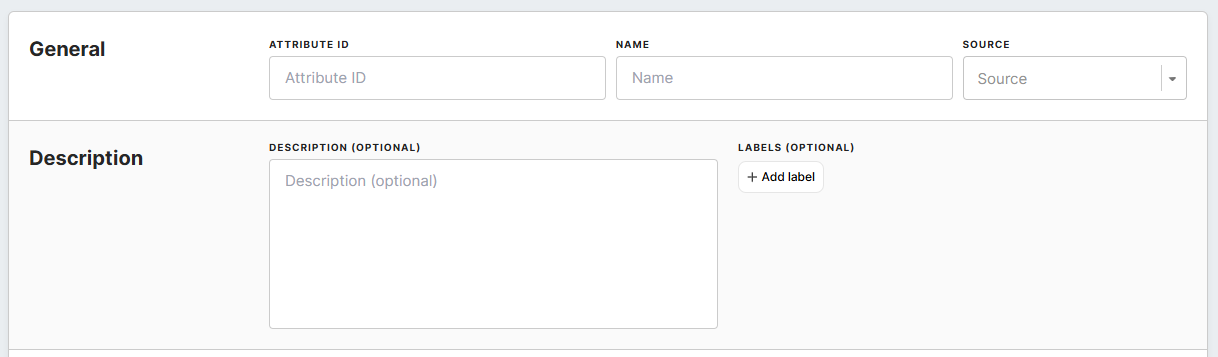
General Settings
-
Attribute ID(Required, cannot be changed later): A unique identifier used for referencing the attribute in exports and integrations. -
Name: The display name of the attribute (can be changed later). -
Source(Not editable later): The data source from which this attribute pulls information. -
Description(Optional): A brief explanation of the attribute’s purpose. If a description is provided, it will appear as a tooltip when hovering over the attribute in profile details.-
A list of attributes and descriptions will be visible within the Data Library/ Attributes tab.
-
-
Labels: Organize attributes using labels for better navigation.-
Learn more: To learn about labels, please go to this article.
-
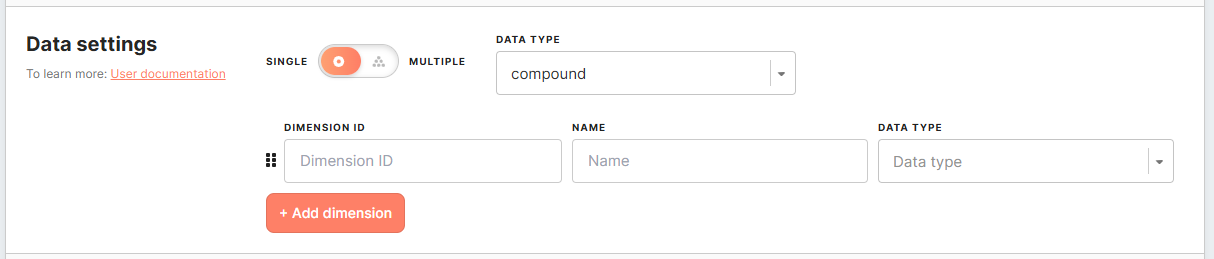
Data Settings

In this section, you define how the attribute behaves. This includes setting whether the attribute holds a single or multiple values, choosing the data type, and defining how the attribute’s value is calculated.
Single vs. Multiple Values
-
Single Value: Each customer can have only one value for this attribute.
-
Multiple Values: A customer can have multiple values (e.g., multiple recent purchases).
Data Type
When creating an attribute, you must specify its data type. The data type determines the kind of values the attribute can store and how they will be processed. You can select the appropriate type from a dropdown menu in the attribute settings.
Basic Data Types

Basic data types store single values and include:
-
Boolean: true or false values (e.g., "Is Subscribed?")
-
String: Text values (e.g., "Customer Name")
-
Integer: Whole numbers (e.g., "Loyalty Points")
-
Float: Decimal numbers (e.g., "Average Purchase Value")
-
Date: A date without a timestamp (e.g., "Birthday")
-
Datetime: A date with a timestamp (e.g., "Last Login Time")
Compound Attributes
Compound attributes store structured data by grouping multiple related values within a single attribute. This allows for more advanced segmentation and analysis compared to separate basic attributes.
Compound attributes are composed of multiple dimensions, each with its own ID, name, and data type.
Structure of a Compound Attribute
A compound attribute consists of multiple dimensions, each with:
-
- Dimension ID – A unique identifier for the dimension.
- Name – A user-friendly name for the dimension.
- Data Type – The type of data stored (e.g., string, number, boolean, date).
Example use case:
A compound attribute named Flight Details could include dimensions like:
| Dimension ID | Name | Data Type |
| origin_city | Origin City | String |
| destination_city | Destination City | String |
| flight_date | Date of Flight | Datetime |
| price | Ticket Price | Float |
With this setup, you can create a segment for “customers who flew to London in December 2018” because the destination and flight date are directly linked within the same attribute.
ID Context Attributes
ID Context Attributes enable highly personalized and targeted campaigns by focusing on specific identifiers (such as email addresses, mobile push tokens, or WhatsApp phone numbers) instead of entire customer profiles. This ensures that every campaign message is relevant, accurate, and delivered to the intended recipient — even when multiple identifiers are linked to the same profile.
Learn more: For full details on how to create and use ID Context Attributes, see the dedicated article.
Definition
The definition of an attribute dictates how the attribute's value for a customer should be calculated. The calculation result should be in the correct form to be in check with the data type. You have at your disposal several predefined calculations like most frequent, count, list, min, max, avg, and least frequent. On the other side, you can set up a totally custom attribute using SQL queries.
|
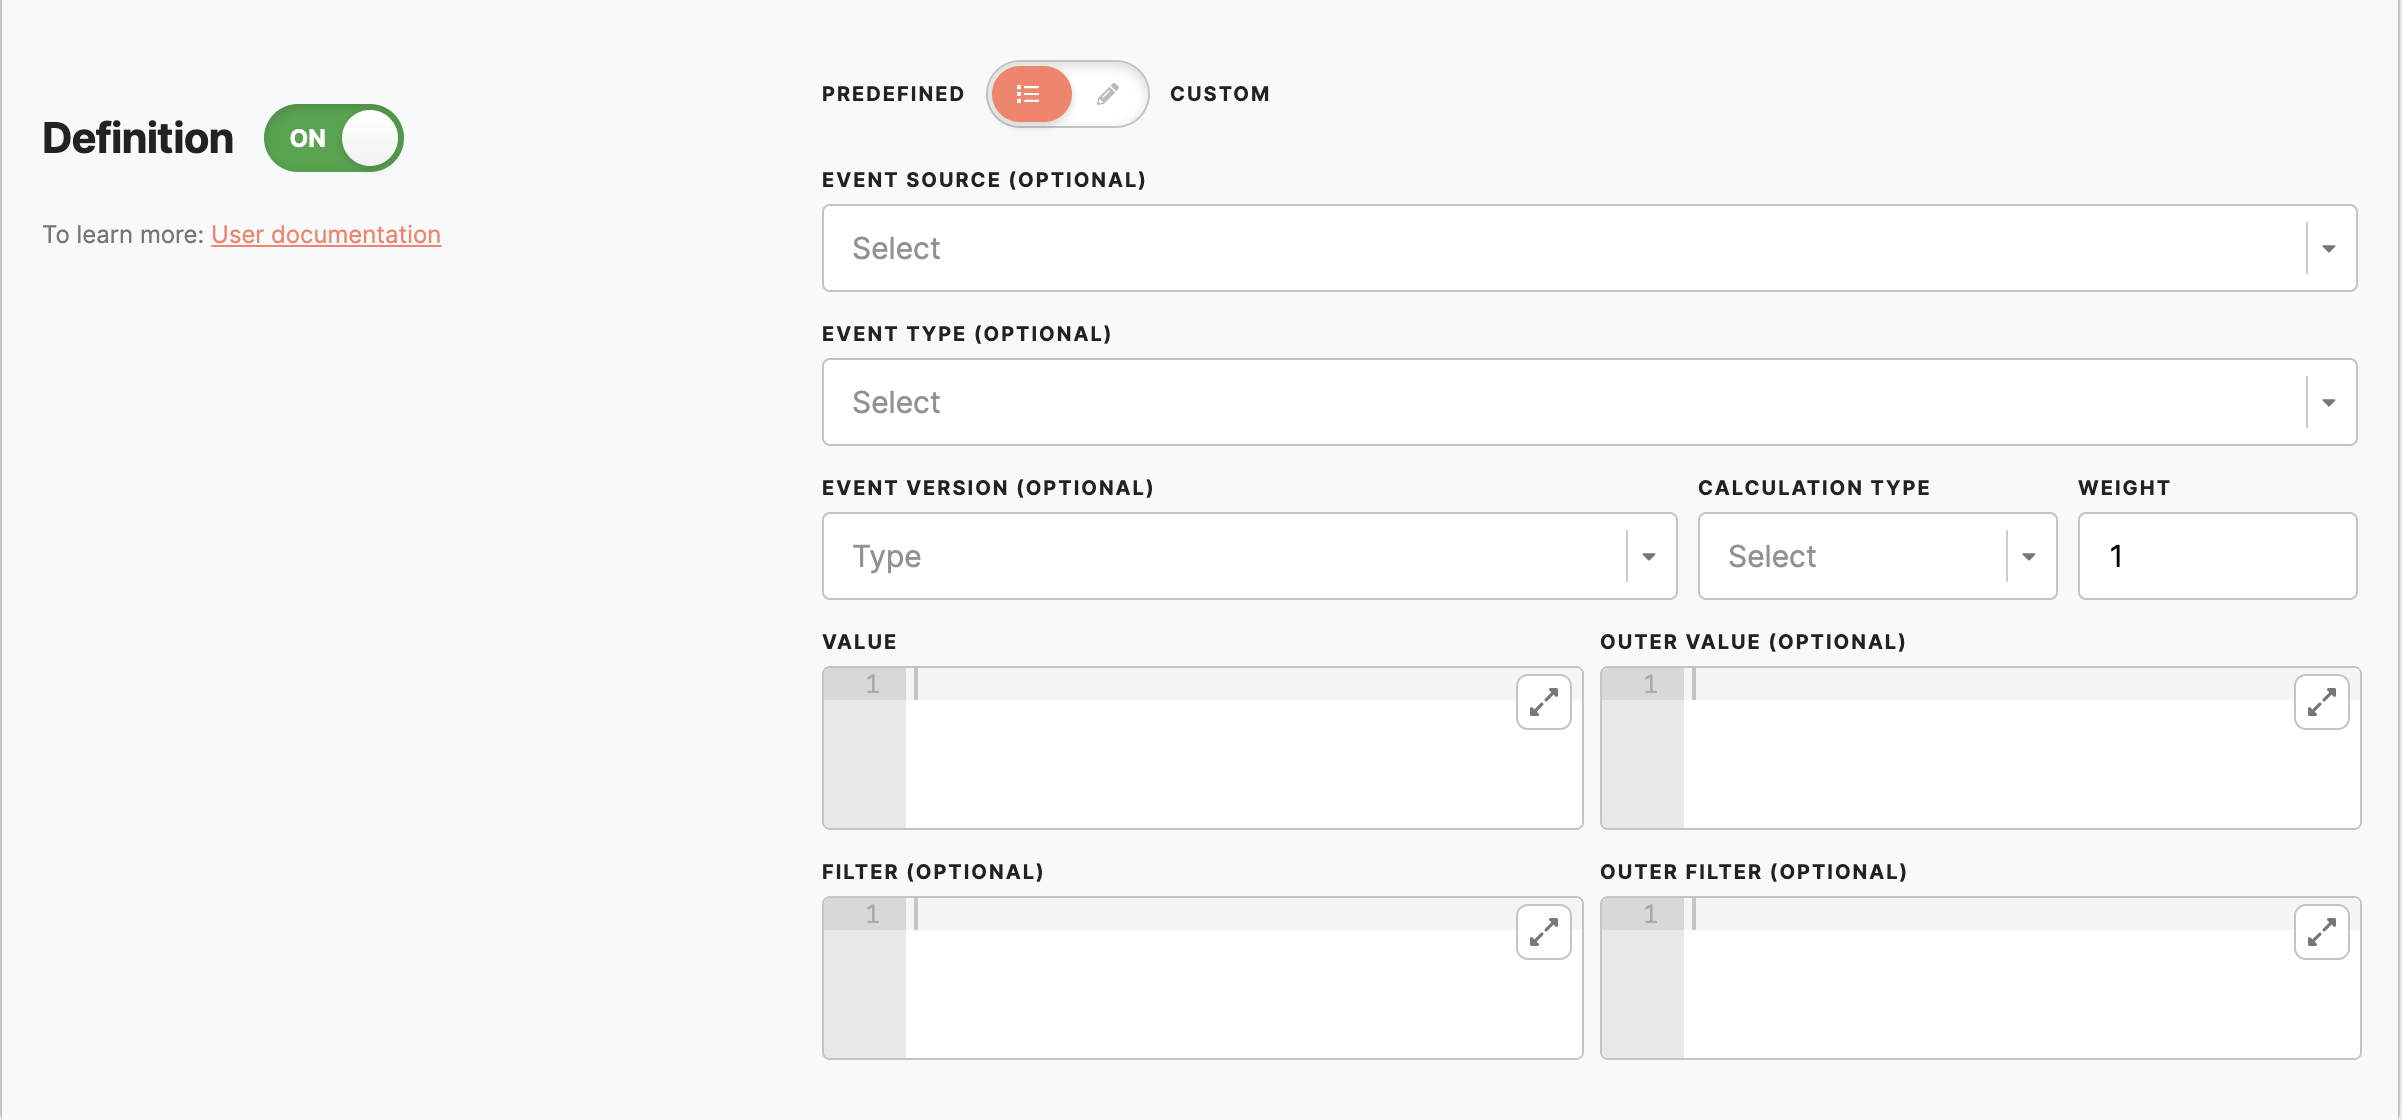
Predefined |
Event source: Select on what sources this attribute will be calculated, select from the drop-down list. If left empty, the attribute will be calculated from all sources.
Event type: Select on what event types this attribute will be calculated, select event type from the drop-down list. If left empty, the attribute will be calculated from all event types from the selected sources.
Event version: Insert event version. It is possible to insert a single version or multiple versions. If left empty, the attribute will be calculated from all versions of the selected events.
Calculation type (required): Select calculation type from the drop-down list (for example, least/ most frequent, sum, etc.) Weight (optional): By default 1. In the cases where there are multiple "subevents" within a single customer event, the "weight" number becomes crucial as it addresses the issue of varying counts or weights for each subevent.
Value (required): put in any field transformation from the selected data source and event type. Outer value: Optionally, you can provide additional operations or transformations on top of the "Value" field. If left empty, the "value" string will be automatically populated. Operations can only be applied to the "value" field; other values would turn down plumbing. Filter: you can provide a filter that will be applied to the events. Outer filter: filter applied on top of the value.
Remember: You can search within the code editor by pressing CTRL+F (Windows/Linux) or CMD+F (Mac) to locate or replace text quickly. |
|
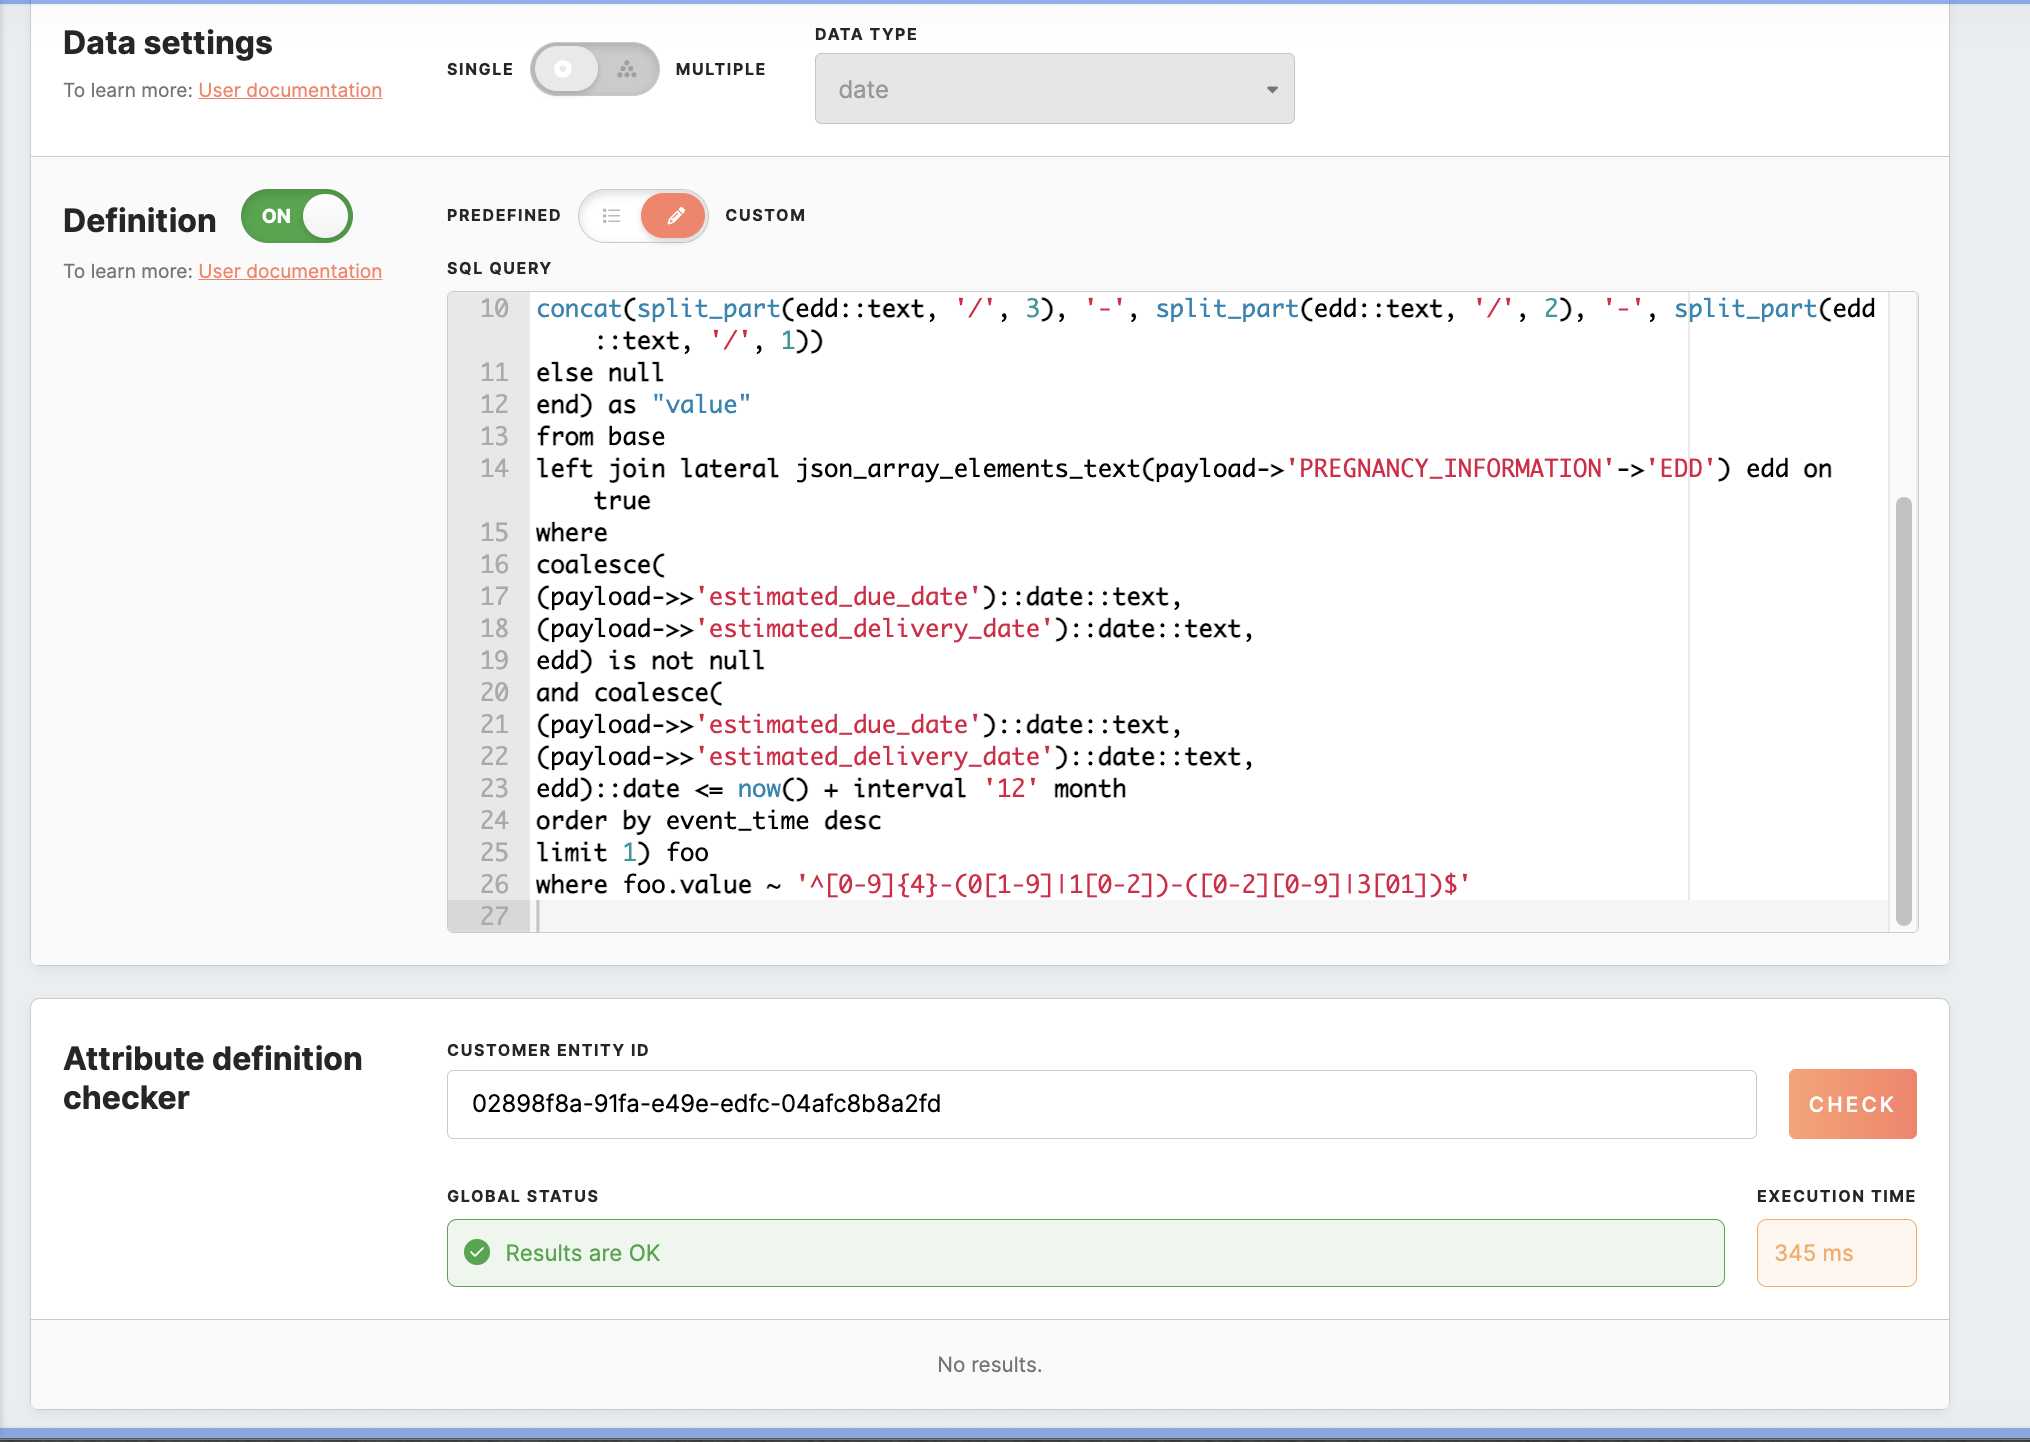
Custom |
The custom option allows managing attribute definition through an SQL query. The query should extract data from table ‘base,’ and the result should have only one column named ‘value.’
|
Attribute definition checker

The Attribute definition checker allows you to validate and adjust prefilled attribute fields for accuracy before saving.
First, ensure that all required fields in the attribute’s form are filled out. After providing the profile ID, click the "Check" button to validate data for the specified profile. If any errors are detected during the validation, you will be promptly notified.
This enables you to make any necessary corrections before saving the attribute.
Remember: Newly created attributes will appear with the New badge that will stay for 7 days.
2. Edit/show-hide attribute
You can edit attributes anytime. If necessary, you can hide an attribute from the Meiro interface.
Hiding an Attribute:
- Effect: When an attribute is hidden, it becomes invisible throughout Meiro Business Explorer (MBE), except within the Administration tab.
- Processing Impact: Hiding an attribute stops its data processing. This can cause errors if the attribute is being used elsewhere in the application, as references to the attribute will no longer function properly.
Remember: Attributes marked with a system tag cannot be edited or hidden.
It is impossible to edit Attribute ID, Sources, and Data Settings. If changes are necessary, it is recommended to hide the incorrect attribute and create a new one.

3. FAQs
|
Why do I sometimes encounter both "results are ok" and "no results" when validating an attribute? What do these responses indicate? |
When you see both "results are ok" and "no results," it signifies that the query itself is well-formed and capable of producing results. However, the customer entity ID you've specified in the query does not have this attribute value.
|
No Comments