Activation of email campaign
To proceed with activating your campaign, please create a campaign and complete its content form.
Learn more: about the content form of an email campaign
Setting frequencies
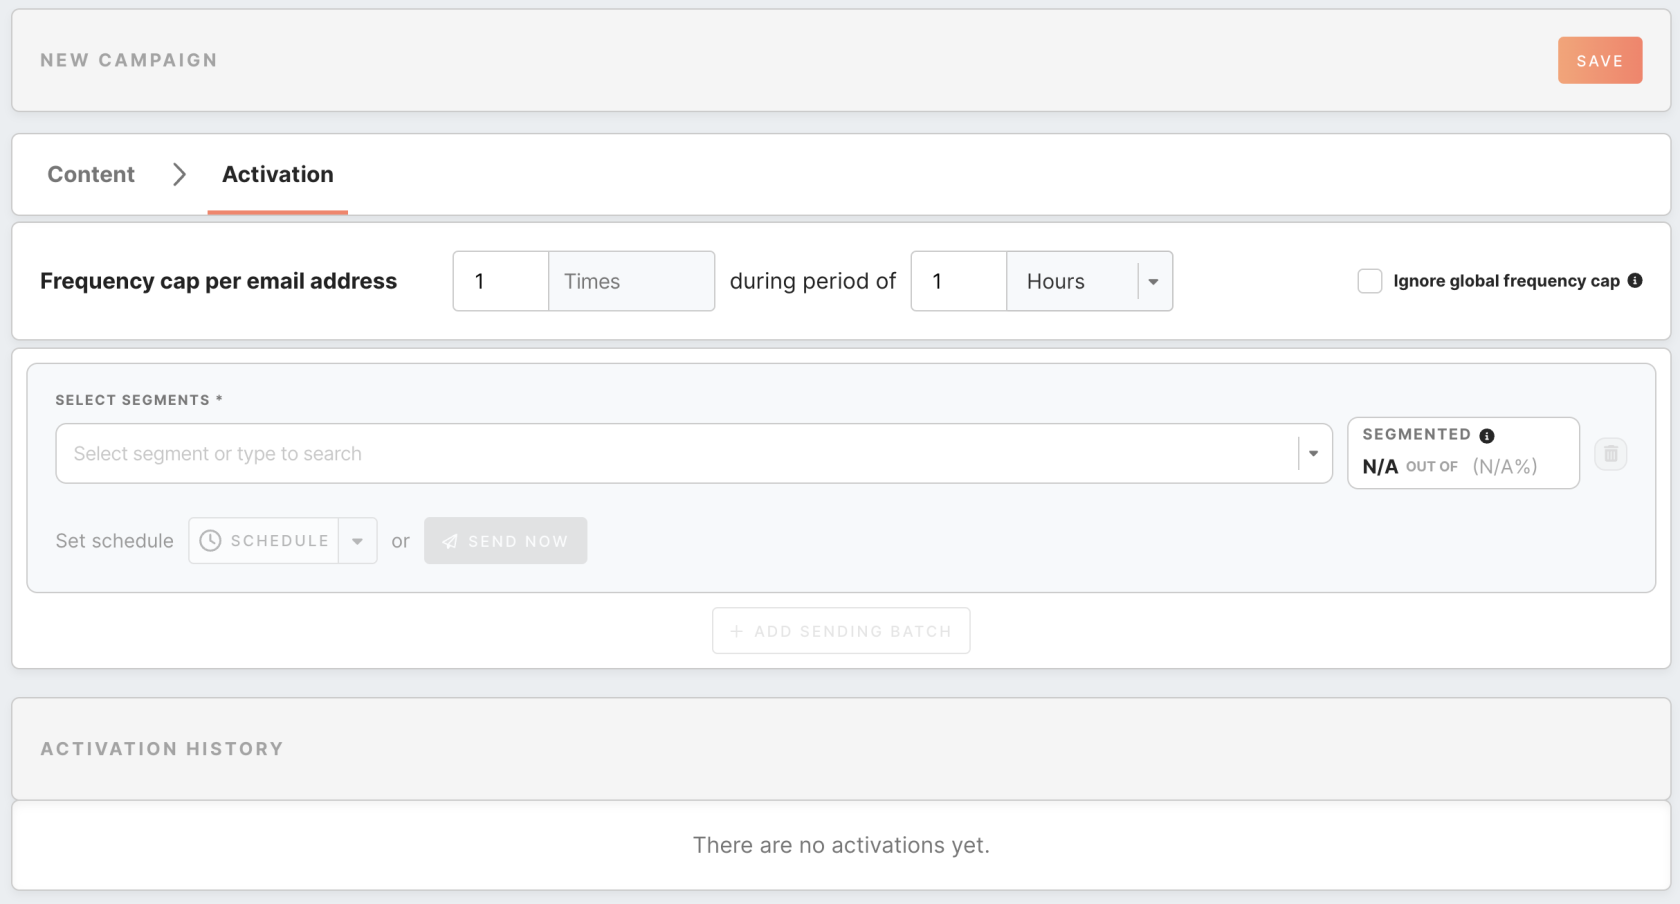
Specify the desired frequency of email delivery in terms of days or hours. The default limit is the same as the global limit. Make desired changes and save them to apply them. It is not possible to save campaigns with stricter global frequency caps.
If you use less strict limits in the local frequency cap than in the global, the campaign will be displayed in the list with a warning icon next to its name. The icon serves as a notification to the user, indicating that the campaign will continue to run based on the less strict limits specified in its local frequency cap.
Ignore global frequency cap
To bypass the frequency limit for a specific campaign, select the "Ignore global frequency cap" checkbox. The campaign will be displayed in the list with a lightning icon next to its name.
Remember: it is also possible to set global frequency across all email campaigns. Read more here.
Segment selection
In order to send the email campaign, you can use a dropdown list to select one or multiple segments of customer profiles. Please note that segments should be created in advance in the Segments tab.
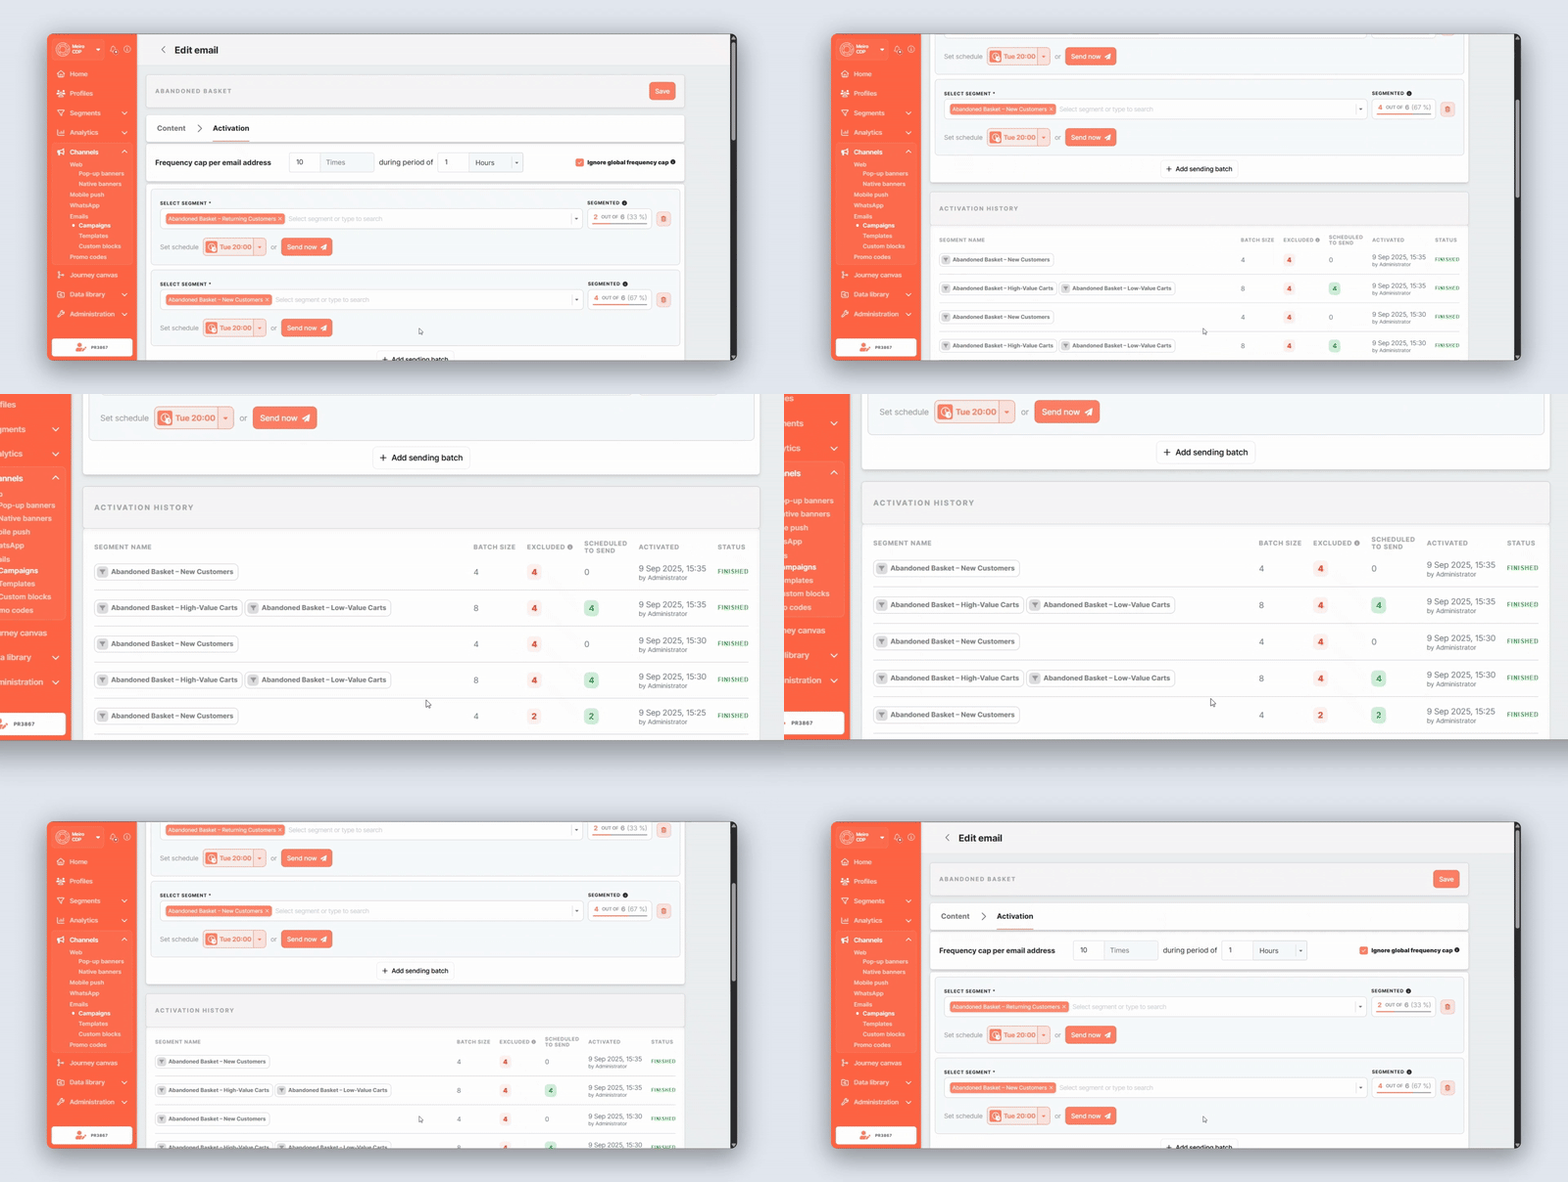
If you wish to create additional sets of segments, simply click on the "Add sending batch" button. This allows you to send or schedule campaigns to different batches independently from one another. By using separate sending batches, you can effectively manage and target your email across various segments.
Remember: when sending an email to a segment batch, duplicate customer profiles are automatically removed. This means that each profile's recognized email will receive the email only once. However, if a customer profile appears in different segment batches, it is possible for that profile to receive the campaign multiple times. To avoid excessive emails, it is recommended to use frequency capping.
When multiple segments are used in a single batch, the number of profiles that will receive the Email campaign is determined by the "or" operator between the conditions specified in all segments.
Learn more: for a better understanding of a segmented profile number, especially when combining lookalike and regular segments in one sending batch, reach out to this article.
Activate campaign
Once you have thoroughly tested your email campaign and are satisfied with its design and content, you have the option to either schedule or send it immediately.
1. Define schedule to campaign
Scheduling your email campaign allows you to reach your audience at the best times, increasing engagement rates and providing more control when your message is sent.
Use a dropdown button to select your preferred schedule type.
You can choose only one scheduling type, as they cannot be combined:
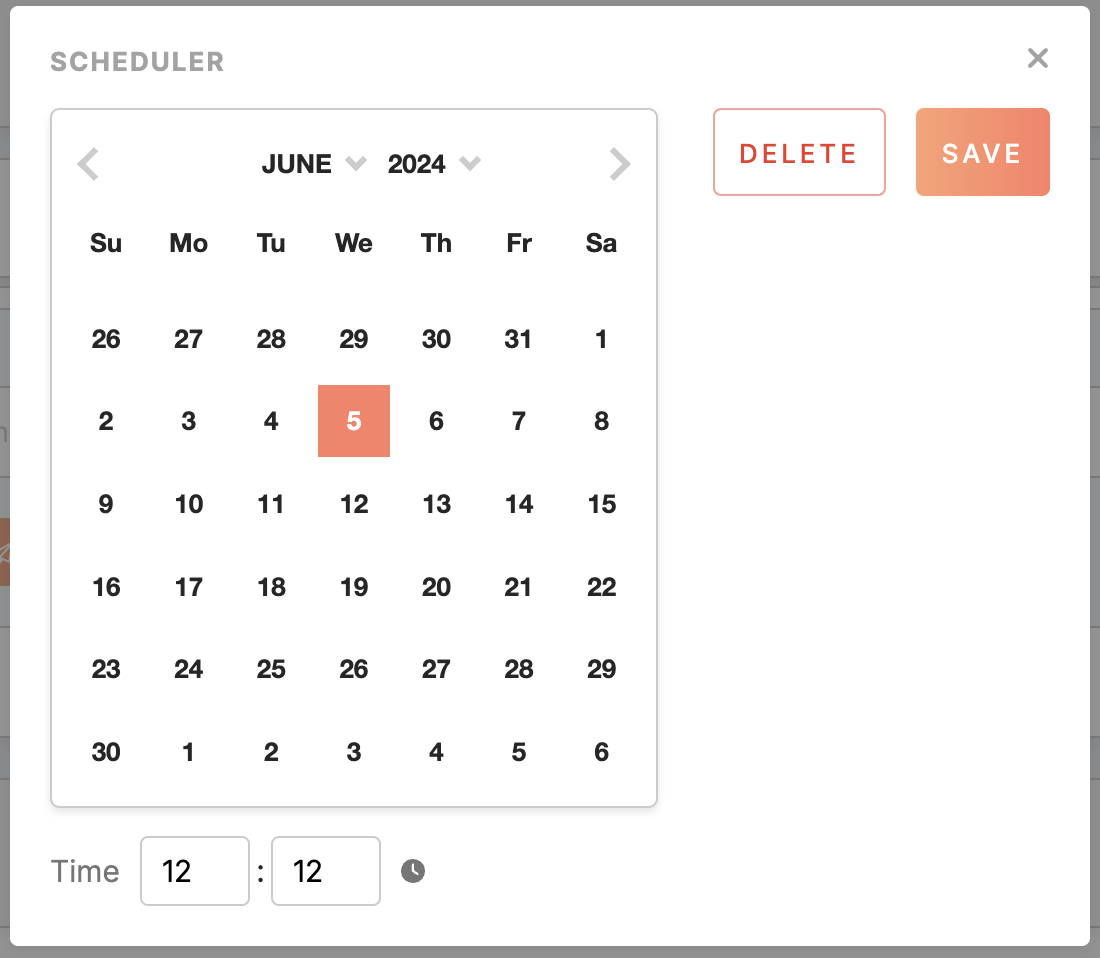
| One-time schedule |
allows for executing the campaign once at this specific DateTime only. The upcoming schedules are highlighted in orange, while the already activated ones are displayed in grey: |
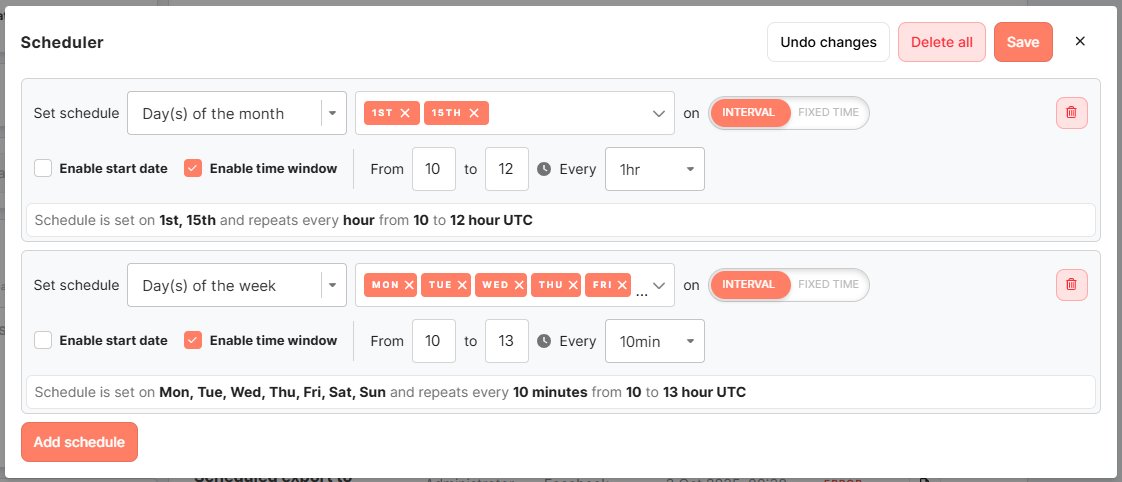
| Recurring schedule |
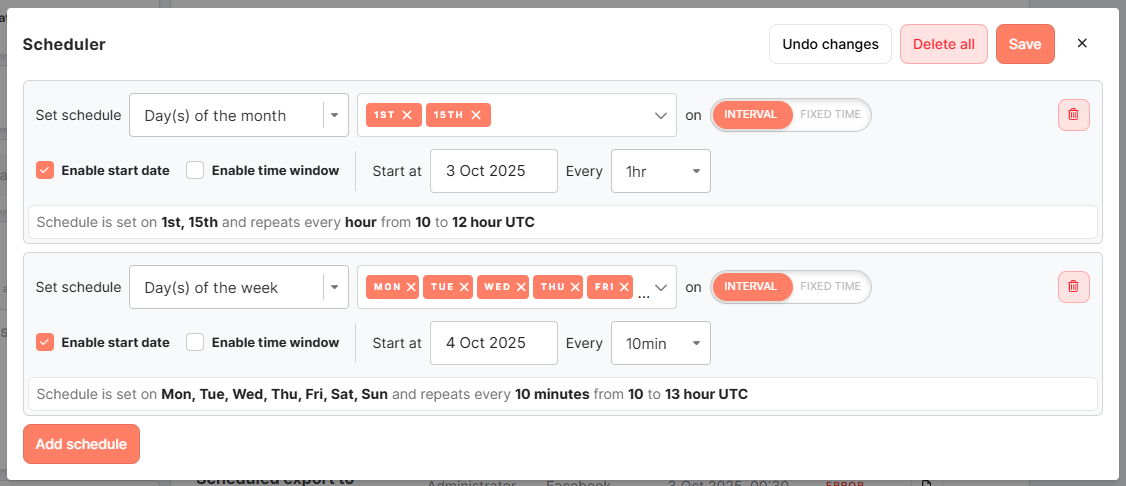
Recurring schedules allow you to automate exports at regular times. You can configure: For both, you can then specify:
Each segment batch has its own independent recurrence. At each interval, only profiles matching the segment conditions at that time will be included.
Time is scheduled and executed in UTC. |
If the schedule was set to the segment batch, then profiles from the segment will receive emails on selected days and times. Note time is scheduled in the UTC timezone.
Remember: you can set a schedule for each sending batch independently of one another.
2. Activate campaign immediately
Use the "Send now" button to send the email to the audience with immediate effect.
Sending an email immediately can be a great way to communicate important, time-sensitive information to your customers or quickly communicate important updates with them. Sending an email right away can help to ensure that everyone receives the necessary information in a timely manner.
Remember: you can immediately send an email campaign to different sending batches independently of one another.
Activation history
Activation history lists email campaign executions from the last 30 days.
Columns
-
Segment name
The segment(s) targeted for this activation. Multiple badges appear if more than one segment was used. -
Batch size
Number of email messages, not profiles. The count of valid email addresses that passed basic checks and are ready. -
Excluded (frequency cap)
Number of email addresses paused by your per-email send limit for the selected period. Shown in red. -
Scheduled to send
Final email messages queued to go out now — Batch size minus Excluded. Shown in green when > 0. -
Activated
When the activation was triggered (with the triggering user displayed below the timestamp). -
Status
One of waiting, running, finished, or error. Counts appear once the activation reaches finished or error.
Where: Channels → Emails › Campaigns → open a campaign → Activation tab → Activation history
Statistics
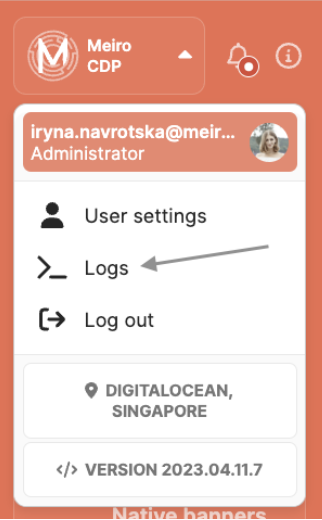
The statistics on the number of entities that received the Email campaign are saved in the Grafana logs, accessible through the User menu. However, only users with the appropriate permissions can view this information.
Other statistics may be found under the Reporting tab for emails.





No Comments