Activating a WhatsApp Campaign: Step-by-Step
Once you’ve configured the content of your WhatsApp campaign, you’re ready to activate it. This section guides you through setting frequency limits, selecting your target segment, scheduling delivery, and monitoring activation history.
Set Frequency Rules
Specify how often your WhatsApp messages can be sent to the same phone number using frequency caps. The default local frequency cap follows the global limits, but you can customize this.
Local Frequency Cap

Define how often users can receive messages from this specific campaign:
-
Enter the maximum number of messages per phone number
-
Choose the period (e.g., 1 time per 1 day)
This helps prevent over-messaging and respects user experience.
Ignore Global Frequency Cap
You may choose to bypass global limits by checking Ignore global frequency cap. This is helpful for critical or transactional messages (e.g., OTPs or system alerts).
-
Campaigns ignoring the global cap display a lightning icon (⚡)

-
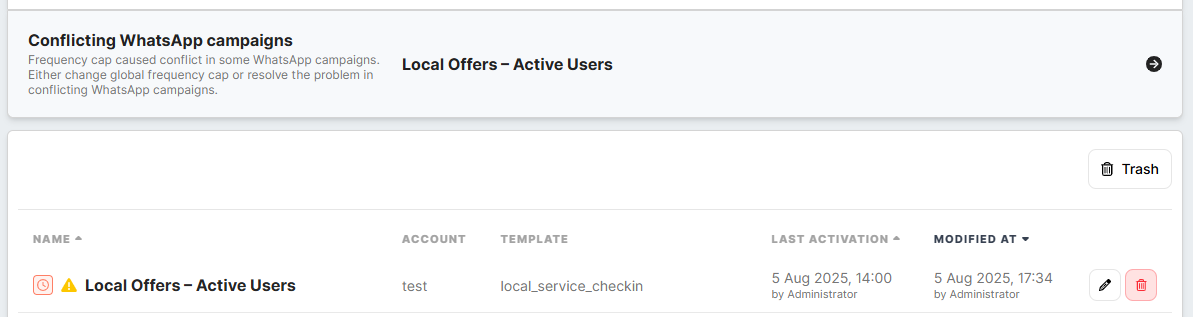
If local limits are less strict than global ones, a warning icon (⚠️) appears in the campaign list
Learn more: Global Frequency Cap Settings
Select Audience Segments
In order to send a WhatsApp campaign, you must select one or more customer segments using the dropdown. Segments must be created in advance in the Segments tab.
If you wish to send the same campaign to different groups, click Add sending batch. This allows you to manage timing and targeting separately for each batch.
If a customer profile appears in multiple batches, they may receive the same campaign more than once. To avoid repetition, use frequency capping to control delivery limits.
Remember: Duplicate profiles within the same batch are automatically filtered to ensure each recipient receives the message only once.
Learn more: about segmentation in WhatsApp campaigns.
Define the Campaign Schedule
After selecting your segment(s), you can choose when your campaign should be delivered:
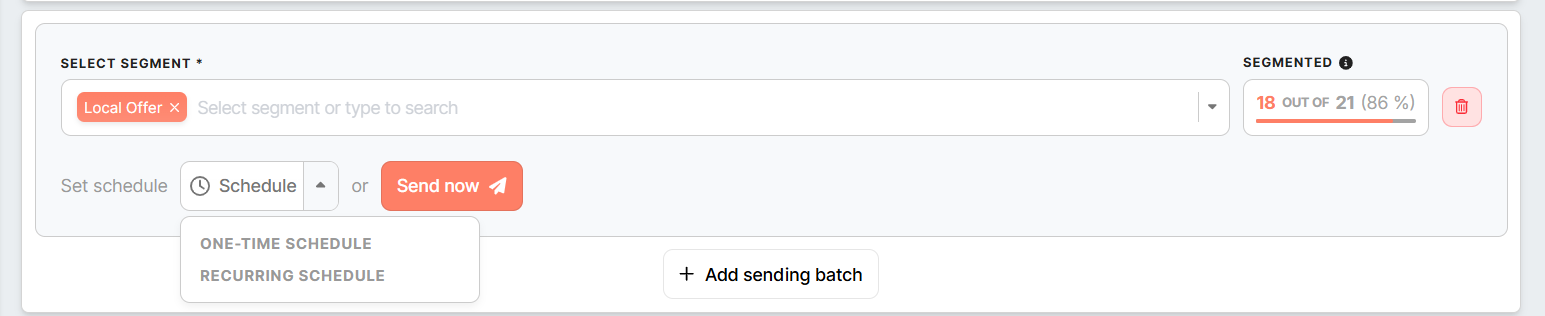
One-Time Schedule
Send the campaign once at a specific DateTime (UTC). This is best for one-time promotions, reminders, or seasonal offers.
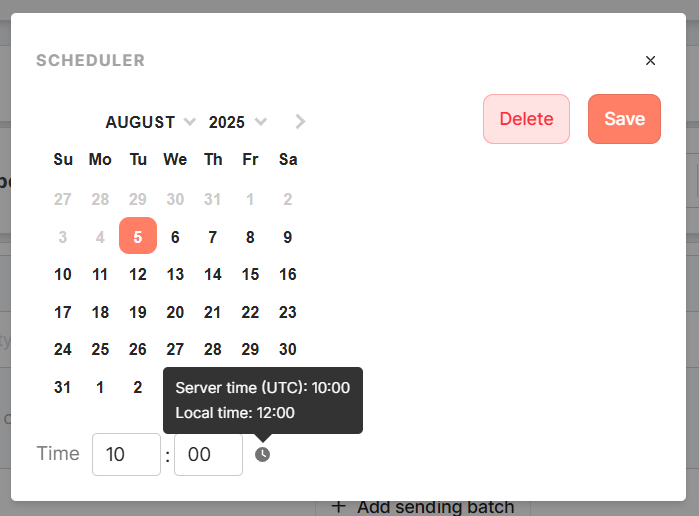
Upcoming schedules are shown in orange, past executions are shown in grey.


Recurring Schedule
Recurring schedules allow you to automate exports at regular times. You can configure:
-
Day(s) of the week (e.g. every Monday and Wednesday at 10:00 UTC)
- Day(s) of the month (e.g. 1st and 15th at 09:00 UTC)
For both, you can then specify:
- Fixed Time (specific fixed time e.g. 10:00 UTC)
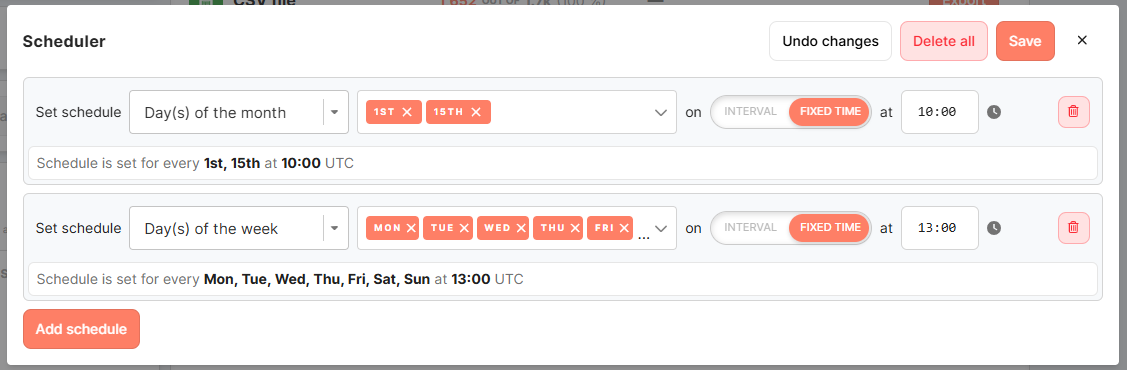
-
Intervals (e.g. every 30 minutes, or every 1 hour within a defined time window)

-
Start dates to limit the schedule duration
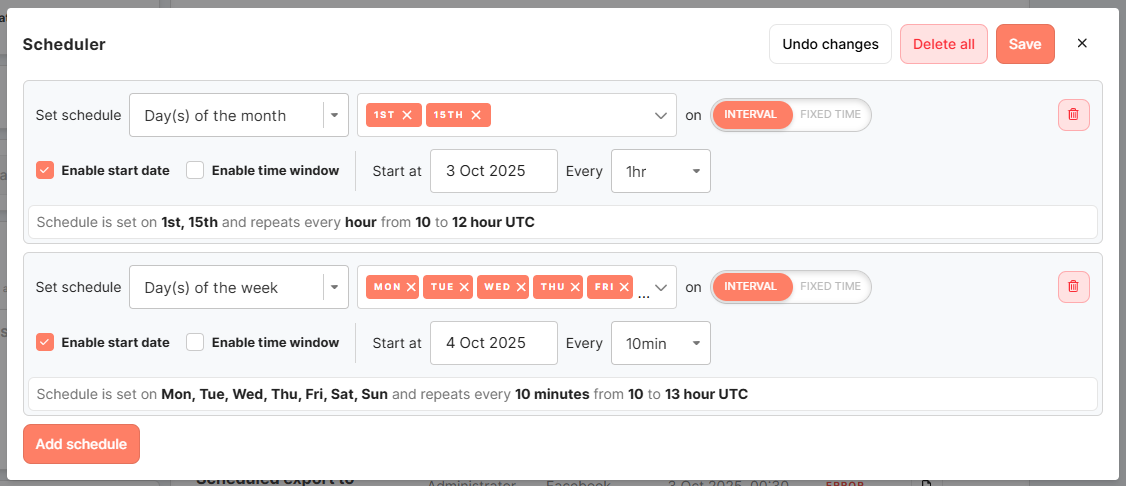

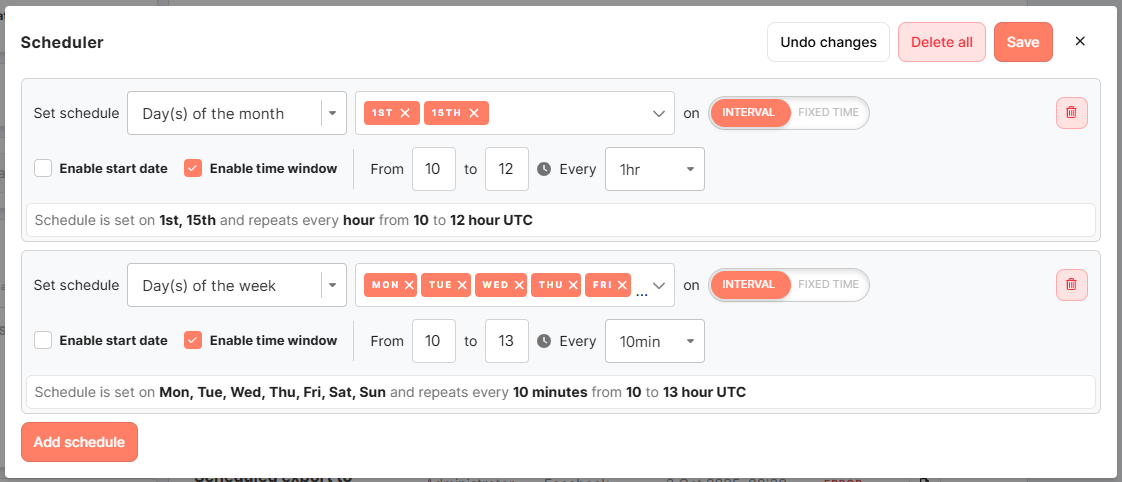

Each segment batch has its own independent recurrence. At each interval, only profiles matching the segment conditions at that time will be included.
Time is scheduled and executed in UTC.
Sending the Campaign Immediately

To trigger the campaign right away, use the Send now button. This will immediately deliver the message to the selected segment.
This is useful for urgent communications or manual one-time sends.
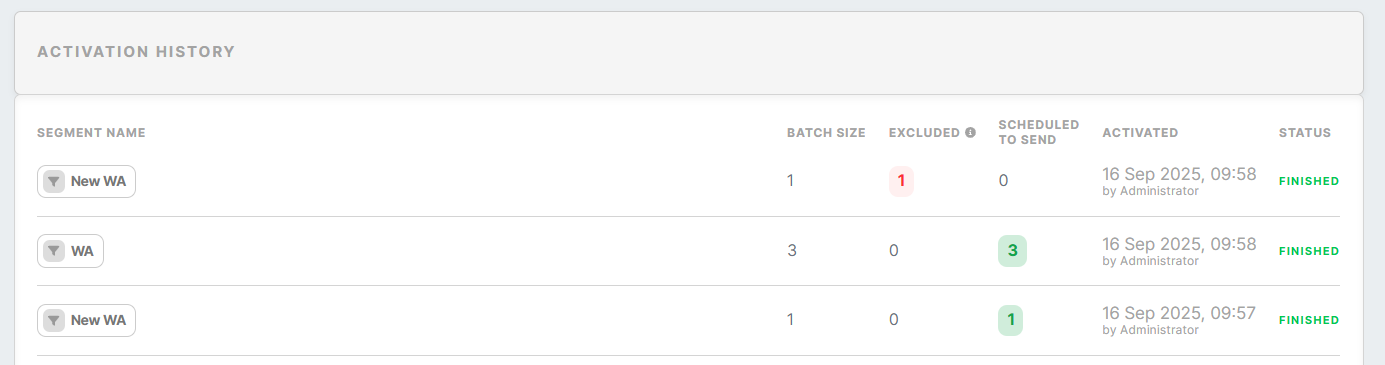
Activation History
Activation history logs WhatsApp campaign executions from the last 30 days.
Columns
-
Segment name
The segment(s) targeted for this activation. Multiple badges appear if more than one segment was used. -
Batch size
Number of WhatsApp messages, not profiles. The count of valid phone numbers that passed basic checks and are ready. -
Excluded (frequency cap)
Number of phone numbers paused by your WhatsApp frequency cap for the selected period. Shown in red. -
Scheduled to send
Final WhatsApp messages queued — Batch size minus Excluded. Shown in green when > 0. -
Activated
When the WhatsApp activation was triggered (with the triggering user shown below). -
Status
waiting, running, finished, or error. Counts appear once the activation is finished or error.
Where: Channels → WhatsApp → open a campaign → Activation tab → Activation history
This view helps you audit and troubleshoot your activations.
Warning: If a required attribute is removed or hidden after the campaign is created, it may cause the campaign to fail during activation. Ensure all attributes remain available before launching.
No Comments