Mobile Push channel configurations
The Administration/Configurations/Channels tab in Meiro Business Explorer enables businesses to configure channels for running campaigns. This guide provides a step-by-step tutorial on configuring the Mobile Push channel in Meiro Business Explorer.
|
Learn from this article: |
Generate Firebase JSON file
Before configuring the Mobile Push channel, a Firebase account must be set up, and a Firebase JSON file must be generated. Below is the sequence of steps to follow for setting this up:
- Once you have created a Firebase project, you can set up an app for iOS or Android in Firebase.
- In the Firebase console, open Settings -> Service Accounts -> click ‘Generate new private key.’
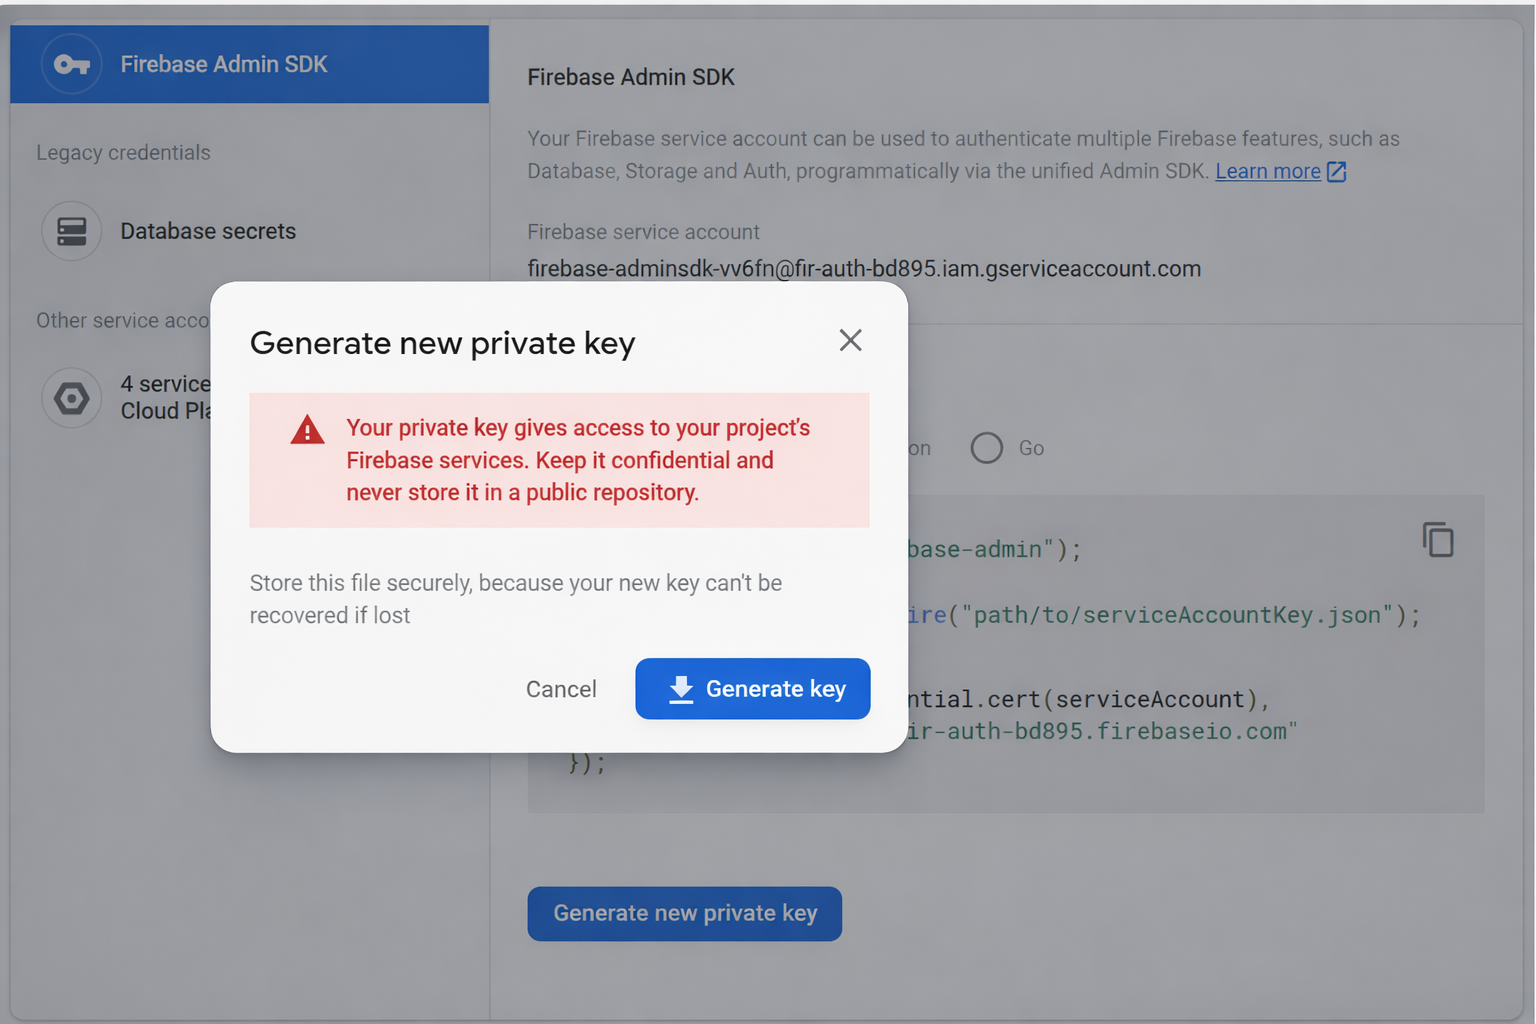
- Click on the ‘Generate key’ to download the ServiceAccount.json file. This file is required to allow Meiro Business Explorer to access your Firebase project.

Configure Firebase project on MBE
To set the Mobile Push channel, you need firstly to configure the Firebase project under the Administration/Configurations/Channels tab.
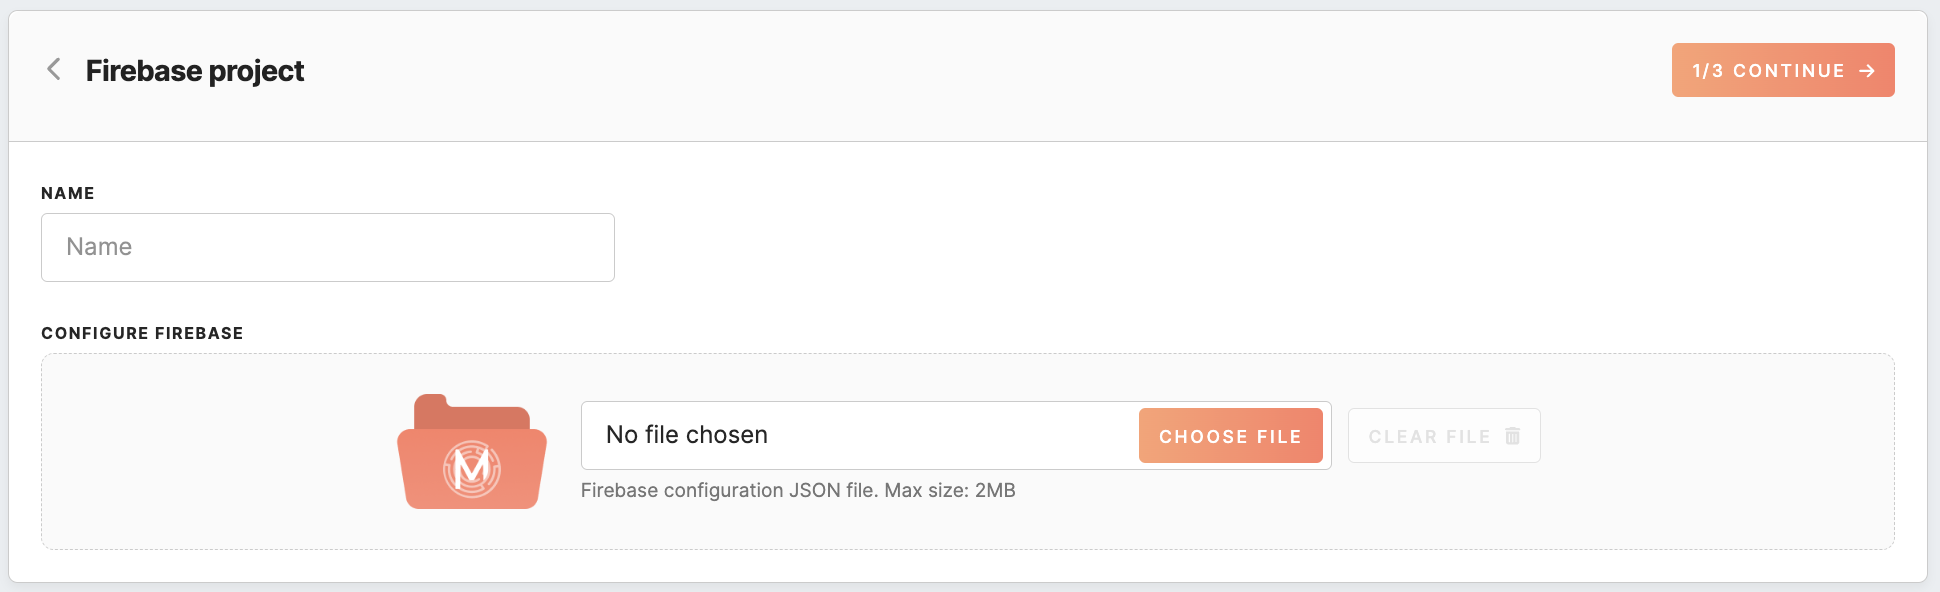
To configure the Firebase project:
- Provide a name for your project
- Upload the
ServiceAccount.jsonfile that was obtained in the previous step.
Application settings
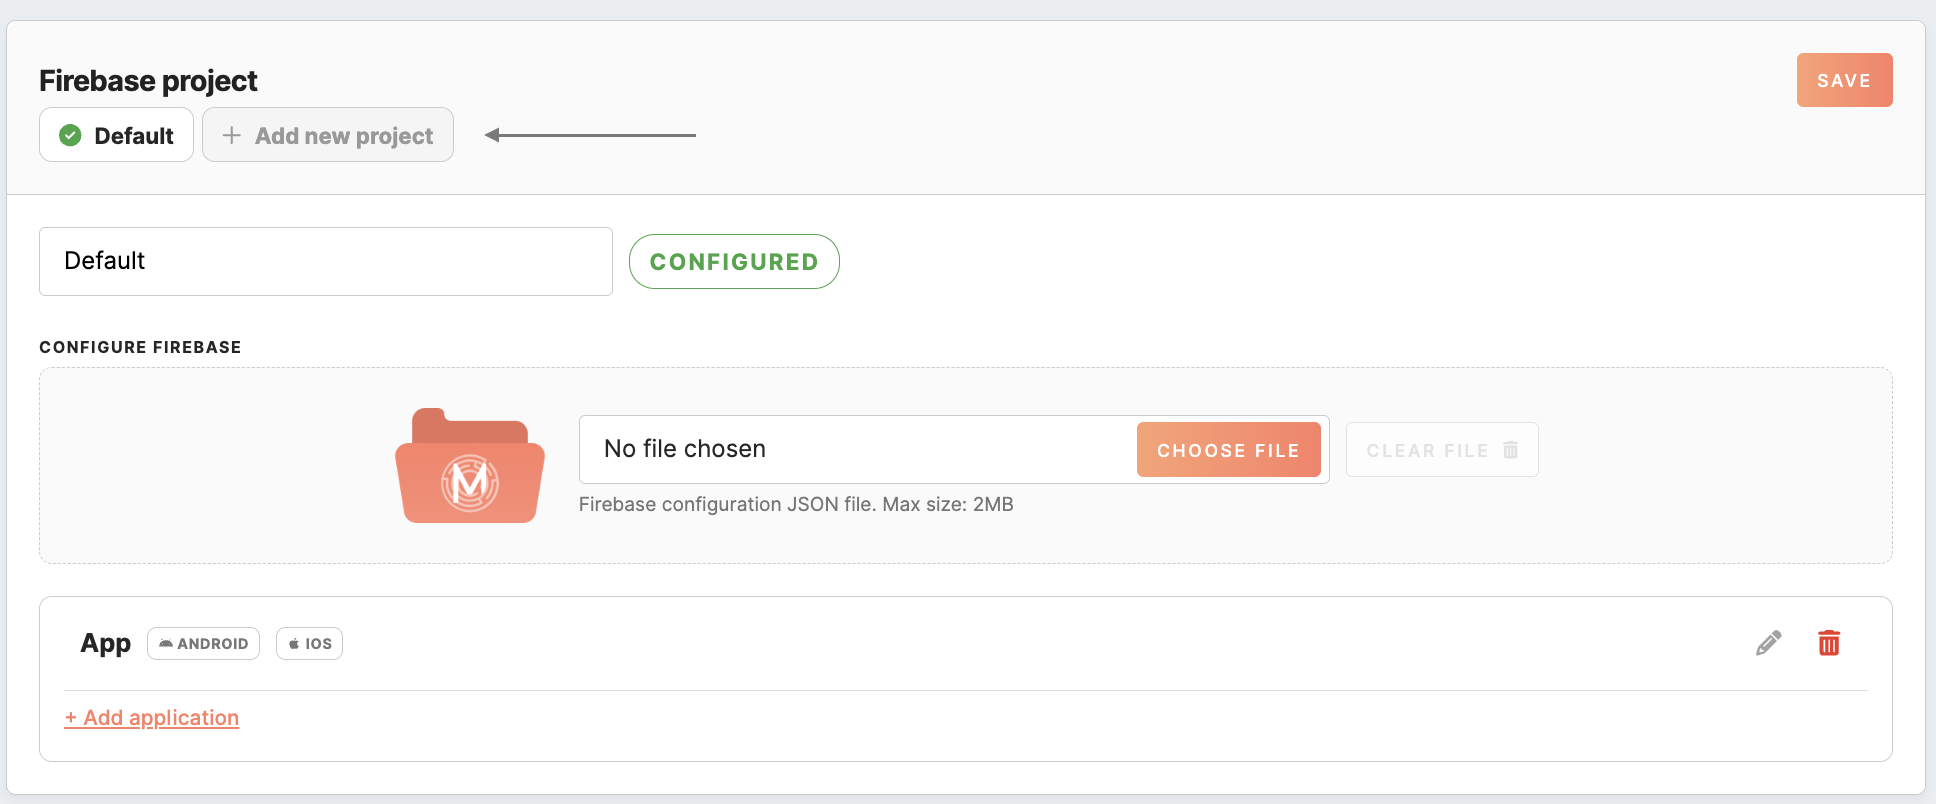
To activate the Mobile Push channel, you must add at least one mobile app. In this section, you can find a list of previously added mobile apps, each with the following details:

|
Name |
The name of the mobile app. |
|
Android/ iOS icon |
The icon appears if the mobile app is configured for Android, iOS, or both. |
|
Edit / Delete |
You can use these options to edit the app's settings or delete an application. |
Adding application
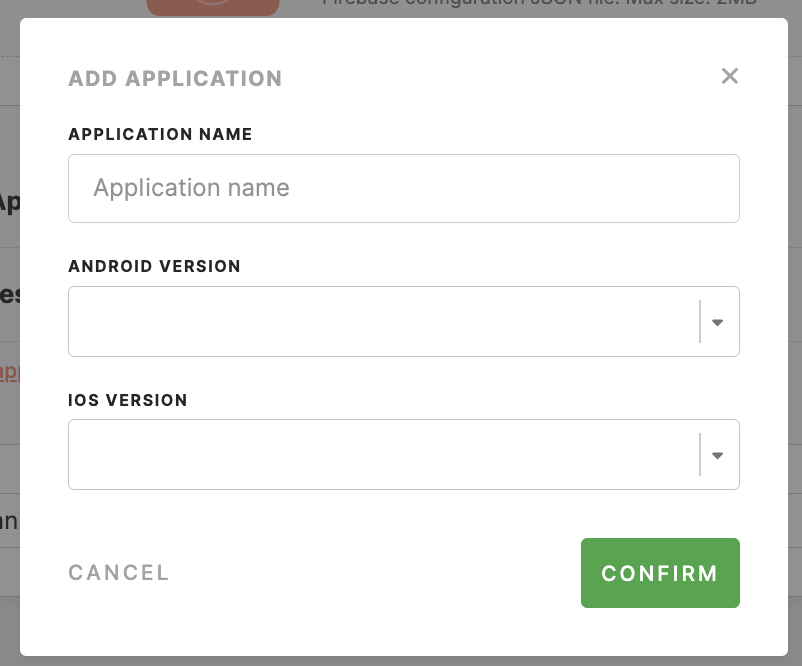
If no app is added yet, click the “add application” button, which will take you to the mobile application settings page. Fill in the information in a new window.
|
Application name (required) |
This is the name of your mobile application. Provide a unique and descriptive name for the application. |
|
Android version / iOS version (at least one is required, or both) |
The App ID is a unique identifier for your mobile app. Applications are pulled directly from the Firebase project, and you need to select the relevant ones for your desired application based on the names you provide. |
Multiple firebase projects
If you need to use multiple Firebase projects within a single Mobile Push channel, you should first enable the channel with your first project. Once this is done, you can add additional projects as needed.
Remember, every project can be reconfigured with the Firebase configuration file as long as it contains the same project ID and client ID .
If you have multiple projects that are properly configured, they will all be enabled simultaneously. This means that the number of profiles available in the Mobile Push channel under the segment detail or the total count of profiles under the activating tab will include profiles from all of the configured projects.
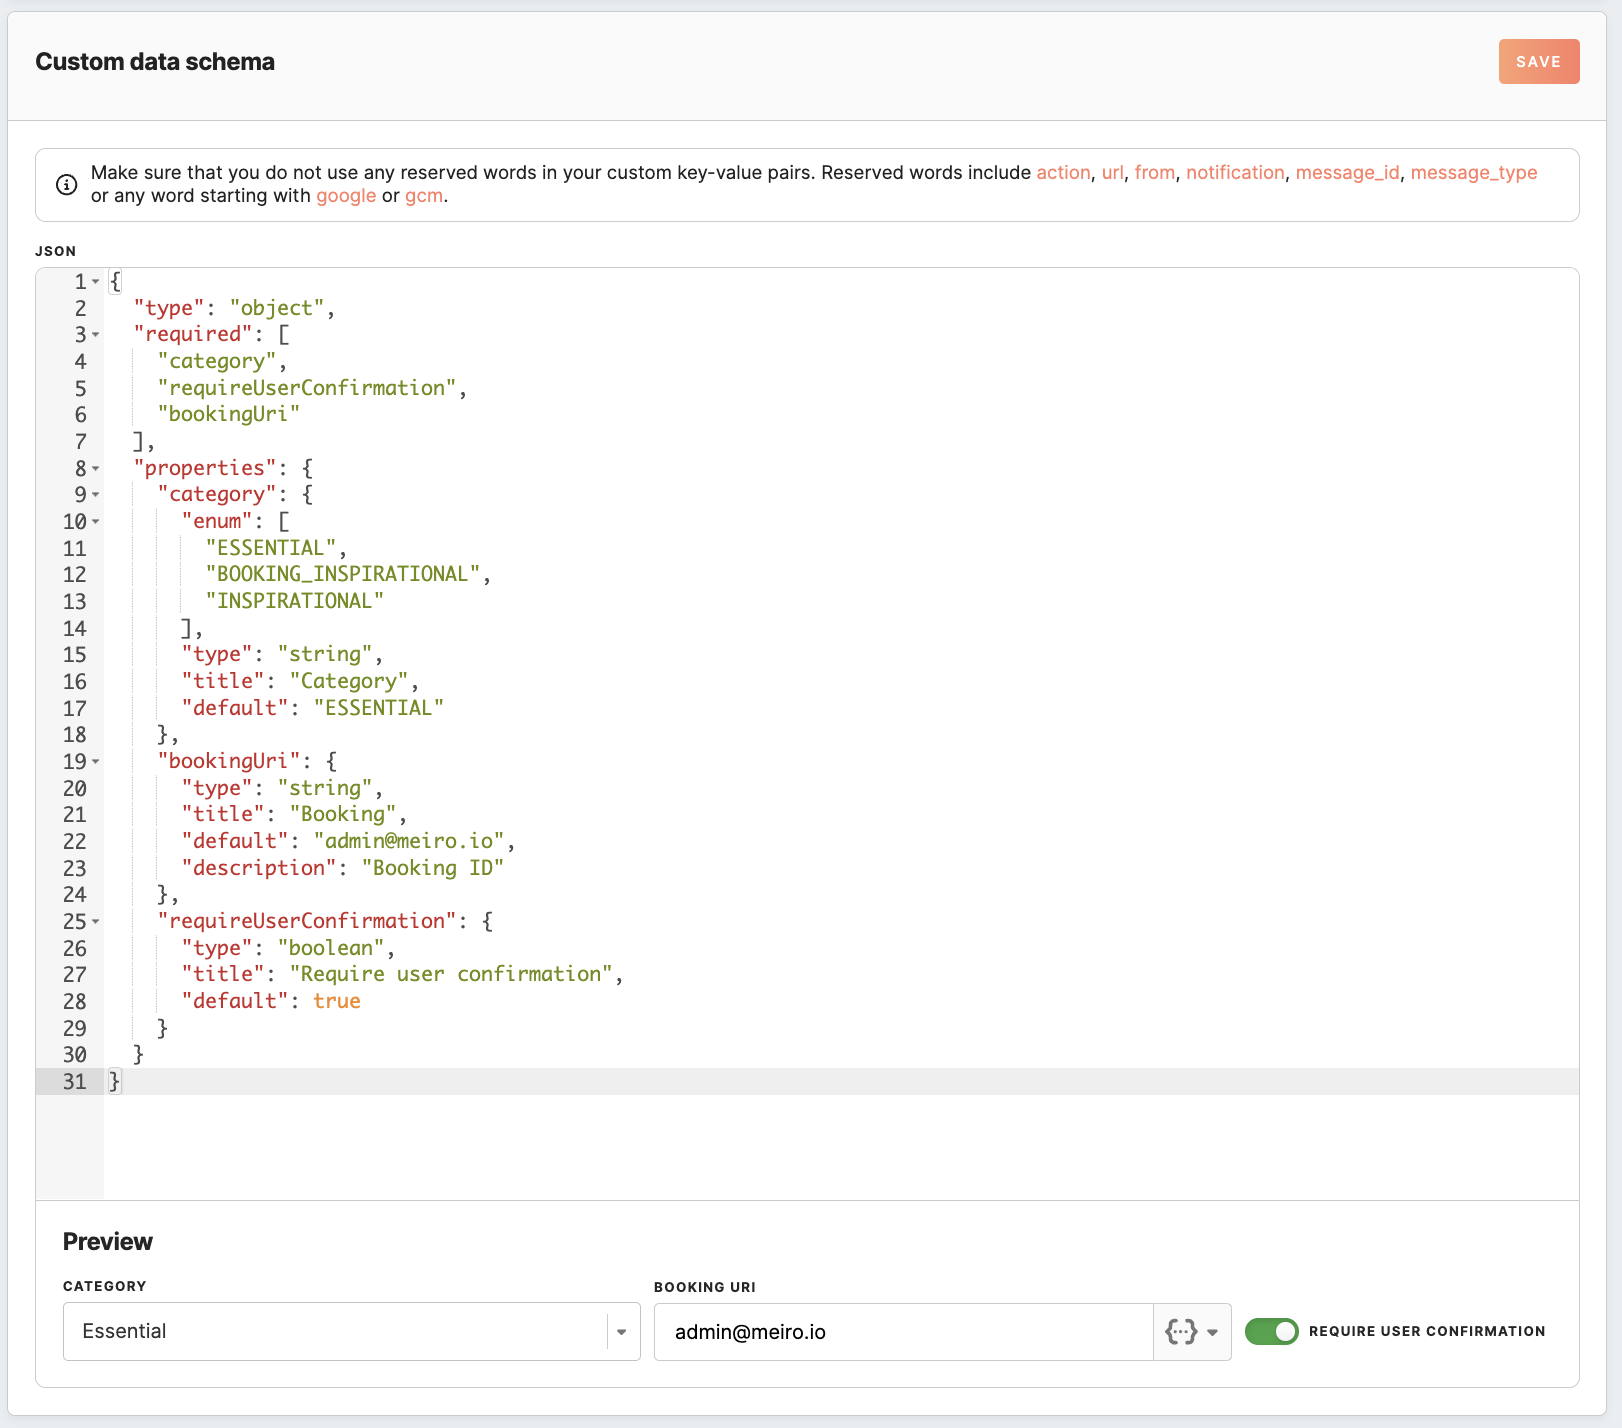
Custom data schema
Custom data payload in Firebase Cloud Messaging (FCM) allows developers to include custom key-value pairs in their push notifications. This capability sends additional data to an app on a user’s device, enabling various functionalities and enhancing the app’s responsiveness to notifications.
The custom data payload can be used for a wide range of purposes, including but not limited to:
- Synchronization: Triggering data synchronization or updates in the app. For example, if new content is available on the server, a notification with a custom payload can instruct the app to fetch the latest data.
- Feature Flags: Controlling feature access or enabling experimental features for a subset of users. The custom data can include flags that the app checks to toggle features on or off.
- Personalization: Customizing content or functionality based on user preferences or behavior. The payload can carry information that helps the app tailor its behavior or content to the individual user.
- Analytics and Tracking: Including identifiers or other data that can be used for tracking notification interactions or conducting analytics. This can help understand how users engage with notifications and optimize future messages.
- Background Processing: Instructing the app to perform background tasks, such as downloading content or updating local databases, without user interaction. This can improve the user experience by ensuring that data is fresh and readily available when the user opens the app.
- Messaging and Communication: Facilitating real-time communication features, such as chat or updates in collaborative applications. The custom data can carry message payloads, status updates, or other relevant information.
To use the custom data payload effectively, developers must handle the data appropriately within their app’s code. This typically involves parsing the custom data in the notification’s payload when a notification is received and then taking specific actions based on the data’s contents. It’s important to design the handling of custom data payloads carefully to ensure a smooth and efficient user experience and consider the security implications of the data being transmitted.
To get started, fill the schema under the Mobile Push channel configurations. You have an option to personalize fields using the LiquidJS template language. For instance, apply this language inside the default value to dynamically prepopulate the known values to each profile.
Preview the schema immediately after filling it, and save it to proceed with creating a Mobile Push campaign.
Once you configure the custom data payload, it gets stored and sent along with the current data object for mobile push campaigns.
You can find your schema visible inside the mobile push content tab.
If you modify the custom data schema while having Mobile Push campaigns using the old schema, you might encounter invalid campaigns that appear on the list of notifications with a warning icon. To resolve this issue, you will need to fix the invalid mobile push campaigns.
Learn more: about the examples of custom data schema and implementation issues in this article.
Finalization of Mobile Push channel configurations
To have the Mobile Push channel configured, you need to add at least one Firebase project and one app. Once the channel is activated, you will notice that the Meiro Mobile Push source is automatically generated in the CDP, along with system events and their attributes.
Integrating Firebase SDK and Implementing Mobile App Changes
Begin by integrating the Firebase SDK into your mobile apps.
Remember: It is necessary to obtain user consent before initializing the SDK and sending events, as Meiro does not manage consent for the Mobile Push channel.
You need to implement sending the following event from your apps to the /meiro_mobile Mobile Events endpoint:
FCM Registration Token Registered:
This event is used to initialize the user's Mobile Push channel. It registers the user's Firebase registration token within the CDP. This event needs to be sent whenever the registration token is initiated, as well as when the token changes. If you already have the Firebase SDK integrated into the apps and have access to the registration token, you only need to implement a one-time procedure to send the current users' registration tokens via this event.
You can use a framework such as WorkManager on Android or BackgroundTasks framework on iOS. You may also pass additional identifiers in the event payload, such as Adjust ID, Appsflyer ID, Google Playstore AdID, and IDFA. Including them enables stitching these analytical events to mobile push events. Learn more about implementing this event and its payload example in this article.
FAQ
What is a registration token, and where can I find it? |
A Registration Token, also known as a Firebase Cloud Messaging (FCM) registration token, is a unique identifier assigned to each instance of a mobile app that registers with FCM. It is used by the FCM service to send push notifications to specific devices.
The registration token changes in three cases: when you uninstall and reinstall the app, when you clear app data, or when you restore the app on a new device.
Learn more: about how to retrieve registration tokens for the Android and iOS mobile app. |
No Comments