Setting Up the WhatsApp Channel in Meiro
This guide explains how to connect your WhatsApp Business Account (WABA) with Meiro CDP and configure the WhatsApp channel for sending campaigns. By the end of this process, your system will be ready to launch personalized WhatsApp messages and track delivery events, replies, and user activity.
Prerequisites from Meta (WhatsApp)
Before configuring the WhatsApp channel in Meiro, ensure you have completed the following setup steps in Meta (Facebook) systems:
-
WhatsApp Business Account (WABA): Your business must have an approved WABA.
-
Admin access to Meta Business Manager: You need permissions to authorize integrations and manage phone numbers.
-
Verified phone number: A phone number must be linked and verified for use in your WABA.
Platform Requirements in Meiro
To enable WhatsApp messaging in Meiro CDP, complete the following platform configuration:
- WhatsApp Channel Activation
a) The WhatsApp channel must be activated for your project. Please contact your Meiro technical consultant to request activation. Once activated, go to Administration → Configuration → Channels and open the WhatsApp configuration panel.
b) Activate the WhatsApp Endpoint in Meiro Events
The WhatsApp events endpoint must be enabled in the Meiro Events system to receive real-time updates from your provider (e.g., delivered messages, seen statuses, subscriptions, unsubscriptions, undelivered).c) Connect the Meiro Events API
Finally, go to the Administration → Configuration → Settings tab in Meiro Business Explorer and make sure the Meiro Events API connection is properly configured. - User Access Permissions
- Ensure that your user role includes access to the WhatsApp section in Meiro. Go to Administration → User Setup and check that permissions are enabled for:
- Channels tab
- WhatsApp section
- Ensure that your user role includes access to the WhatsApp section in Meiro. Go to Administration → User Setup and check that permissions are enabled for:
Configuring WhatsApp in Meiro
Once the WhatsApp channel is activated, follow these steps to complete the setup:
Step 1: Business Account Configuration
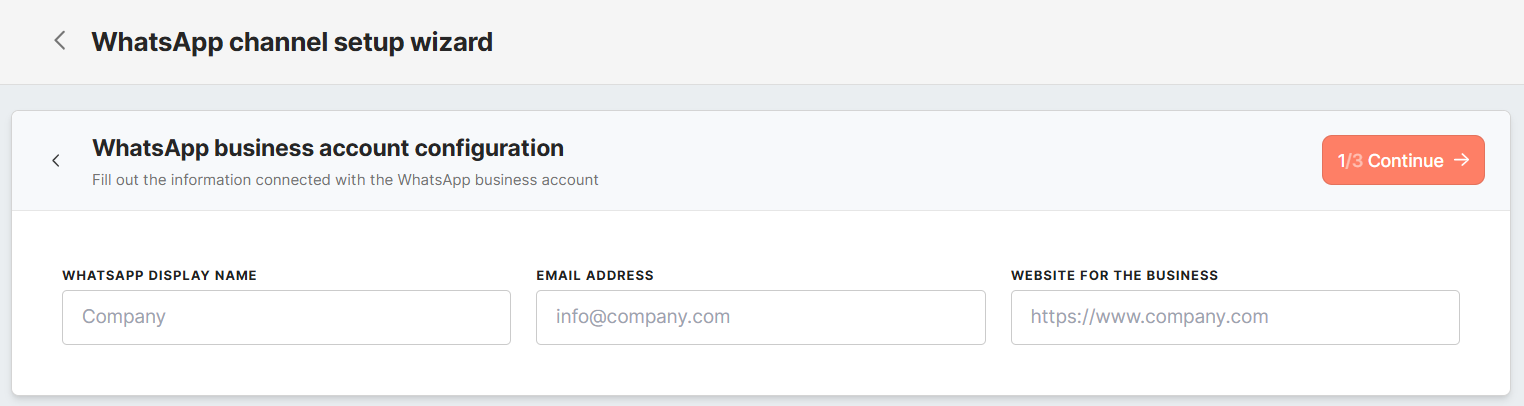
In the first step of the wizard, enter general information for your business:
-
WhatsApp Display Name: This is the name users will see in their WhatsApp chats.
-
Email Address: A business contact email tied to your Meta Business Manager.
-
Website: Your official company website URL.
Click Continue to proceed.
Step 2: Phone Number Configuration
This step links your verified phone number with Meiro. You have two options:
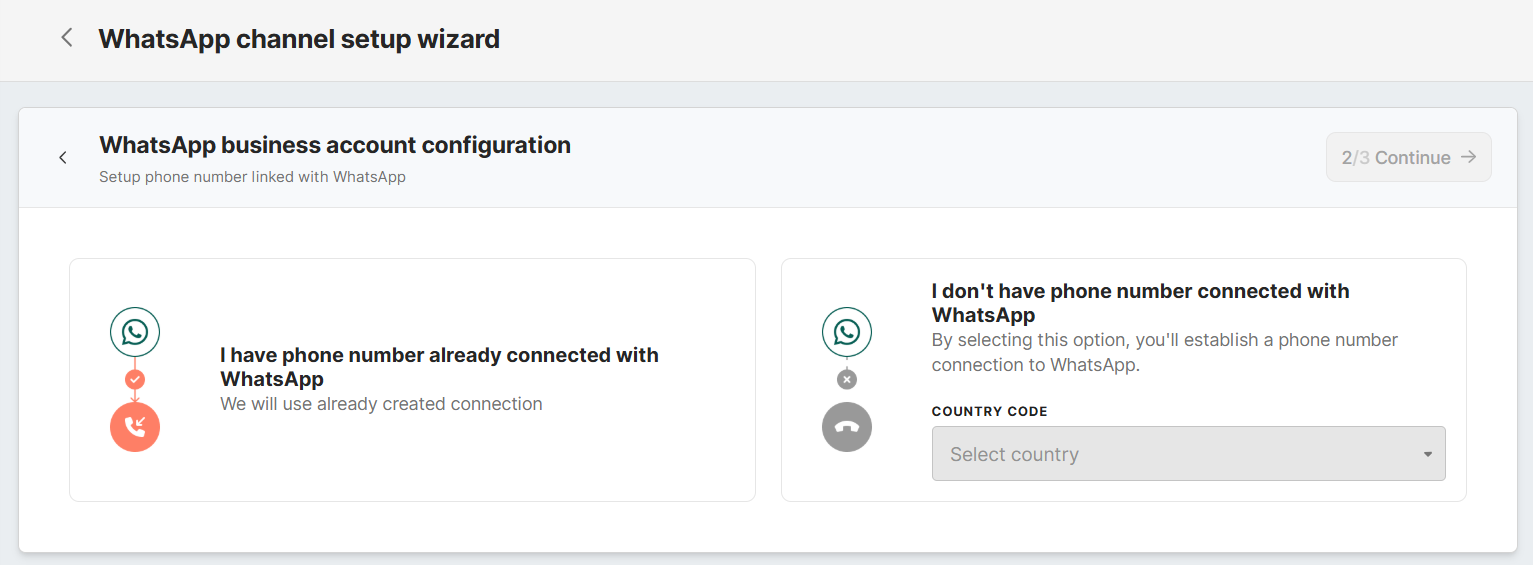
Option 1: Use an existing WhatsApp number
Choose this if your number is already connected to your WABA. No additional verification is required.
Option 2: Connect a new number
Select this if you're setting up WhatsApp for the first time:
- Choose the country code for the number.
- Follow the guided steps to complete verification.
The “Continue” button becomes active once the required information is entered.
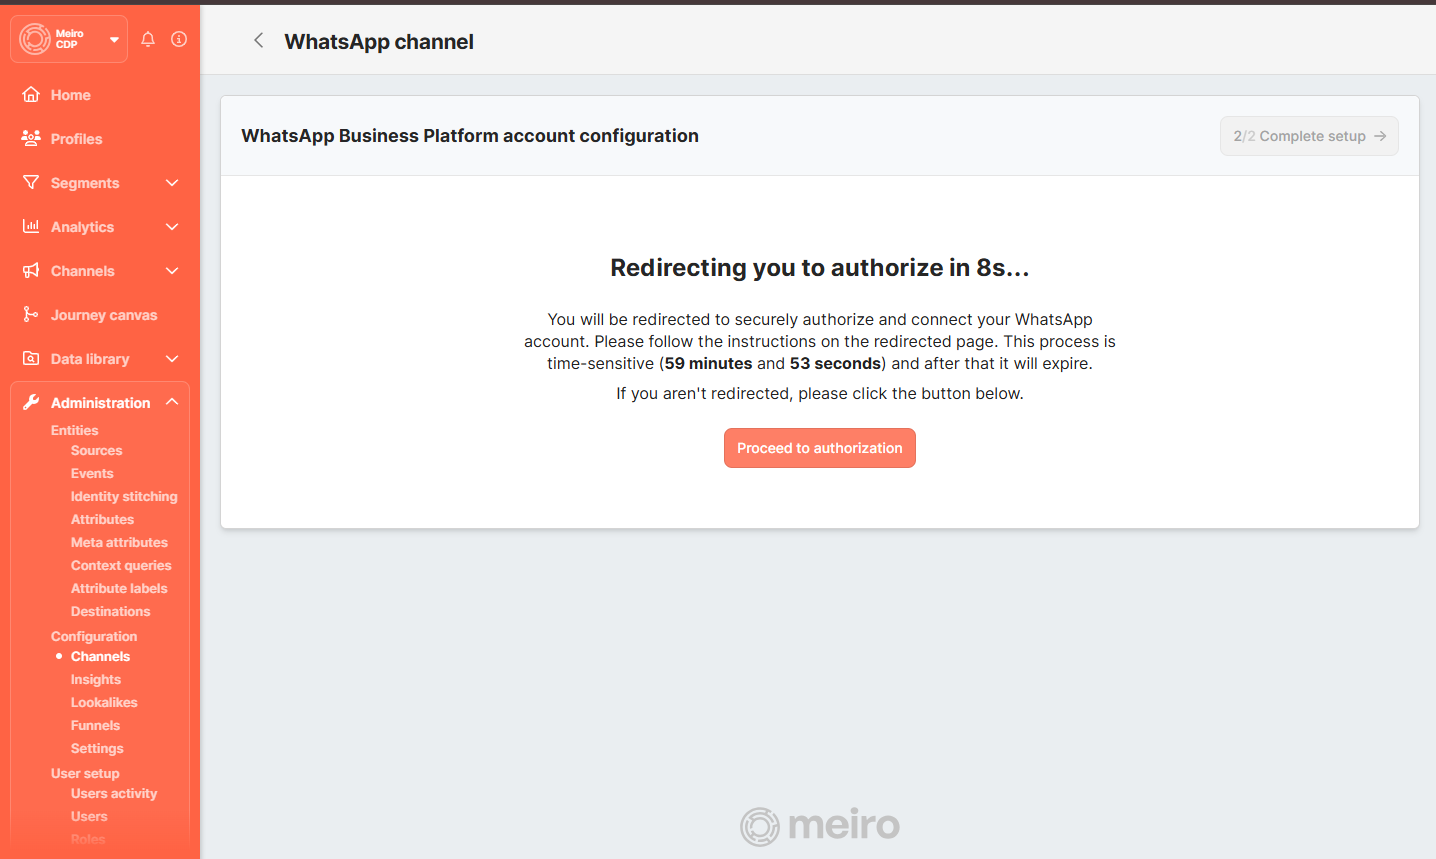
Step 2 (continued): Authorization and Verification
Once you’ve selected your phone number, the next step is to authorize Meiro to connect with your WhatsApp Business Account through Meta. This is done via a short verification process inside Meta’s platform, where you’ll confirm your Facebook account, grant the necessary permissions, and review your business details. When you finish, you’ll return here to complete the connection.
Follow the steps below to connect your WhatsApp Business Account to Meiro via SMSManager.
1. Registration Information
In this step, the form is already pre-filled with the business details you provided earlier in the CDP. Simply review the information to make sure everything is correct.
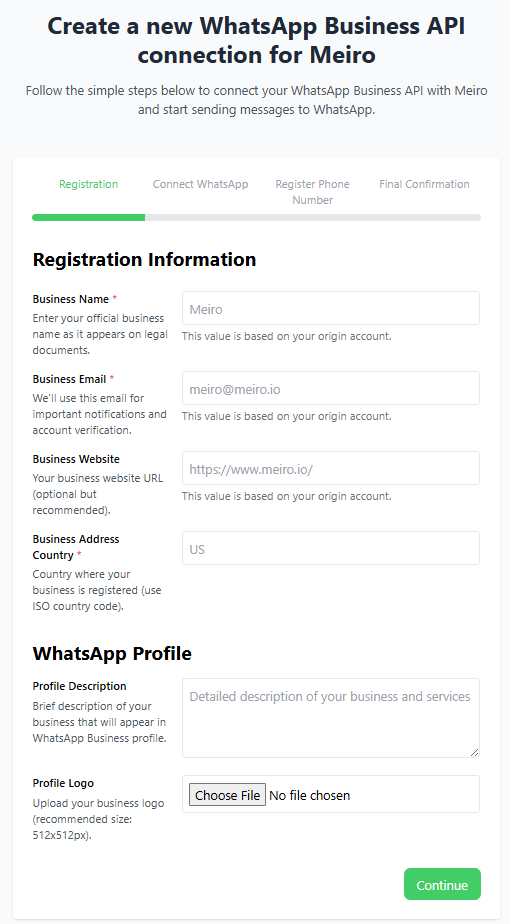
Optionaly, you can add:
- Profile Description – Short description of your business and services for your WhatsApp Business profile.
- Profile Logo – Upload your business logo (recommended size: 512×512 px).
If everything looks correct, click Continue to proceed.
2. Connect WhatsApp
In this step, you’ll start the process of connecting your WhatsApp Business API account to Meiro.
Click Login with Facebook to begin.
This will open Meta’s authorization flow in a new window, where you’ll grant Meiro access to your WhatsApp Business Account.
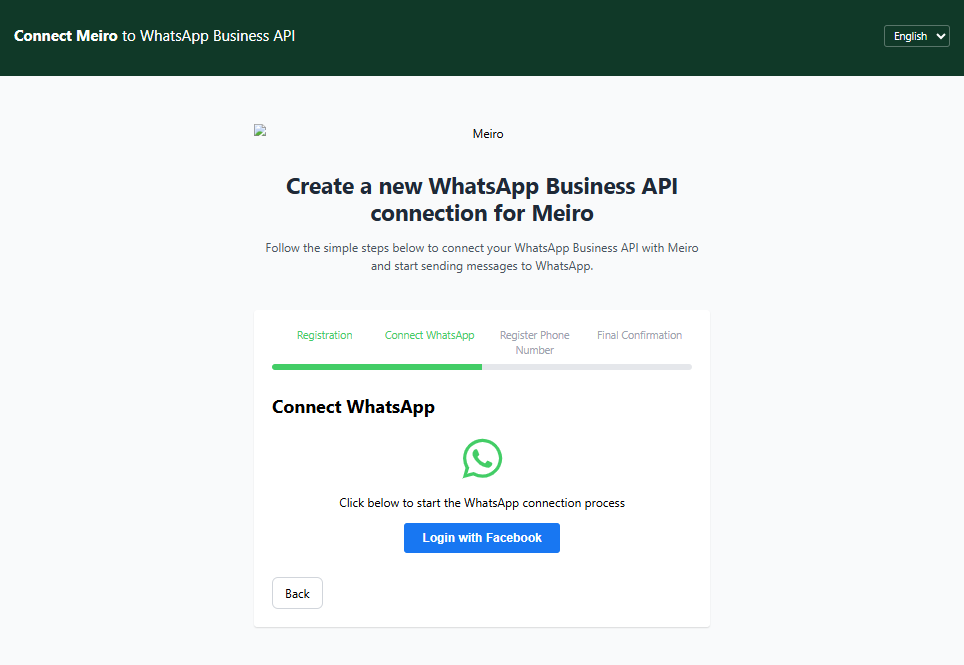
Once you click the button:
-
You’ll be redirected to Meta for authentication.
-
Log in using your Facebook account linked to your WhatsApp Business profile.
-
Follow the on-screen prompts until you return to Meiro’s setup wizard.
After clicking Login with Facebook, you’ll be redirected to Meta’s authorization flow. This process lets Meiro connect to your WhatsApp Business Account.
3. Meta’s authorization flow
The GIF below shows the entire process at a glance. Detailed step-by-step instructions follow.
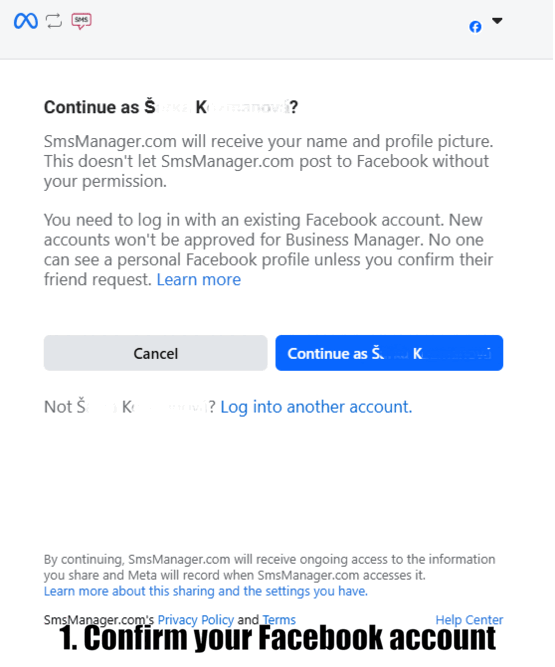
1. Confirm your Facebook account
Meta will confirm which Facebook account you’re using.
- If the correct account is shown → Click “Continue as [Name]”.
- If not → Click “Log into another account”.
2. Grant SmsManager permissions
Meta will display the permissions SmsManager needs (e.g., send messages, create templates, access metrics).
- Click “Get started” to continue.
3. Fill in business information
Check that your business details are correct. These are usually pre-filled from your Meta Business Manager settings.
- Review: Business portfolio, Business name, Website, Country.
- Adjust if needed.
- Click “Next”.
4. Select or create your WhatsApp Business account
Choose your existing WhatsApp Business account and profile, or create new ones if necessary.
- Leave “Automatically identify order and lead events” checked if you want Meta to track these.
- Click “Next”.
5. Confirm WhatsApp Business profile
Review your profile details:
- Account name
- Display name
- Category
Adjust the category if needed.
Click “Next”.
6. Review SmsManager’s access request
Meta will show a summary of the permissions you’re granting to SmsManager. These include:
- Managing WhatsApp accounts
- Managing and accessing conversations
- Logging events on your behalf and sending them to Meta
Click “Continue”.
7. Authorization in progress
Meta will connect your account. This may take up to 90 seconds.
- If it times out, click Retry Authorization.
8. Success confirmation
When complete, you’ll see your account’s conversation limits.
- Click “Finish” to complete the process.
4. Register Phone Number
After completing Meta’s authorization flow and clicking Finish, you’ll be redirected back to the Create a new WhatsApp Business API connection for Meiro screen.
At this stage, Meiro will automatically start registering the phone number you set up during the Meta flow.
You don’t need to do anything — just wait until the process completes.
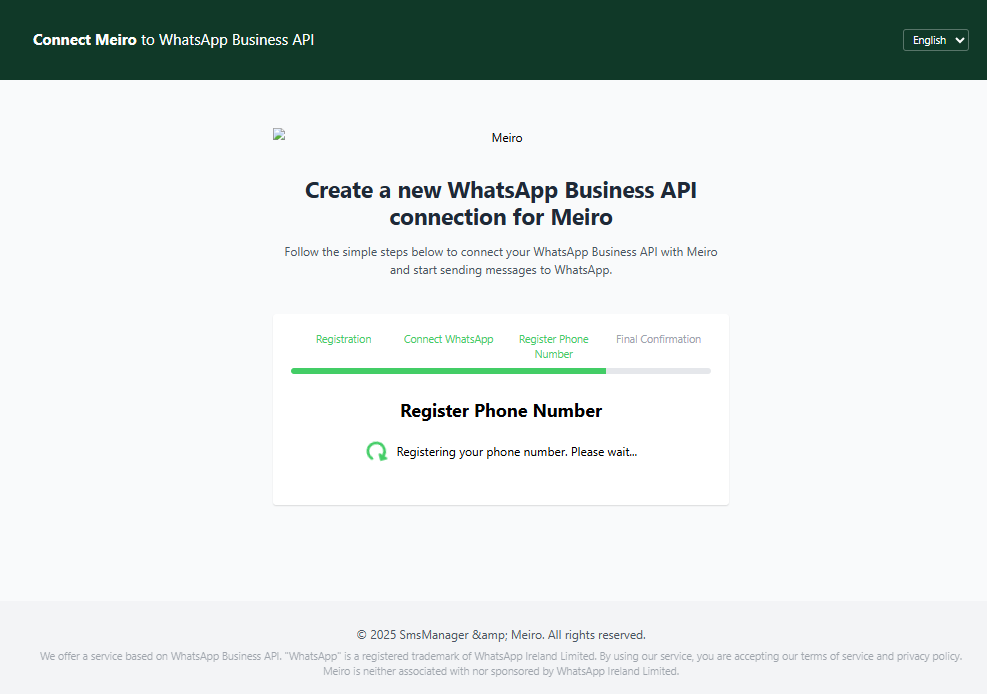
Once registration is successful, you’ll automatically proceed to the Final Confirmation step.
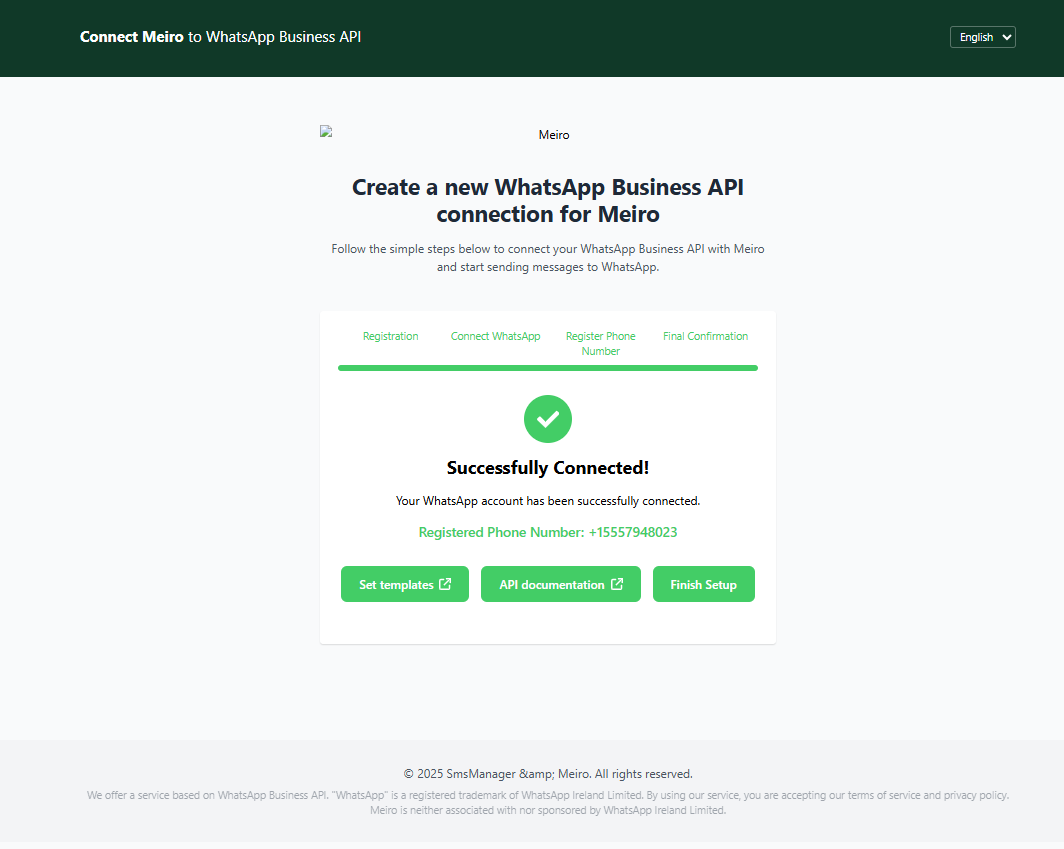
5. Final Confirmation
Once your phone number registration is complete, you’ll see the Successfully Connected! screen.
This means your WhatsApp Business API connection with Meiro is now active.
Your registered phone number will be displayed here for reference.
From this page, you can:
-
Set templates – Create message templates for your WhatsApp communications.
-
Open API documentation – View technical details for integrating the API.
-
Finish Setup – After clicking Finish Setup, you’ll be redirected back to the CDP. The final step is to choose the Stitching Category, which determines how WhatsApp phone numbers will be linked to user profiles in Meiro.
After clicking Finish Setup, you’ll be redirected back to the WhatsApp channel setup wizard in Meiro. You’ll see a Success screen confirming that your WhatsApp Business Platform account was authorized.
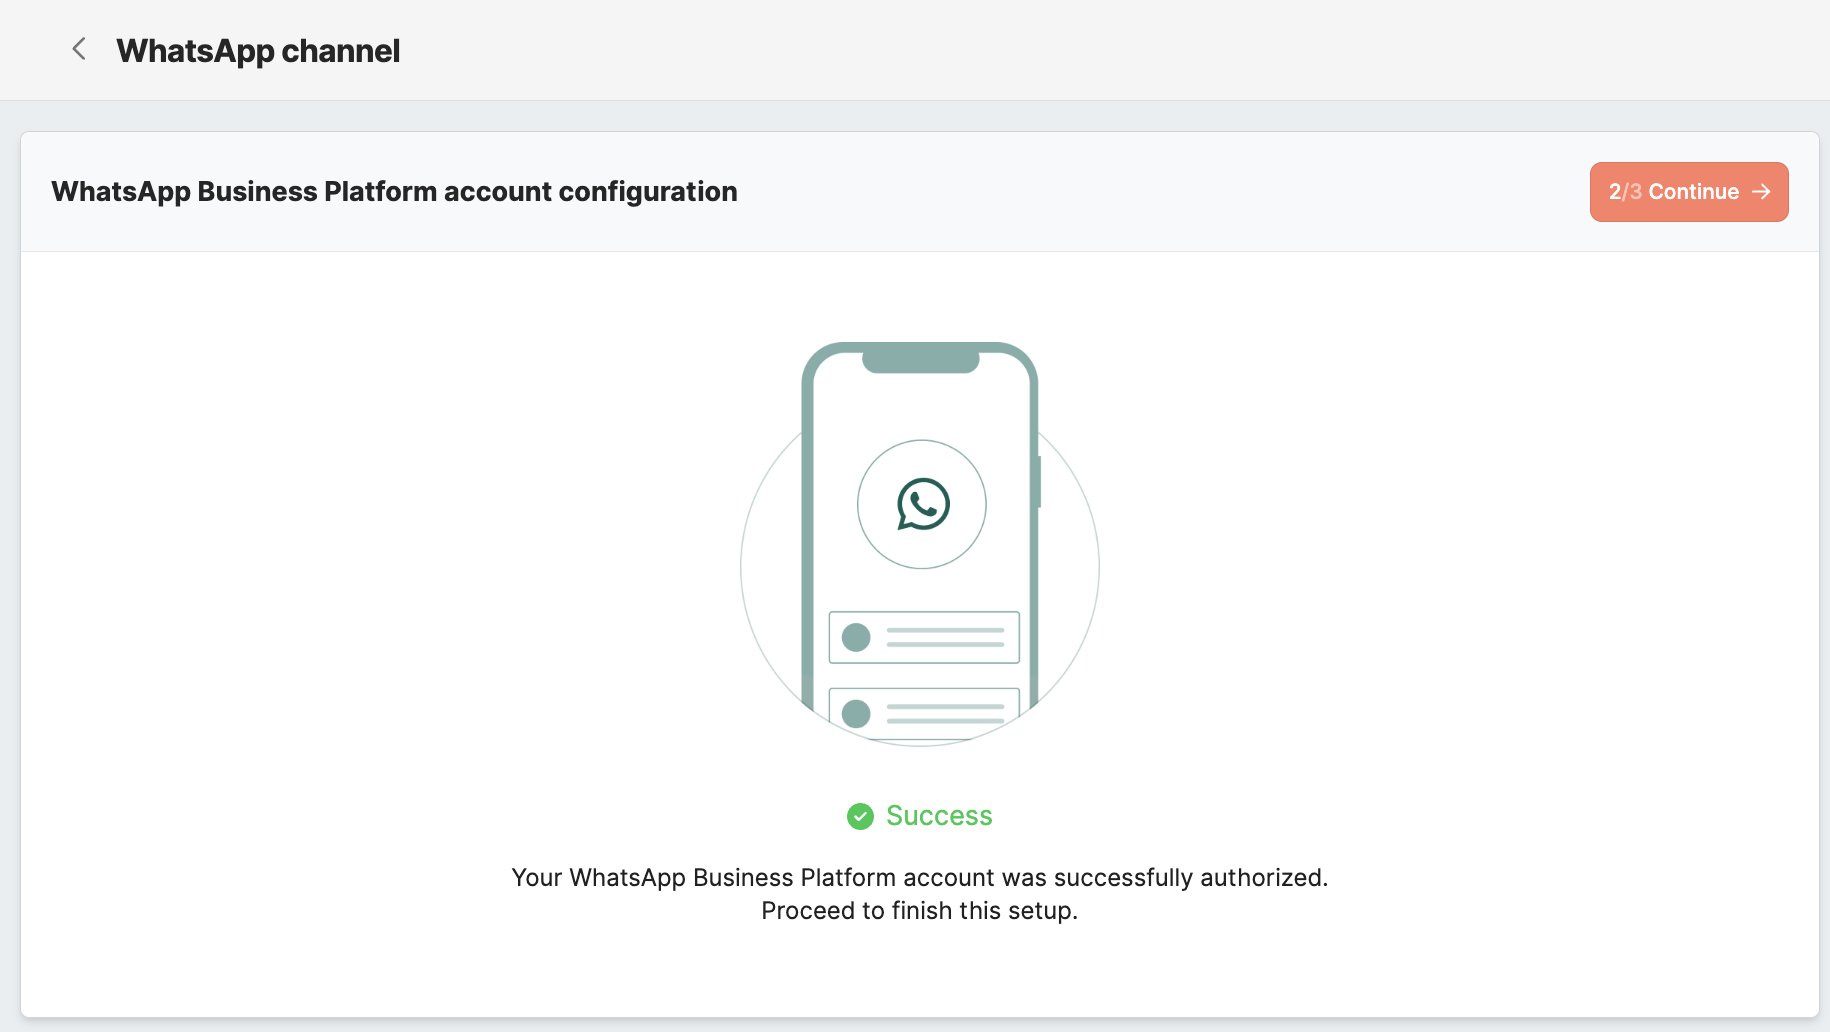
Click Continue to proceed to the stitching category configuration.
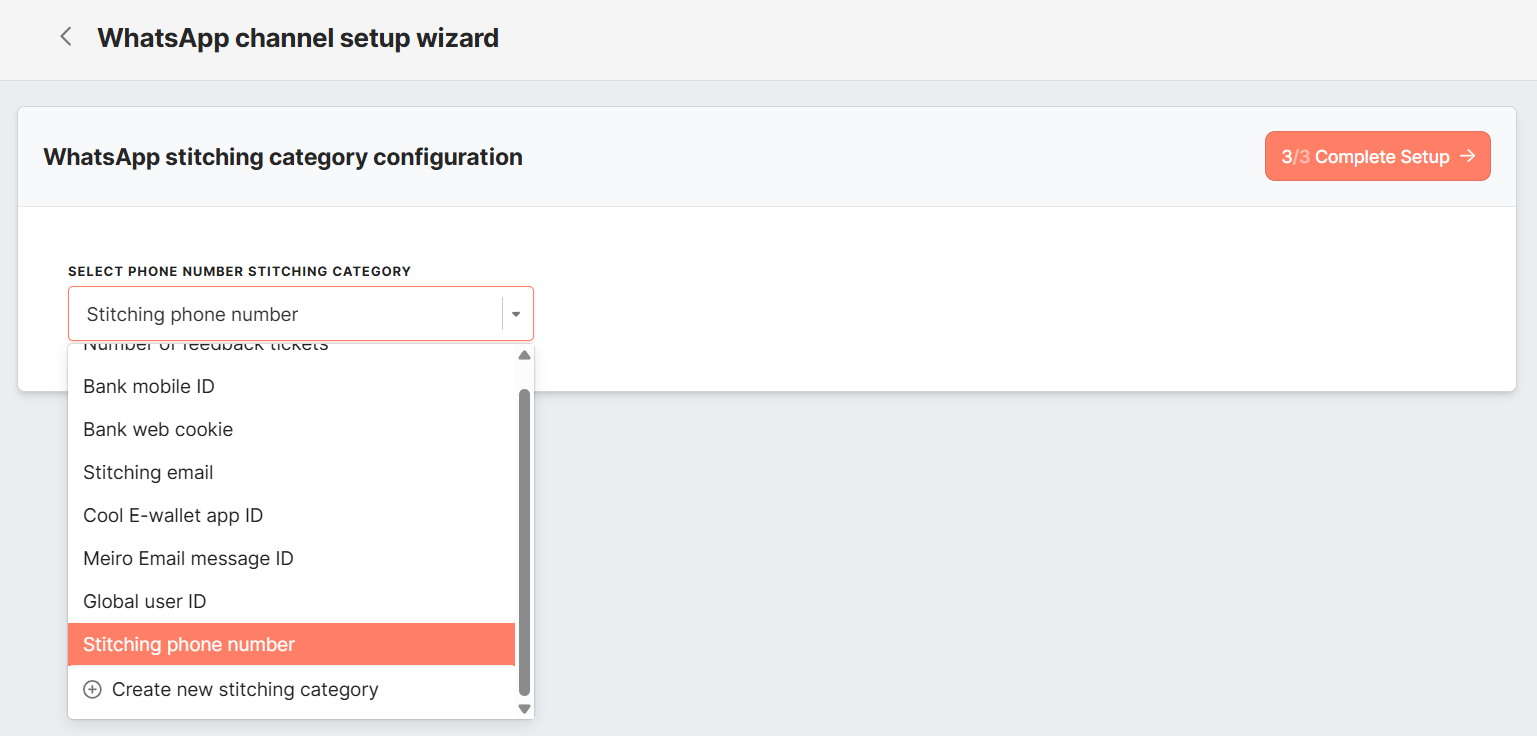
Step 3: Select Stitching Category
You’ll see the WhatsApp stitching category configuration screen. Here, select the category that best matches how you want WhatsApp phone numbers to be associated with user profiles in Meiro (e.g., phone number, email, customer ID).
-
Use the dropdown to choose the appropriate identity stitching category (e.g., by phone number).
-
You can also create a new stitching category if needed.
Remember: This step is irreversible. Once selected and confirmed, the stitching category cannot be changed. Double-check your selection before clicking Confirm and continue.
After completing the configuration wizard (Meta authorization, phone number registration, and stitching category), your WhatsApp channel is fully configured and ready for use in campaigns. At this stage, Meiro will automatically create:
-
A WhatsApp source connection
-
System events (e.g., sent, delivered, seen, subscribed, unsubscribed, blocked, undelivered)
-
Attributes used for WhatsApp user profiles and campaign tracking

Managing Subscriptions (Consent & Unsubscribe)
Once your WhatsApp channel is connected and configured, you can manage customer subscriptions to ensure that only consenting recipients receive your campaigns.
Consent (Subscribe)
-
A customer can subscribe by sending
"SUBSCRIBE"via WhatsApp. -
Consent can also be received through the
wa_subscribedevent sent to the Meiro/whatsappendpoint.
Unsubscribe
-
A customer can unsubscribe by sending
"UNSUBSCRIBE"or"STOP"via WhatsApp. -
Unsubscribe can also be triggered by the
wa_unsubscribedevent sent to the same endpoint.
Remember:
Ensure that the phone stitching category for WhatsApp is properly configured so subscription events are matched to the correct customer profile.
Subscription and unsubscribe events are logged in Meiro and can be used for segmentation and targeting in campaigns.
Getting Started with WhatsApp Campaigns
With your WhatsApp channel successfully connected, you’re ready to begin using it within your campaigns. Here’s what you can do next:
Launch a WhatsApp Campaign
Start building and sending WhatsApp messages via the Campaigns > WhatsApp section. Choose a template, define your audience, personalize content, and set activation rules.
Learn more about creating and managing WhatsApp campaigns here.
Automatically Track User Activity
Meiro will now automatically log key events such as:
-
WhatsApp Campaign Delivered
-
WhatsApp Campaign Seen
-
WhatsApp Campaign Sent
-
WhatsApp Subscribed
-
WhatsApp Unsubscribed
Want to see the full list of WhatsApp events?
You can find more details and the complete list of WhatsApp-related events here, including blocked, undelivered, and other types of events.
Explore More Capabilities
Now that you’re set up, explore advanced WhatsApp features like:
No Comments