Klaviyo destination
|
Prerequisites for setting up Klaviyo Loader
- The first step is to set up the loader within Meiro Integration by following the instructions given in this article.
After you finalize the first step, you can proceed with the following:
2. Set up the loader as a destination in CDP. This step is described below in this article.
3. Export segmented customer profiles to the destination. Read here.
|
Setting up Klaviyo destination in CDP
The destination can be set in the Meiro Business Explorer in the Administration/Entities/Destination tab. The setup is usually done by the Meiro technical consultant.
|
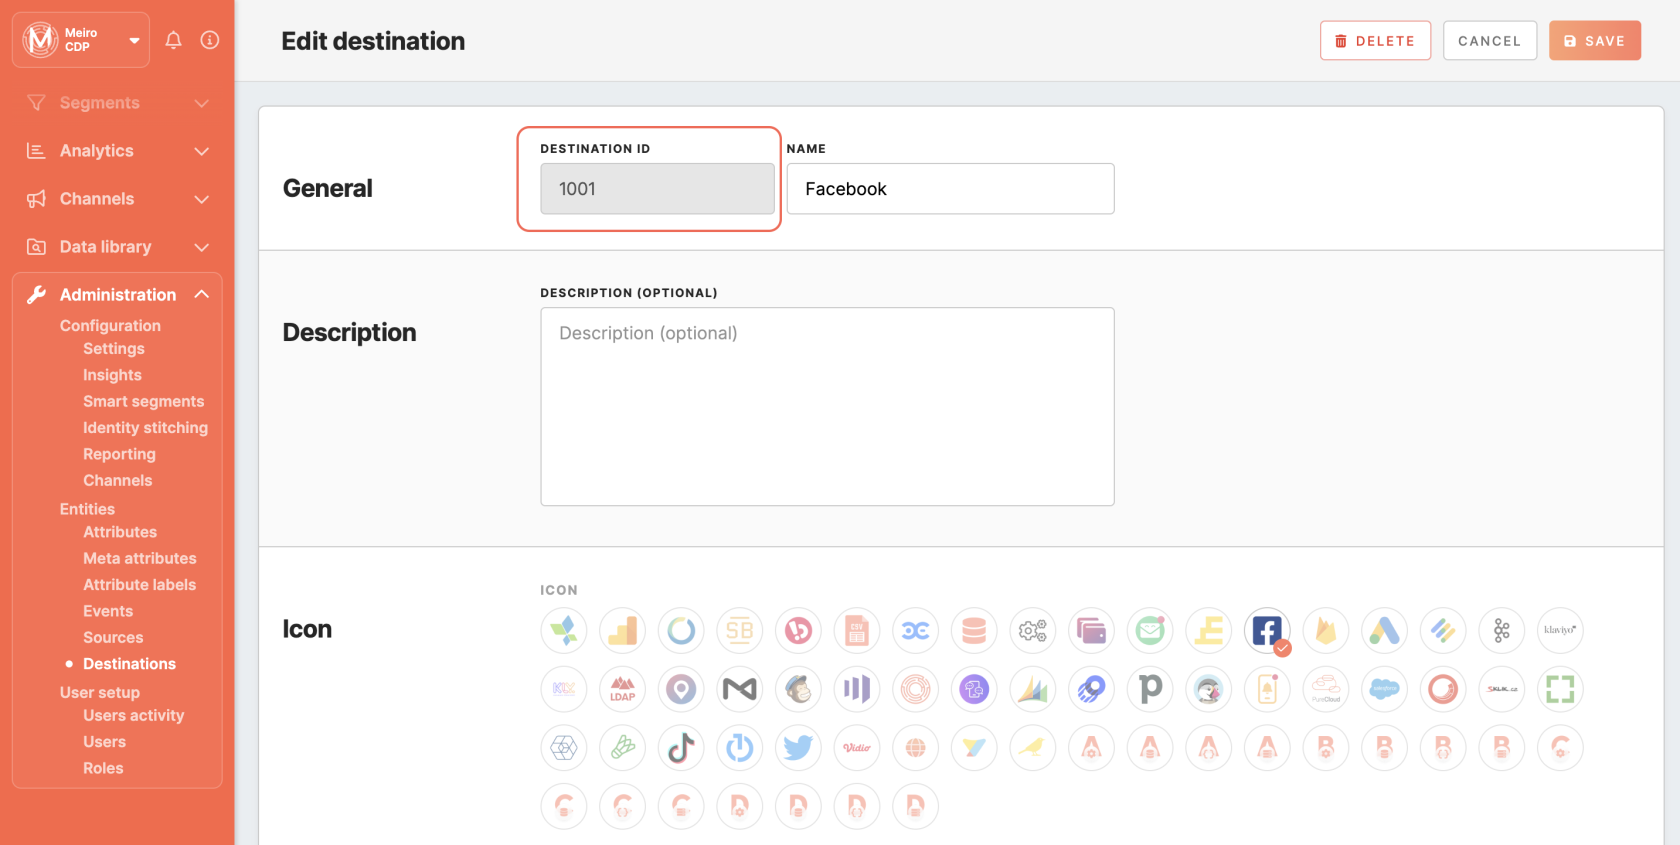
Destination ID
(required, not editable)
|
"The Destination ID" is a numeric value that analysts will refer to within the Meiro Integrations environment. After you choose the ID, it will not be possible to change it later on.
Find the right workspace in Meiro Integrations and check Destination ID:
Insert Destination ID in the Meiro Business Explorer.
|
|
Name (required)
|
The name will be visible across the Meiro Business Explorer for the users (Data Library/ Destination tab, segment detail)
|
|
Description (optional)
|
It is possible to add a description to the destination. The description will be displayed for use in the Data Library/ Destination tab.
|
|
Icon (required)
|
The icon will be visible across the Meiro Business Explorer for the users (insights, Data Library/ Attributes, Sources and Destinations tabs, segments, and customer profiles).
|
|
Exported & Mandatory attributes
(required)
|
"Exported attributes" - values of exported attributes will be sent to the dedicated Meiro Integrations workspace, then to the destination.
"Mandatory attributes" all customers in the export must have those attributes' values known.
For this destination, both "exported attribute" and "mandatory attribute" are:
Exported Attributes: Email is required. Other attributes are optional, depending on the use case (e.g. Name, Phone, Product Recommendations).
Mandatory Attributes: Email
|
|
Meiro Integrations
(required)
|
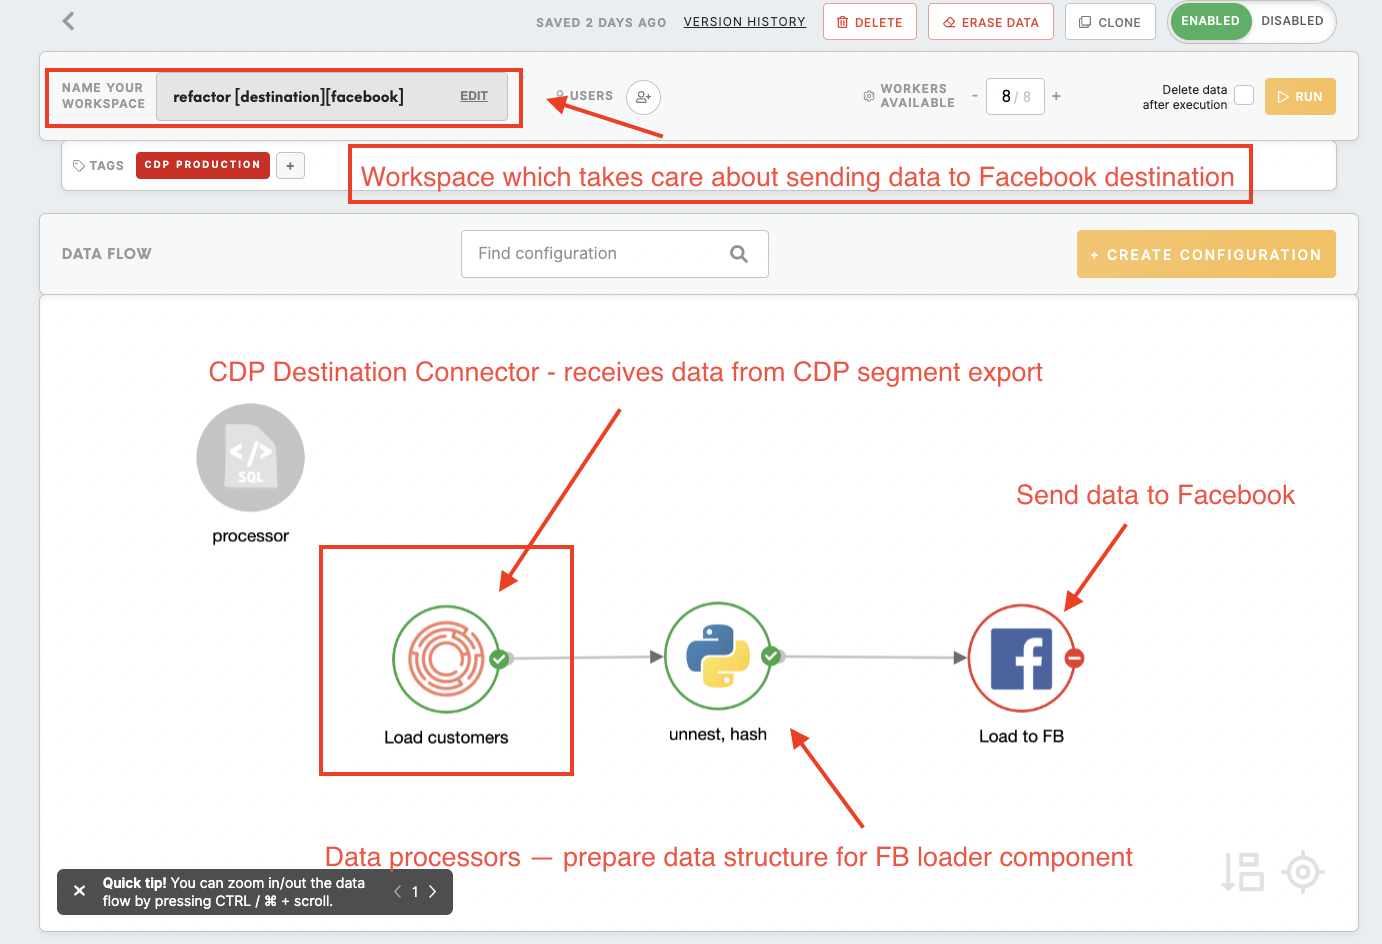
"MI workspace" refers to the workspace in Meiro Integration which will be executed when the segment is exported.
To run exports you need to know the name of the workspace. You should get the name of the respective workspace from the Meiro data analyst.
Meiro data analyst takes care of the Meiro Integration's workspace preparation, and data transformation for a specific destination (e.g. Facebook, Twitter, Google Analytics). Each destination requires a different (very specific) data structure.
|
|
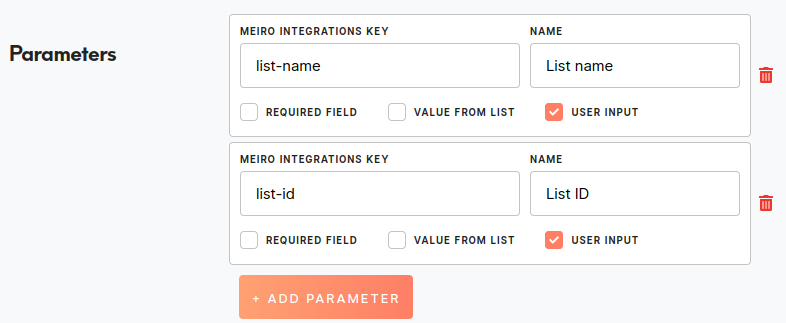
Parameters: one of list-name or list-id is required
|
Meiro Integration key: one of list-name or list-id is required
- If list-id is provided the component will expect the list already exists and will update the contacts in it
- If list-name is provided the component will create the list with the given name and populate it
If both list-id and list-name are provided the component will update the contacts, however, will NOT rename the list in case a different name is provided

User Input: ticked
This field is required to be filled in order to Klaviyo.
|
Export segment to Klaviyo
After segmenting the audience, go to the Exports section, where you should be able to find to which destination it is currently possible to export the segment (It is possible to set more exports, but it requires the help of the Meiro team).
Export tab settings
Exportable
|
Exportable shows how many customer profiles will be exported to your destination.
This number is defined by the conditions you choose to segment the audience and mandatory attributes set up by the administrator (that must be present to export to your destination).
For example, if you segment 1000 profiles, but only 10 have mandatory attributes present, only those 10 will be exported to your destination.
Mandatory attributes are visible in the Data Library/ Destinations tab.
For exports to Klaviyo, the mandatory attribute are:
Email
|
Parameters
|
One of list-name or list-id is required
- If
list-id is provided the component will expect the list already exists and will update the contacts in it
- If
list-name is provided the component will create the list with the given name and populate it
If both list-id and list-name are provided the component will update the contacts, however, will NOT rename the list in case a different name is provided
|
Data Requirements
|
Input file structure
- Component expats
export.ndjson file
- Each line contains one contact object that will be exported to Klaviyo
- Email address is required
- Each additional JSON attribute on the contact object will be pushed to Klaviyo contact as custom property
Example:
{
   "email":"callum.dempsey@gmail.com",
   "first_name":"Callum",
   "last_name":"Dempsey",
   "product":{
      "product_name":"Race Car",
      "product_price": "15",
      "product_category":"Car miniatures"
   }
}

{
   "email":"jane@doe.com",
   "first_name":"Jane",
   "last_name":"Doe",
   "product":{
      "product_name":"Lego",
      "product_price": "25"
   }
}

{
   "email":"antonio.rivera@gmail.com",
   "first_name":"Antonio",
   "last_name":"Rivera",
   "phone_number":"+420731145567"
}
|
Klaviyo environment
Export your segment manually by clicking on the Export button or set up a schedule (optional), so your export will run at a scheduled time.
- Create a segment, fill in the Klaviyo
list-name or list-id.
- Click on the Export button.
- Then go to Klaviyo.
- Find your new audience created and exported in Klaviyo. Go to Lists & Segments, the Contact list will be visible there. Example:
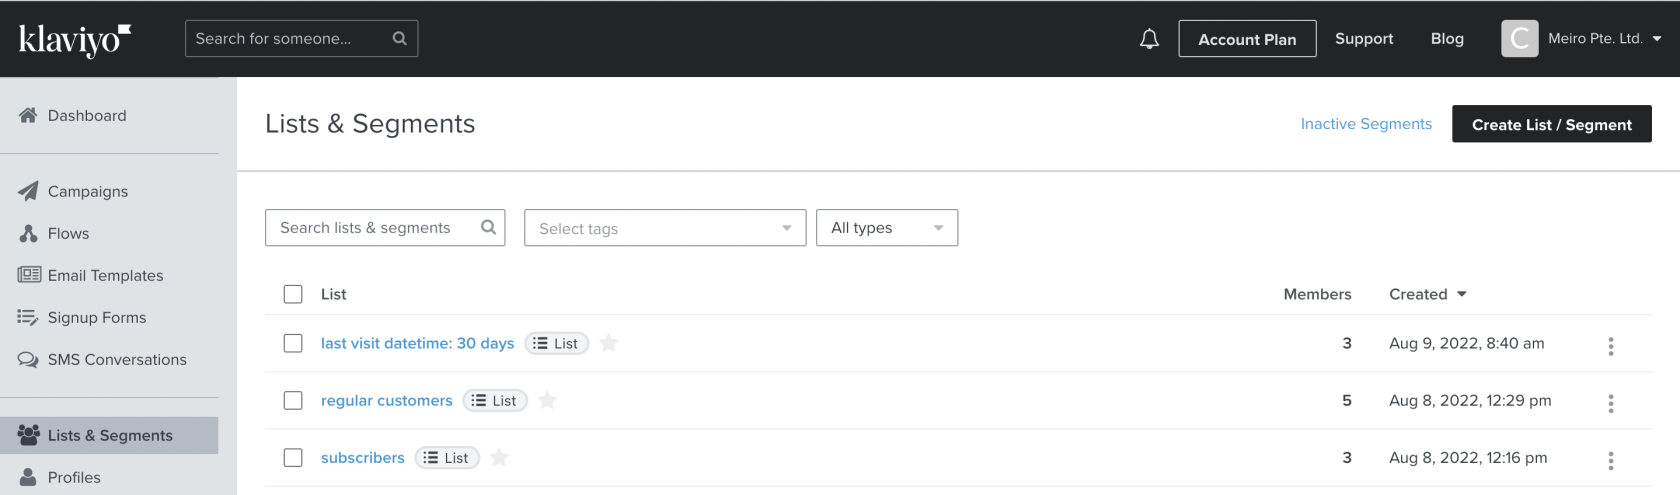
5. Copy list-id from settings of the newly created Contact list and paste it to the Meiro segment builder.
6. All following scheduled exports will be uploaded to the ONE specific List.
FAQs
|
Does export create a new audience or update an existing one?
|
If list-name is provided the component creates a new Contact List
If list-id is provided the component updates contacts in the Contact List.
The Contact List must exist in this case or the component will fail.
|
|
Can I add a new contact list?
|
Yes. When you provide a list-name but no list-id the component created a new Contact List.
|
|
Can I update the existing contact list with new customer profiles?
|
Yes. Provide an existing list-id and the component will add or update the contacts in the list. Contacts are never deleted from the list.
|
|
Are there any limits for exports?
|
There are no (known) limits on the number of contacts.
|
|
What data is exported to Klaviyo?
|
In the most simple use case, only emails will be exported to Klaviyo. However additional attributes can be exported as well, including nested JSON objects.
Data analysts need to prepare the correct data structure for the component.
|


No Comments