Personalizing Email Content with CDP Attribute Data
Personalization is a crucial aspect of effective email marketing. By tailoring your emails to your recipients' needs, interests, and issues, you demonstrate that you understand them and want to help them. Personalization in Email is supported in:
- Dynamic content with Email Visual Builder
- Adding default values to attributes
- Dynamic content with multi-value compound attributes
- Personalization in HTML Builder with liquid tags
- Using Liquid Syntax directly in text blocks
Subject and preheader personalization
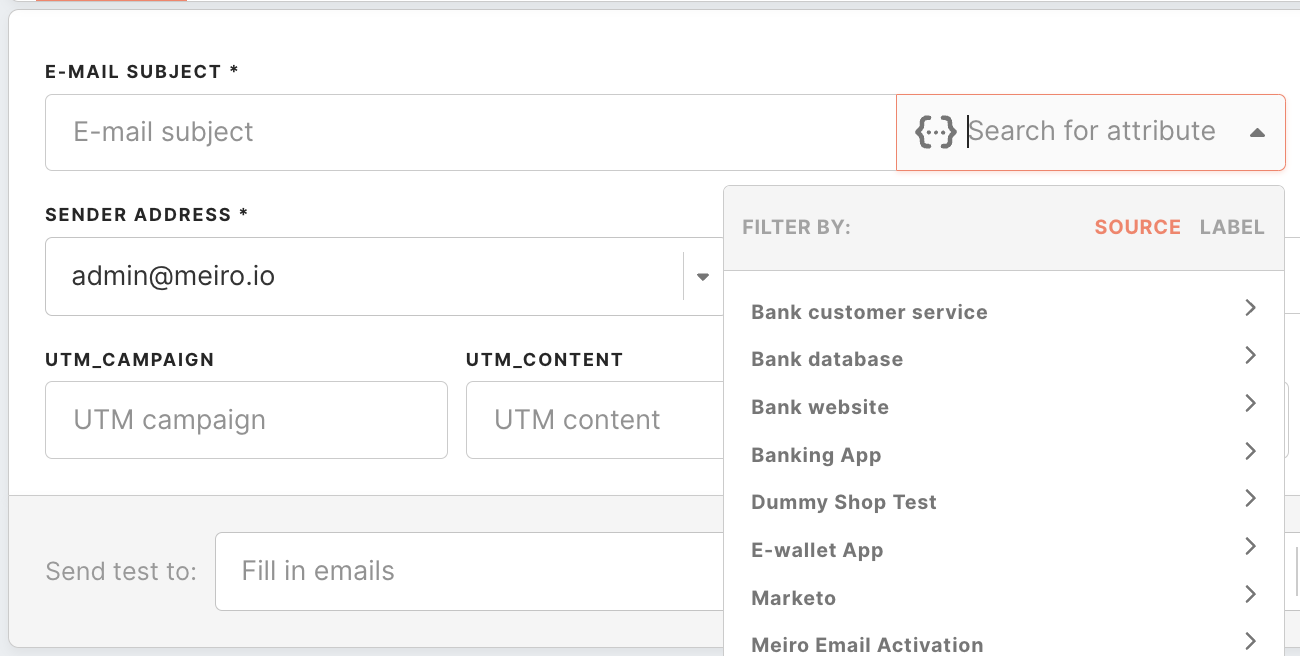
In email marketing, capturing the attention of your subscribers relies on three crucial elements: the sender name, subject line, and preheader. Using the attribute picker, you can easily reference specific customer information and create subject and preheader lines tailored to each recipient.
Dynamic content with Email Visual Builder
The attribute picker is a feature in the Email Visual Builder that allows you to search for and select specific attributes for personalization purposes. You can use both single-value and multi-value attributes to personalize your email content. For example, you can use the customer's name, location, or past purchase history to create personalized content.
To use the attribute picker, simply click on the attribute picker icon, which will display a list of all available attributes you can choose from. You can then select the attribute you want to use, and it will be inserted into your email content.
Remember: An empty string will be inserted if the attribute is not known for a particular customer. To avoid sending empty strings, it is advisable to segment your audience based on the attributes that are known or use default values for specific attribute.
Adding personalization to text
To personalize the text content, simply click on the attribute picker icon, which will display a list of all available attributes you can choose from. You can then select the attribute you want to use, and it will be inserted into your email content. When the email is rendered, the attribute will be replaced with its corresponding value from the customer's profile, if available.

Adding personalization to image
By using attributes that hold image URL dimensions, you can tailor your email content with personalized images in emails.
Simply click on the attribute picker icon, which will display a list of all available attributes you can choose from. Using dynamic product URLs in your email campaigns allows you to display the exact products that the recipient has expressed an interest in, increasing the likelihood of a conversion.
Warning: it is necessary for the attribute used in the image to hold the image URL; otherwise, the recipient may receive an email with a broken image. To prevent sending an empty image, you can indicate the default value in the image URL using the following syntax: {{image_url | default: 'https://me.instance.meiro.tech/sdk/images/some_image.png'}}. Use apostrophes instead of quotations.
Adding personalization to button
Access the attribute picker from the configuration settings tab to personalize the button. From there, you can select the desired attribute, which will be inserted inside the button. When the email is rendered, the attribute will be replaced with its corresponding value from the customer's profile, if available.

Email personalization with ID context attributes
Personalized emails drive engagement, but only if the data is accurate. When profiles merge (e.g., family members sharing an account or users logging in across devices), traditional personalization might display the wrong name, booking details, or product recommendations.
ID context attributes solve this by tying personalization to a specific identifier (like an email address), ensuring:
✅ Accuracy: The right user sees their data, even in merged profiles.
✅ Privacy: Prevents exposure of another user’s information.
✅ Relevance: Deep links, images, and custom data align with the recipient’s context.
How ID context attributes work
ID context attributes are compound attributes that store email-specific data (e.g., context.name, context.booking_reference). When used in email campaigns, they override generic profile attributes to ensure precision.
Enabling ID context attributes in email campaigns
-
In your email campaign:
- Toggle "Use ID Context Activation" ON.
-
Select the relevant ID context attribute from the dropdown.
-
Using the Attribute picker:
-
Once enabled, an "ID Context" section appears in the picker.
-
Select dimensions and insert them into the campaign with a single click.
-
Adding default values to attributes
It is possible that users may or may not have a specified value for some attributes. If no default value is specified, the value will not be displayed. To set a default value, use the "default" field in the text block and type in any value you want the user to receive in case there is no known value for the attribute. This ensures that users will see a default value if the attribute's actual value is unknown, instead of just seeing a blank space.
You can add default values to the subject and preheaders of your emails, or directly within Visual Editor to the text, button or image blocks.
You can specify a default or fallback value using the following syntax: {{attribute | default: "some value"}}. For example, if you have a field that says "Dear {{customer_db_name | default: "customer"}}" and the user's name is Ben, the personalized content will read "Dear Ben". But if the user doesn't have a value for this attribute, it will be displayed as "Dear customer".

To set a default value to some blocks inside Visual Editor, use the "default" field in the block and type in any value you want the user to receive in case there is no known value for the attribute.
Warning: To prevent sending an empty image, you can indicate the default value in the image URL using apostrophes instead of the usual quotation marks, so syntax should be: {{image_url | default: 'https://me.instance.meiro.tech/sdk/images/some_image.png'}}.
Adding default values to multi-value compound attributes
It is possible that users may or may not have a specified value for some attributes. If no default value is specified, the value will not be displayed. To set a default value, use the "if" condition in the content block.
Dynamic content with multi-value attributes
How to add iterations to content blocks?
Iterations can effectively solve various use cases, including displaying recently viewed products, highlighting abandoned baskets, suggesting recommended products, or replenishing products. Iteration enables you to dynamically populate the content of a block with data from a data source.
To demonstrate the usage of iteration, follow these steps:
-
Select the block element you want to iterate.
-
Go to the display tab on the top
-
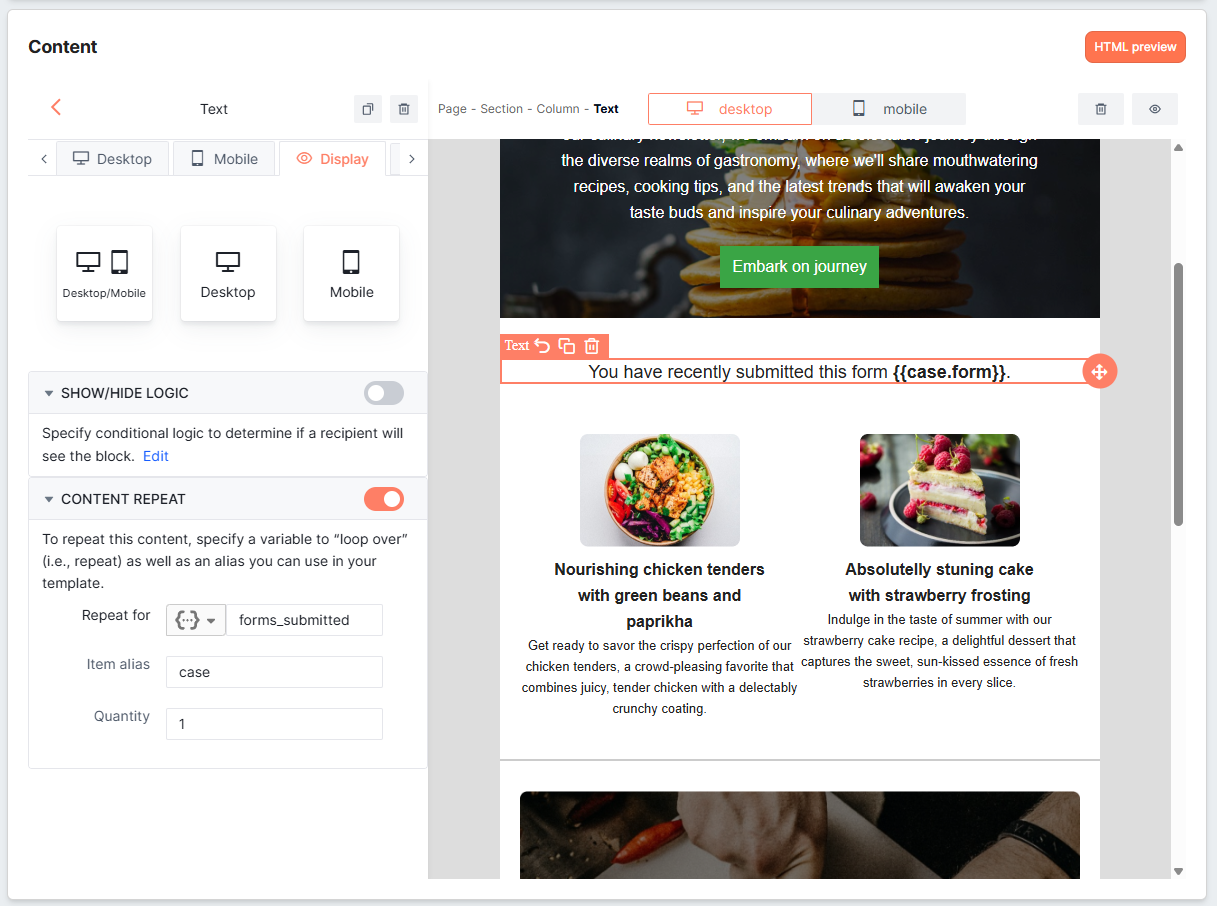
In the section Content Repeat, enable the toggle to allow iterations.
-
In the repeat fore field, insert the ID of the multi-value compound attribute. For instance, it could be
forms_submittedorall_products_purchased(note that these examples are provided for illustration purposes and will differ from the attribute IDs in your CDP). -
Specify the item alias that you will reference within the iteration.
-
Set the limit quantity according to your requirements.
-
To incorporate the multi-value attributes into your email content, use the item name followed by the dimension ID of the attribute enclosed within curly brackets. For example,
{{item_name.dimension_id}}.
Assuming you have this multiple compound attribute and its attribute ID and dimension ID are:
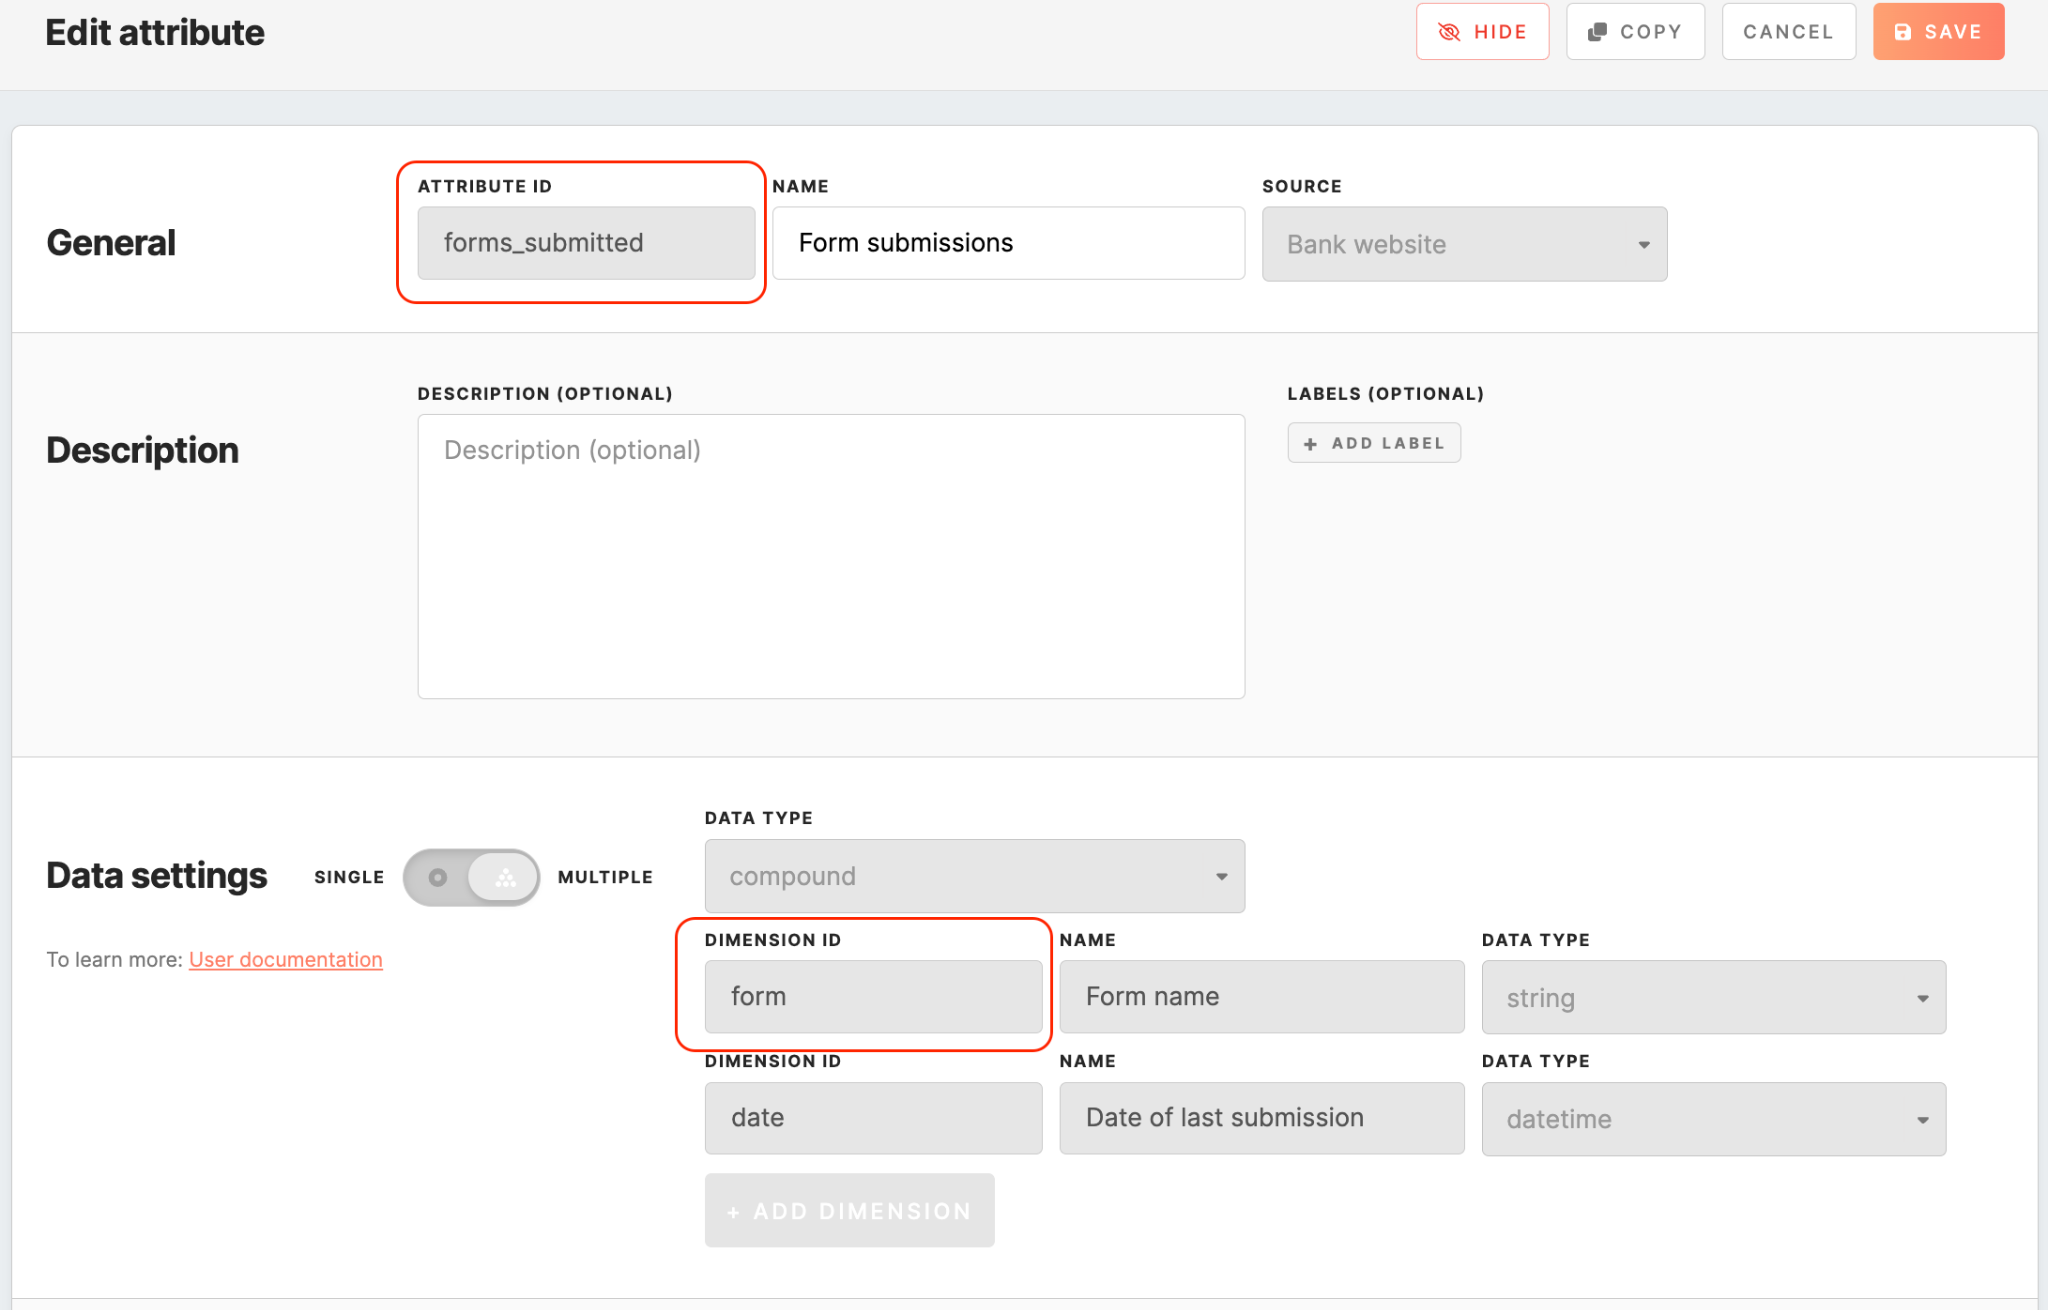
Your configurations for using iterations to blocks might appear as follows:
Dynamically populating column blocks
You can dynamically populate column blocks and their inner content (e.g. images, text) using the Content Repeat option under the Display tab. Follow these steps to achieve this dynamic content display:
-
Begin by adding a column block to your content page.
-
Populate the column section with image and text elements or any other content required.
-
Select the column and go to the Display tab.
-
Enable the Content Repeat toggle.
-
In the Repeat for field, choose a multi-value attribute using the Attribute Picker.
-
Set the Item alias to define how each item will be referenced (e.g. product).
-
Set the Limit to control how many items are shown.
-
Inside the column’s child elements, use the item alias to reference values:
{{item_alias.dimension_id}}.
Example:{{product.name}},{{product.image_url}}. -
Preview your email and send a test to confirm everything renders correctly.
Personalization in HTML Builder with liquid tags
If you choose to use the HTML builder, you can leverage liquid tags to personalize your email content. The Liquid is an open-source templating language that allows logical operators to control how to include content from the CDP attributes in your email templates.
To create your message using liquid tags, you can declare the tags in the content editor. There are two types of tags you can use - output and conditional tags.
Output Tags
Let's say you want to create a personalized greeting for each recipient, including their name and country. You can use Liquid tags syntax to display the values of the name and country attributes in your message.
To customize the content of your emails, you can utilize attribute IDs, e.g. web_first_name and web_country_login (please note that these are examples and may not correspond to the actual attribute IDs in your specific CDP). By incorporating these attribute IDs into your email template as placeholders, you can create personalized greetings like "Hello {{web_first_name}} from {{web_country_login}}." When the email is sent, the placeholders will be replaced with the corresponding values of the first name and country attributes for each recipient. This will result in a tailored greeting, such as "Hello John from the United States."
Conditional Tags
- If statement: for example, you want to offer a discount to customers who have previously made a purchase. To do this, you can use an if statement to check if a customer has made a purchase before and offer them a discount if they have. For instance:
{% if web_all_purchases_comp.quantity > 0 %}
<p>Thanks for shopping with us before! As a thank you, here's a 10% discount code: DISCOUNT10</p>
{% else %}
<p>Welcome to our store! Sign up for our newsletter to receive exclusive discounts and promotions.</p>
{% endif %}
In this example, we're checking if the customer has made any purchases, and if the quantity is greater than 0, we offer them a discount code. If not, we welcome them to the store and encourage them to sign up for the newsletter.
- For loop statement: for example, you want to display a list of all the products on sale, which is a multi-value compound attribute. You can use a for loop to iterate through all the products, check if they have a sale price, and display a list of all the products currently on sale. For instance:
<h2>Products on Sale</h2>
<ul>
{% for product in web_products_added_to_cart | default: [] %}
  {% if product_price < product_compare_at_price %}
    <li>
      <a href="{{ product.url }}">{{ product.title | default: 'Unnamed Product' }}</a> -
      {{ product_price | money }} (was {{ product_compare_at_price | money }})
    </li>
  {% endif %}
{% endfor %}
</ul>
In this example, we're using a for loop to iterate through all the products in the store and check if they have a sale price (i.e., if the current price is less than the original price). If a product has a sale price, we display its title, sale price, and original price in a list.
Remember: In Liquid syntax, attribute names are referenced directly by their names rather than using curly brackets.
Remember: The examples of attributes presented in the article are provided for illustrative purposes only, and their IDs and dimensions will differ from those in your CDP.
In conclusion, the use of personalized content in marketing has proven to be a powerful tool for businesses to connect with their audience and achieve better results. By leveraging conditional tags and personal attributes, marketers can deliver tailored messages to improve key metrics.
Learn more: about the liquid syntax
Using Liquid Syntax Directly in Text Blocks
In addition to using Liquid tags within the HTML builder, Liquid syntax can also be applied directly within text blocks. This feature allows you to implement conditional logic, loops, and other dynamic operations in text fields, offering more flexibility in personalizing your content.
You can use conditional statements to display different messages based on user attributes, as shown in the examples below:
Numerical Comparison (e.g., customer loyalty status):
{% if eng_bank_app != blank %}
Thank you for being a VIP customer!
{% elsif eng_bank_app >= 90 %}
Thank you for your loyalty! You have spent over $1000 with us!
{% else %}
We appreciate your business. Here's a special offer for you!
{% endif %}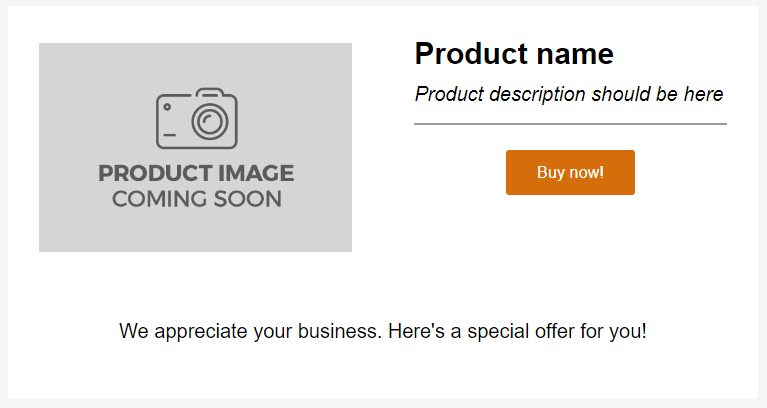
String Comparison (e.g., greeting based on country):
{% if mx_geo_country == 'Singapore' %}
Hello! Thank you for shopping with us from Singapore!
{% elsif mx_geo_country == 'Czech Republic' or mx_geo_country == 'Czechia' %}
Hello! We're happy to serve our Czech customers!
{% else %}
Hello! We appreciate your business no matter where you are from!
{% endif %}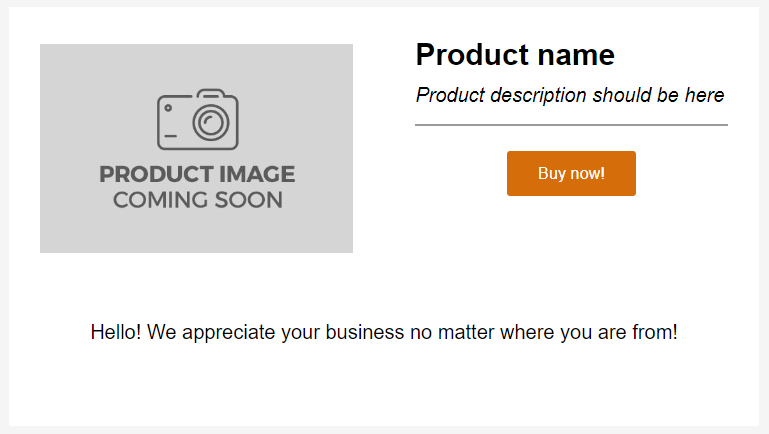
Boolean Conditions (e.g., subscription status):
{% if forms_submitted %}
Thank you for subscribing to our newsletter! Stay tuned for updates and exclusive offers.
{% else %}
Don't miss out! Subscribe to our newsletter for the latest news and promotions.
{% endif %}
Remember: When using attributes within Liquid syntax, it’s important to manually input them (e.g., eng_bank_app), as inserting attributes from the dropdown will automatically wrap them in {{ }}, which is incompatible with Liquid’s conditional logic.
Remember: Ensure that the attributes you use in Liquid syntax, such as eng_bank_app or forms_submitted, are properly created and available in the Attributes section under the Administration tab in the CDP. Using non-existent or incorrectly named attributes will result in errors during the email creation process. Always verify the correct attribute IDs before implementing them in your templates.
Testing and Previewing Liquid Syntax
Before sending your campaign, it’s important to ensure that the Liquid syntax and personalized content display as expected. To preview how your dynamic content will appear to recipients, you can use the Email preview option. Simply click on the Email preview button located in the upper right corner of the email editor.

This allows you to check how conditions, loops, and personalized blocks will render based on actual data, ensuring that all logic and attributes work correctly before the email is sent out.
For more information on thoroughly testing your email, including sending test emails, please refer to this article.
No Comments