Tutorial: How to create a workspace and data flow
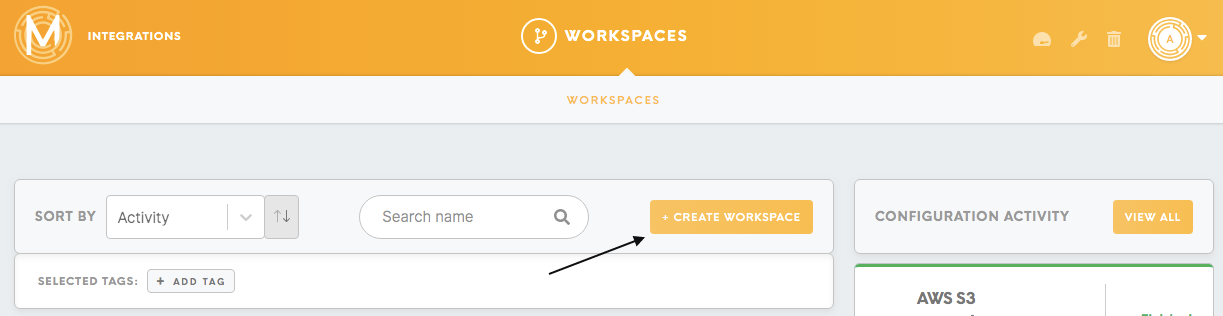
1. Click on the Create Workspace button.
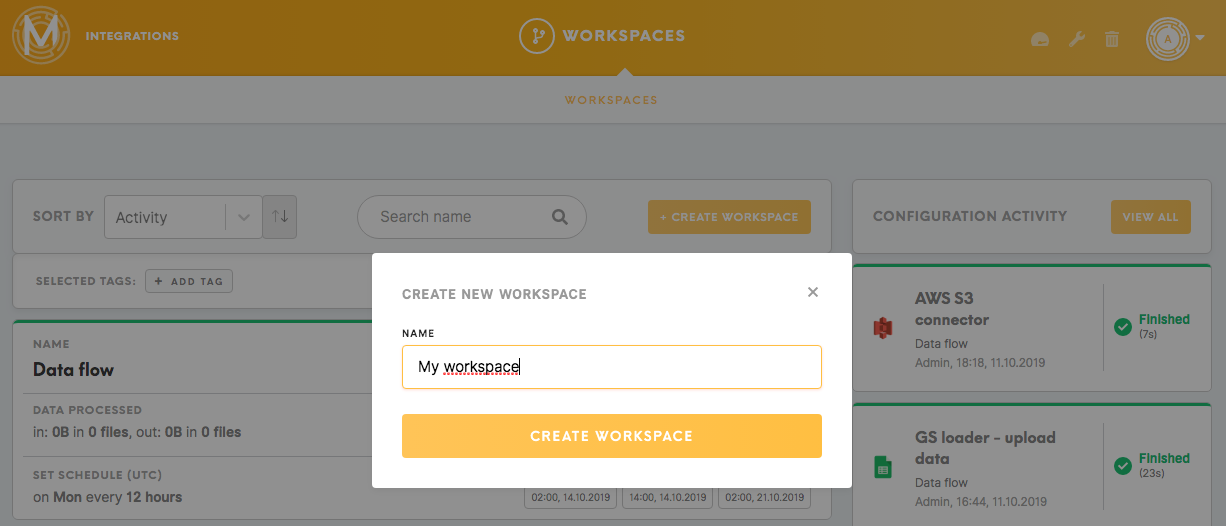
2. Provide a name of your choice for the workspace that you want to create (you can always edit the name of the workspace later). You will see the created workspace on the home screen.
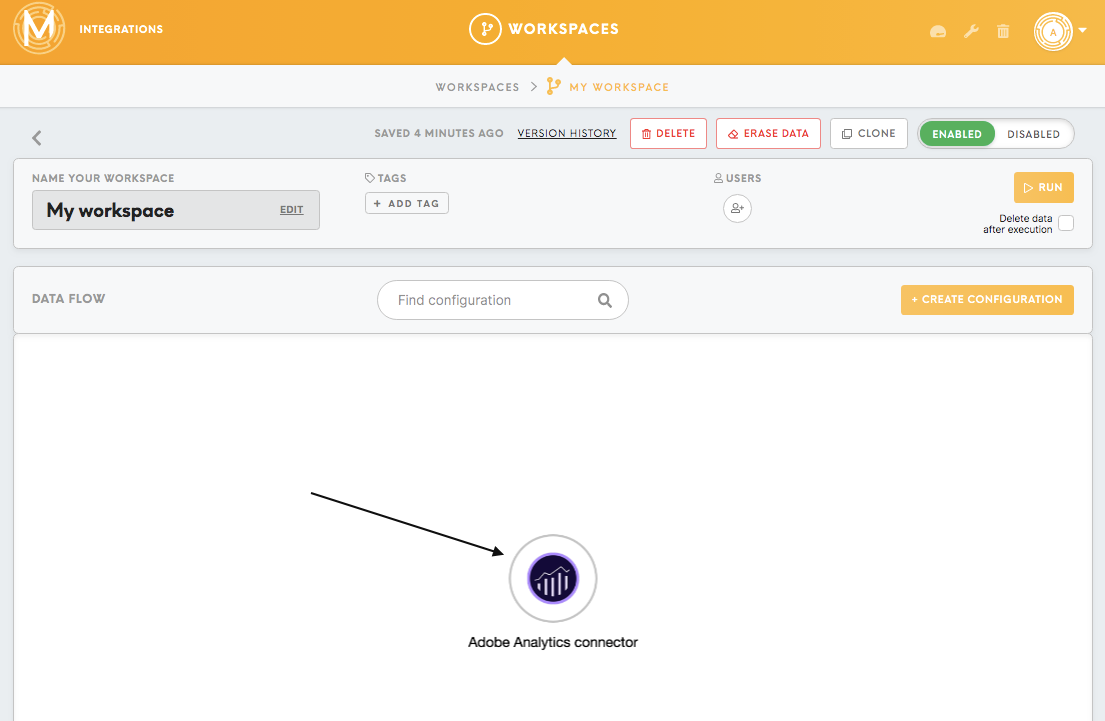
3. Create a configuration with components. The list of available components can be found here. This step allows you to create a data flow that gives you a visual of the entire process that will take place.
To create a new configuration, go to your workspace, click on the Create Configuration tab, which will take you to the window that lists all the different components available.

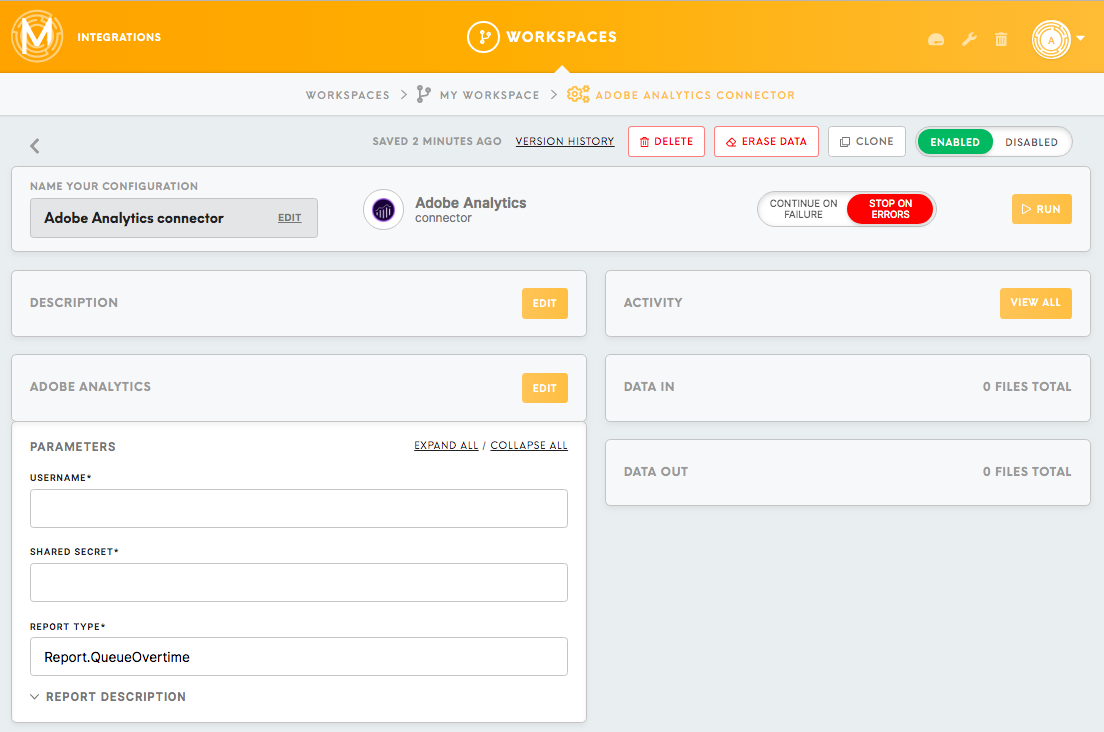
4. Based on your needs, select the components (connector, processor, loader). Note that a configuration can have any number of components. For each component that you select, provide a name, which is required, and a description, which is optional.

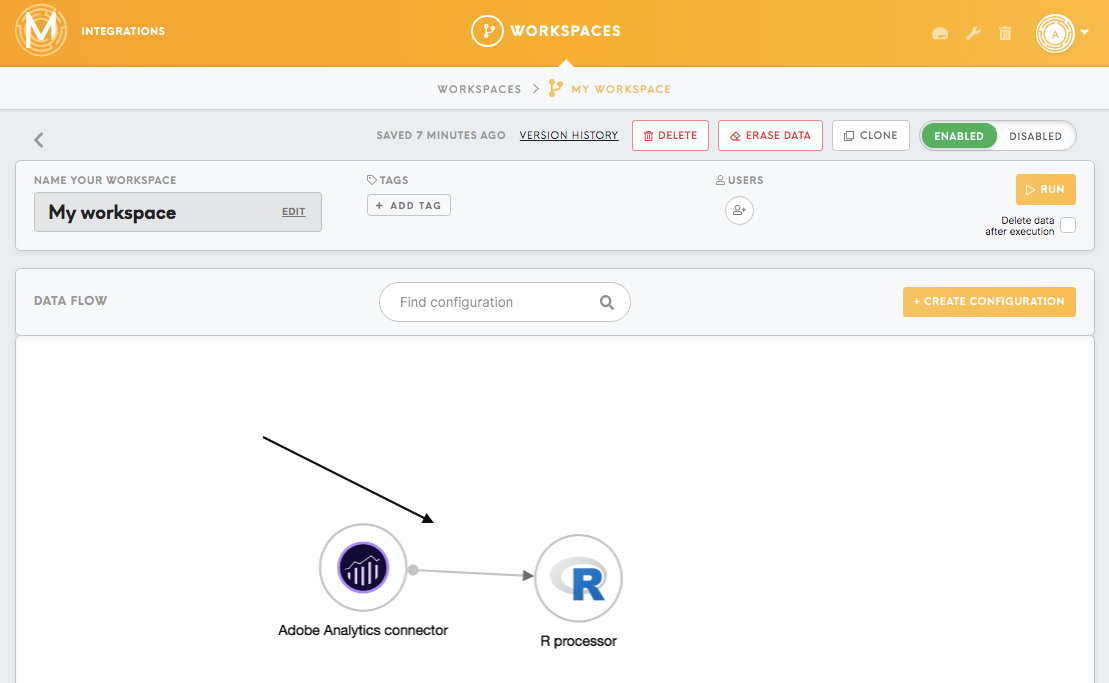
5. Once you select a component and use it to create a new configuration, it appears in the data flow window.
6. The configuration parameters for the connector and loader and the program code for the processor can be defined by clicking on the respective component.
7. You can establish connections between components by drawing an edge for the respective components. Note that the graph that you create by establishing connections between components should be acyclic.
No Comments