Components
Connectors, Processors, Loaders
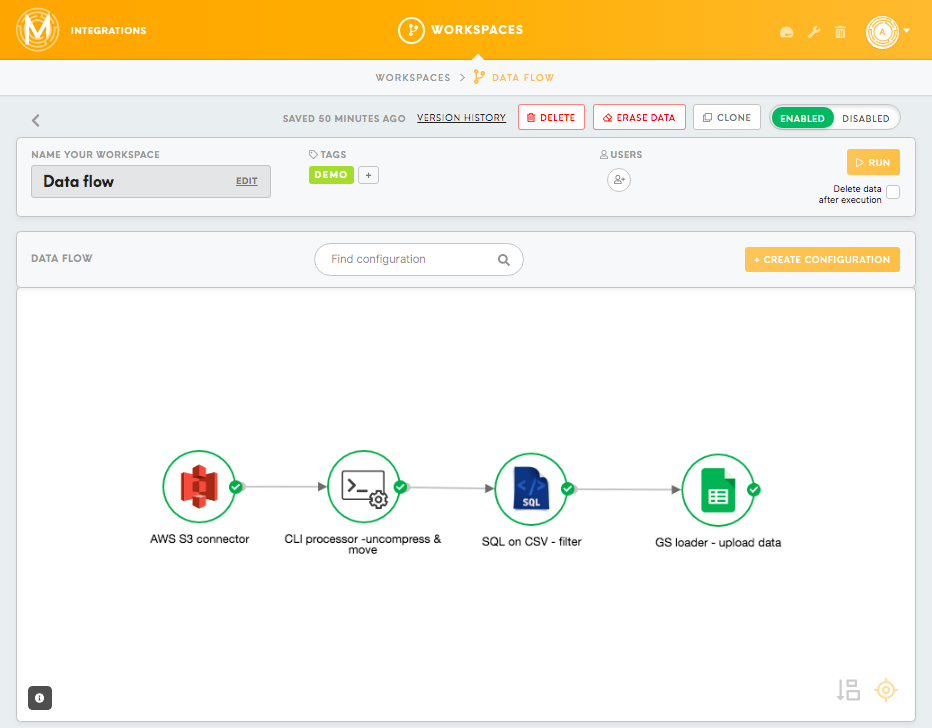
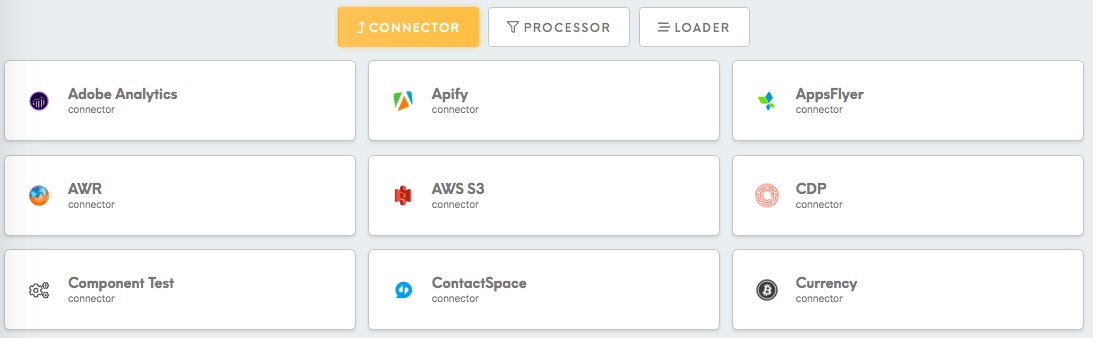
Each workspace can contain different types of components: Connectors, Processors, Loaders that allow working on the chosen data.
Connectors: let you connect to the data source that you intend to use.
Processors: process the data that has been taken as the input from the previous component (which is usually the connector or the processor) as per your needs.
Loaders: let you load the processed data that it gets as the input from the previous component (which is usually the processor) on to the preferred destination
Read more: about connectors, loaders, processors, workspace in the Meiro Integrations documentation.
By connecting different components, it is possible to build a data flow.
More Information: on how to build a data flow refer to this article.
Form
Each component is defined by a form holding the most important component's data.

The name and the description are chosen by the user and can be edited at any time.
Learn more: how to edit the description field, please go to this article.
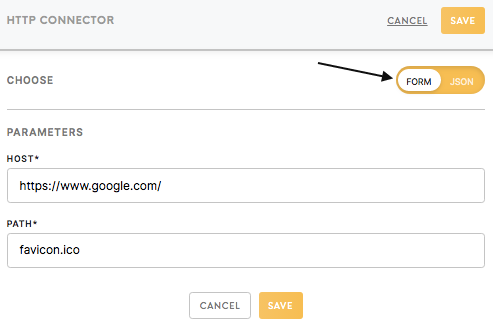
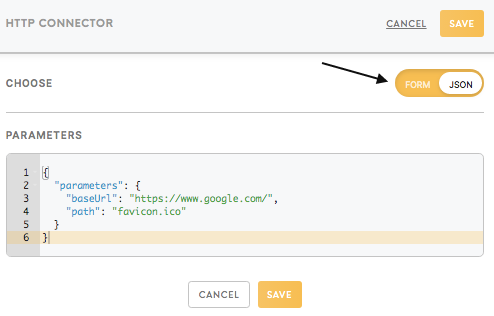
Parameters should be filled with the right credentials and settings for the respective component. Parameters might include credentials for authorising access to the third-party applications (i.e. data sources and final destinations), specific settings on how to query or transform the data, and names of the output tables and files.
Parameters can be filled in Form as well as JSON format.
Activity
Shows the recent activity on the components.
Learn more: about activity refer to this article.
Data In/ Data Out
Data In shows the data that has been loaded in the component.
Data Out shows the data that has been processed through the component.
For connectors, Data In stays empty and loaded data will be visible in the bucket Data Out.
For loaders, Data Out stays empty and data ready to load will be visible in the bucket Data In.
Copy path to the Data In/ Out files through clicking on the copy to the clipboard icon. ![]()

Learn more: about the folder structure refer to this article.
Additional features

Saved (...)
The information about the latest activity.
Version History
By clicking on the Version History, you can see the history of the configuration with listed modifications (user, date and time, what has been changed). You can revert to a chosen version if needed by clicking on the green arrow on the right side. Your current version will be saved too.
Delete
By clicking on the Delete button, you can delete the component. After that, It can be found in the Trash tab.
Erase Data
By clicking on the Erase Data button, you can erase the content in the configuration container.
Clone
By clicking on the Clone button, you can copy the configuration. After confirming the pop-out window, you will see a list of available workspaces. You can choose the current workspace if you need it.
Enable/Disable
By clicking on the button, you can either enable or disable the configuration.
If you disable the component it will not run in the workspace job and its data will not be visible in the following component, but you will be still able to run the component manually for further development.
Continue on failure/ Stop on errors
By clicking on the button, you can enable the component to continue on failure or stop running when it has encountered an error.
Run
By clicking on the Run button, you can run the component.
Connectors
A connector lets you connect to the data source that you intend to use. The data from the data source (e.g. AWS S3, Adobe Analytics, Google Cloud Storage) acts as the input to the connector as well as the output to the next component (which is usually the processor).
In order to set up the configuration correctly, you might need credentials to the application you wish to access data from.
After successfully connecting to the connector, you will see your data in the Data Out bucket.
More Information: on how to use particular connectors refer to the documentation.
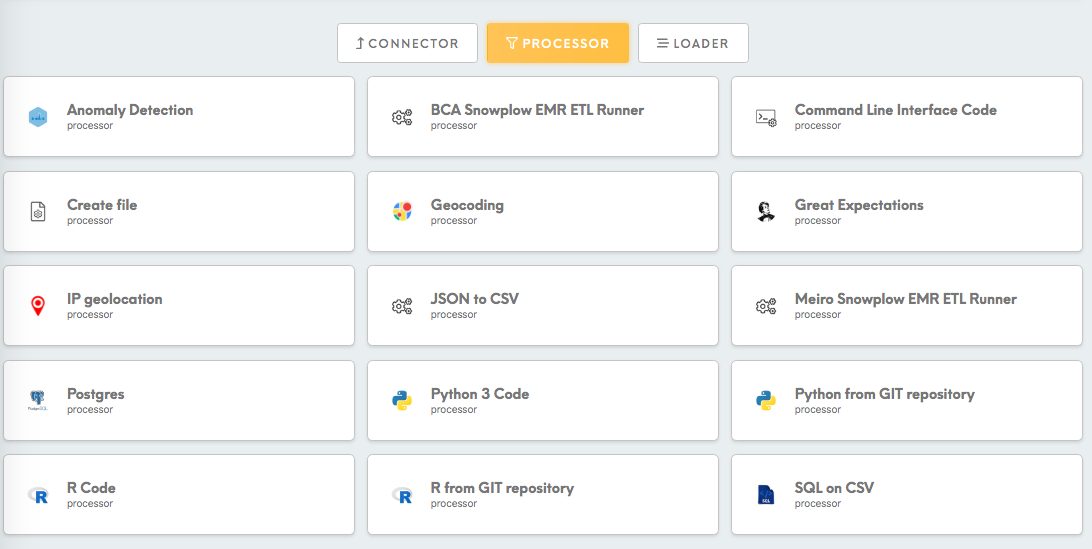
Processors
A processor processes the data that has been taken as the input from the previous component (which is usually the connector or processor) as per your needs. The data can be processed using processors such as Command Line Interface Code, Python 3 Code, R Code, JSON to CSV, etc. The output of the processor, which is the processed data is used as the input to the next component (which is usually the other processor or loader).
More Information: on how to use particular processors refer to the documentation.
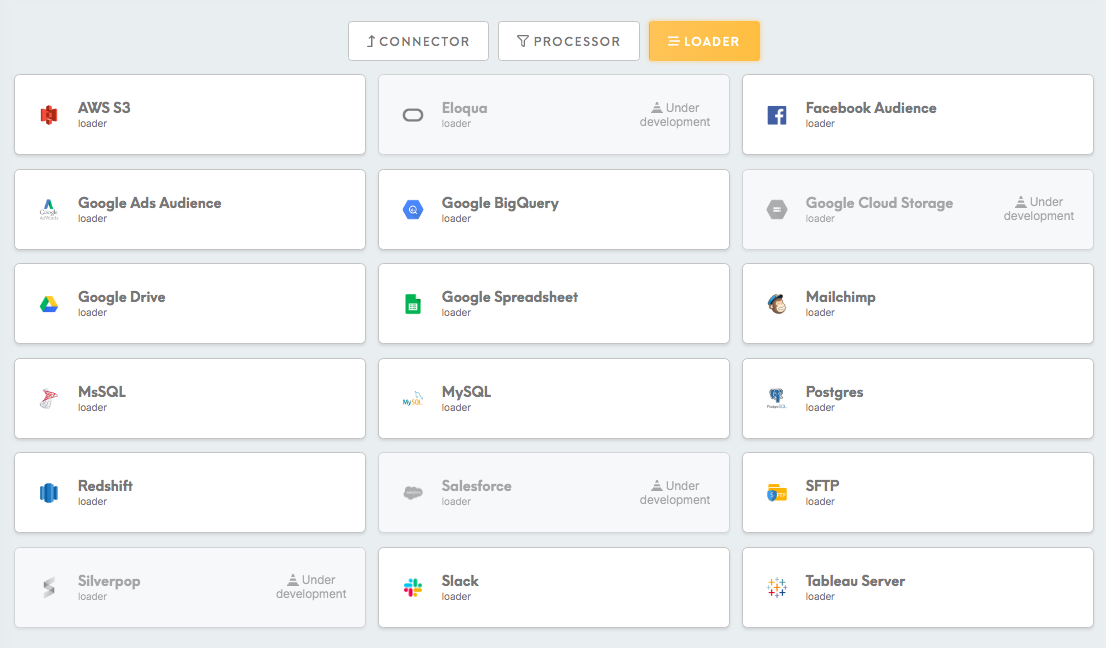
Loaders
A loader lets you load the processed data that it gets as the input from the previous component (which is usually the processor) on to the preferred destination. The preferred destination could be AWS S3 bucket, Google Spreadsheet, Tableau, Postgres, etc.
In order to set up the configuration correctly, you need credentials to the application you wish to load the data to.
The data you wish to load is specified in the bucket Data In, after loading the data to the loaders Data Out bucket will stay empty, while you will see your data in the application itself.
More Information: on how to use particular loaders refer to the documentation.
No Comments