Twitter Ads Audience Destination
1. Steps to implement Twitter Ads Audience Destination
- Create a task in #help_product to create the destination in Business Explorer (CDP).
Remember: For on-premise implementation, instructions may be given by product team for clients to execute.
- Create a workspace in Meiro Integrations (MI) for the Twitter Ads Audience destination. This is the workspace that will run when the user clicks on "Export" in the segment builder.
- The workspace consists of a CDP Destination connector, a processor, and a Twitter Ads Audience loader.
- In Business Explorer, select the MI workspace under Meiro Integrations that you have created for the Google Analytics Audience.
- Set up attribute(s) for any of the identifiers that the Twitter Ads Audience loader accepts, as well as the attribute definition(s) in Customer Data Model (CDM).
- Go to Administration > Entities > Destinations > Edit

- Add the created attribute(s) under exported attribute(s) and mandatory attribute(s) and set the logic to OR if you have multiple attributes, since you only need at least 1 attribute value to be present for each entity.

Learn More: Refer to the loader documentation for more details about the identifiers
- Add under Parameters: audience_id, audience_name, twitter_account_id. The parameters will show up in the segment builder when user chooses Twitter Ads Audience destination as an export destination. It will be populated into the MI workspace variables of the same names: audience_id, audience_name, twitter_account_id. with the value that the user fills in.
Example:
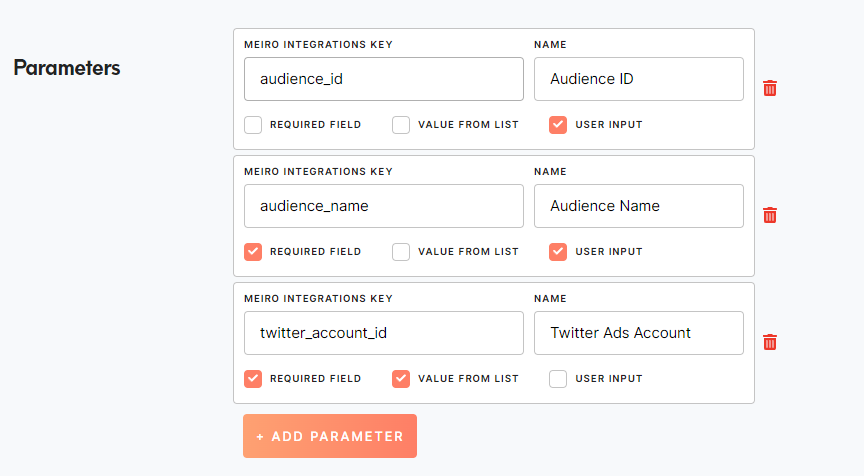
Remember: It is optional to add the twitter_account_id parameter, it is only required when there are multiple Twitter accounts that needs to be exported to. In this example, value from list is enabled and user input is disabled, this requires the list of values to be populated for the destination. Instructions on how to do that in the github repository here. It will be made into an implementation document instead when it's ready.
Warning: If you defined parameters, you must make sure the Meiro Integrations Key matches the Workspace variable name in the chosen MI workspace.
When you are done, you should see the destination under Administration > Entities > Destinations (Example below)

Note down the ID of the destination, you will need it for the CDP Destination connector configuration
2. Configurations for Workspace in Meiro Integrations
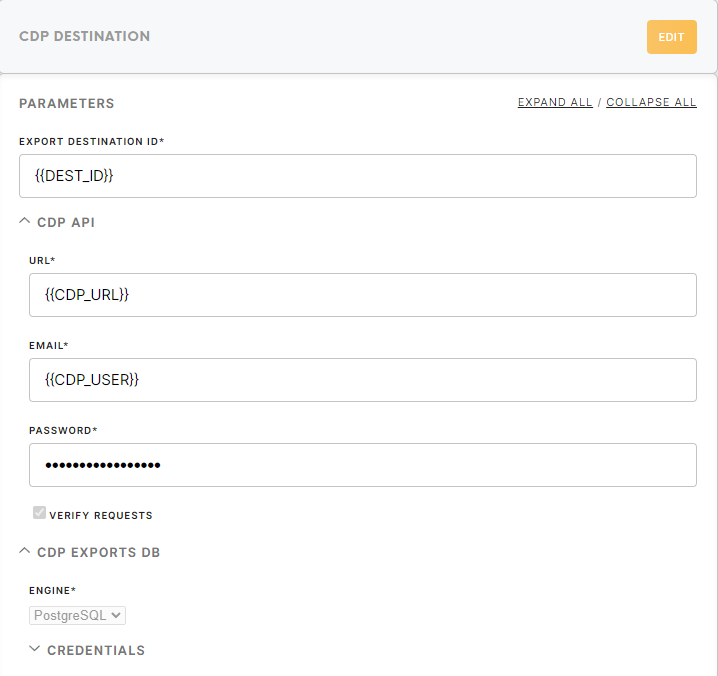
CDP Destination connector
- You will need to setup the MI API credentials and on the CDP
- You will require the CDP API credentials for this connector.
- The "Export Destination ID" is the ID of the CDP Destination for Google Analytics that is setup in Business Explorer.
- You will require the credentials for the CDP database as well.
- The output of this configuration is
/data/out/tables/export.csv. Your processor will need to move it into/data/out/files/imports.csvafter processing.
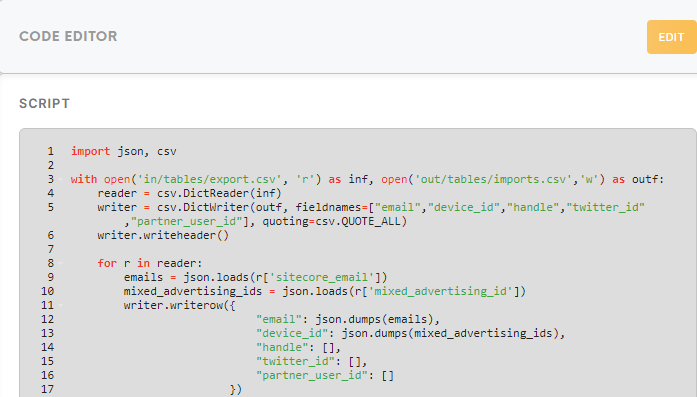
Processor
- This processor should take the attribute values that are exported and rename them to the format according to the Twitter Ads Audience loader documentation, then rename and move the file from in/tables/export.csv to out/tables/imports.csv.
- Example implementation using Python 3 code processor:
Twitter Ads Audience loader
- The loader expects the exported audience segment to be in the path:
/data/in/tables/imports.csv - The
imports.csvfile will have the attribute values specified in the processor. - Make use of the workspace variables specified with parameters during destination setup to fill in Account ID, Audience ID and Audience Name respectively. Example implementation below:

No Comments