How to generate simulated attributes values for demo purpose
The purpose of this documentation is to show you how you can create simulated attributes for demo purposes. This can be really helpful for us or our partners to quickly showcase use cases for our clients on the CDP itself without a full CDP implementation in place.
Creating mock up attributes for demo
There are two ways to create mock up attributes for demo purposes, which are:
-
Ingest simulated/demo data into CDP and build attributes from the simulated events.
-
Randomize values in the attribute definition. The prerequisite for this method 1. This is because there needs to be at least some events with stitching identifiers for customer entities to exist for the attributes to be shown.
Example process
You want to use Meiro Integrations to process the data for this purpose, because you will need to use the CDP events loader in Meiro Integrations to load in the events properly.
First you want to create a “demo” source and event(s) in the CDP, following the steps in this doc (TBD)
Take for example you have data in the form of e-commerce transactions, like this (highly simplified for brevity) :
| order_id | item_id | item_name | qty | price | customer_id | transaction_date |
| 1 | A1 | Jacket | 1 | 50.0 | c1 | 2022-05-16 |
| 2 | A2 | Shoe | 1 | 20.0 | c2 | 2022-05-17 |
If it’s the form of a .csv file, you have 2 options, whichever is more practical for you (Keep in mind these are just suggestions, there are a multitude of ways to ingest sample data into the CDP):
- Import the data into Google Sheets, and use that as an extractor in Meiro Integrations.
- Import the data directly into the CDP’s CockroachDB, you can use your DBeaver SQL client to do this, or any other CockroachDB compatible SQL client.
After that, it’s simply a matter of transforming the data into the format recognizable by the CDP Events Loader. To know how to use the loader, refer to this doc (TBD)
Basically, you want the final output that goes into the CDP events loader to look like this, with payload being a JSON string of the fields that you want to ingest for the event:
| source_id | type | version | user_identifiers | event_time | payload |
| ecomm | tran | 1-0-0 | c1 | 2022-05-16 |
{ “item_id”: “A1”, “item_name”: “Jacket”, “qty”: 1, “price”: 50.0, “customer_id”: “c1” } |
| ecomm | tran | 1-0-0 | c2 | 2022-05-17 |
{ “item_id”: “A2”, “item_name”: “Shoe”, “qty”: 1, “price”: 20.0, “customer_id”: “c2” } |
Now that you have the events ingested, you want to set up the stitching rules and for the events, which you can do in the CDP. Following the example given, the rules would look like this:

After that, you can start building the attributes! On how to build attributes, refer to this doc (TBD).
Following the example given, an example attribute using method 1 (based on event) for “Total Spending” might look something like this:

Value: (payload->>'qty')::int * (payload->>'price')::numeric
For an attribute using method 2 (random values that don’t exist in the events), it might look something like this, basically, you want to create a query that randomizes some value from a list:
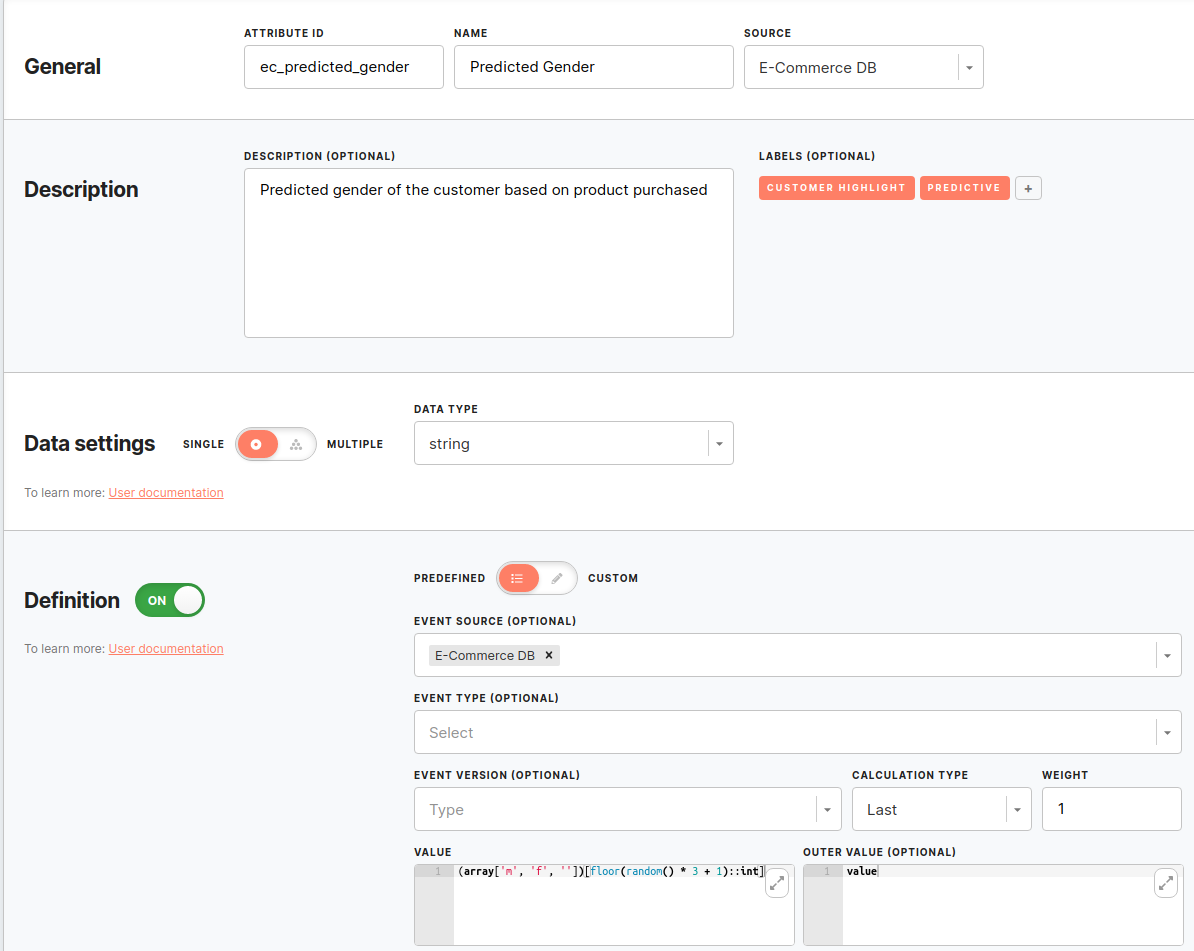
Value: (array['m', 'f', ''])[floor(random() * 3 + 1)::int]
After you have built the attributes, to make sure that there are no issues, head on over to the plumbing logs to check if there are any errors with your attribute definitions! As for how to check the logs, refer to this doc (TBD)
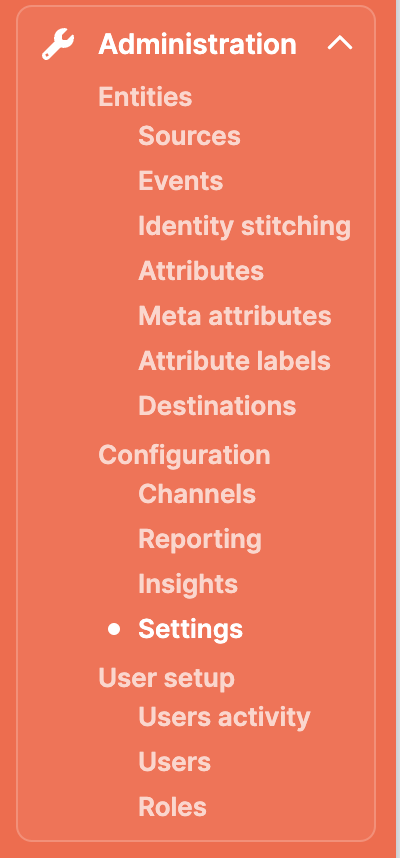
It should take no more than a few hours to see the attribute values reflected on the CDP. The values you see on the CDP platform are values from a cache, so to make the cache reflect the most current values, you want to go into the settings and run a cache refresh, this way you may get the attribute values to be visible on the platform earlier.

You can find this menu item under Administration -> Configuration -> Settings tab:
No Comments