How to Implement Meiro Events in MI and CDP and set up alerts for Meiro Events
Overview
In this article, we will provide a checklist on the steps to implement Meiro Events (ME) pipeline in MI and CDP. We also include some guidelines when setting up alerts for ME.
Before implementation
- Check that we are receiving the events. You may do so through the ME Montoring Dashboard App (https://me.<client-name>.meiro.io/app/monitoring) or by running queries in ME Database (me.<client-name>.meiro.space)
- Check that the payload of the event is correctly implemented. ie, The payload contains the correct fields and correct information.
CDP: Implementation checklist
- Create an Data Source, and give it an appropriate name ("Website" or the client's web URL is good)
- For each event type, create a new Event in CDP.
- For standard events (page views, outbound link clicks, Google Analytics client ID sync and Facebook client ID sync), they should have their own separate Event in CDP.
- For contact form submit events and custom events, you may want to categorize the events to reduce the total number of events and make the implementation simpler.
- Create these stitching Attributes for identity stitching.
- Stitching Meiro User IDs - a list of Meiro user IDs to stitch all Meiro Events. By default, all Meiro Events has a Meiro user id in its payload.
- Stitching GA CIDs - a list of Google Analytics client IDs. Needed to stitch Google Analytics client ID sync event.
- Stitching FB CIDs - a list of Facebook client IDs. Needed to stitch Facebook client ID sync event.
- Stitching Emails - a list of emails of the customer. Needed to stitch custom events or contact form submit events with events containing the email field from other sources.
- Stitching Phone Number - a list of phone numbers of the customer. Reasoning is similar to Stitching Emails.
- Using these attributes, create Identity Stitching rules.
MI: Implementation checklist
The MI workspace that ingests ME data is usually made up of 4 components/steps. Extract->Transform->Format->Load.
1. Extract
Here, we extract the raw events from the ME database. It is important to filter out events generated by Google bots by adding this filter:
payload -> 'user_agent' ->> 'browser_family' not in ('AdsBot-Google', 'Googlebot')It is also a good idea to limit the time period to past X hours to reduce memory usage in MI.
reception_time >= current_timestamp - interval '8 hours'2. Transform
This is where all the data transformation takes place. We add, change and remove fields here in this data processing step.
We also transform each row into a json. The resulting file is an ndjson
Here are some of common transformations we use.
- Validating phone numbers, extracting its country code
import phonenumbers x = phonenumbers.parse(payload['phone_number']) payload['country_code'] = x.country_code payload['phone_number_validated'] = x.national_number - Validating emails
from validate_email import validate_email payload['email_validated'] = lower(trim(payload['email'])) if validate_email(payload['email']) - Timezone conversion - for Meiro Events, the reception_time is in UTC time and no timezone conversion is required. However, if the client implements in their local timezone, it would be useful to add its UTC time.
import pytz local = pytz.timezone("Europe/Prague") def convert_time_to_utc(time): naive = datetime.datetime.strptime(time, "%Y-%m-%d %H:%M:%S") local_dt = local.localize(naive, is_dst=False) utc_dt = local_dt.astimezone(pytz.utc) return utc_dt.strftime("%Y-%m-%d %H:%M:%S") payload["created_utc"] = convert_time_to_utc(payload["created"]) - Add vokativ of names
from vokativ import sex, vokativ if payload["payload"].get("first_name"): first_name = payload["payload"].get("first_name").lower().strip() payload["payload"]["gender_estimate"] = sex(first_name) payload["payload"]["first_name_vocative"] = vokativ(first_name) - Remove unnecessary fields from payload
payload.pop("headers")
payload.pop("method")
3. Format
We format the data into a format suitable for ingestion into CDP. Ids and event ids are also generated here based on payload information. A standard python script is used to format the events. To learn more about the how the script works, please read Format events | Meiro Docs
4. Load
Finally, we will load our data. Like the previous step, a standard python script is used to load the events. To learn more about how the script works, please read Load event to CDP | Meiro Docs
Meiro Events monitoring and alerts
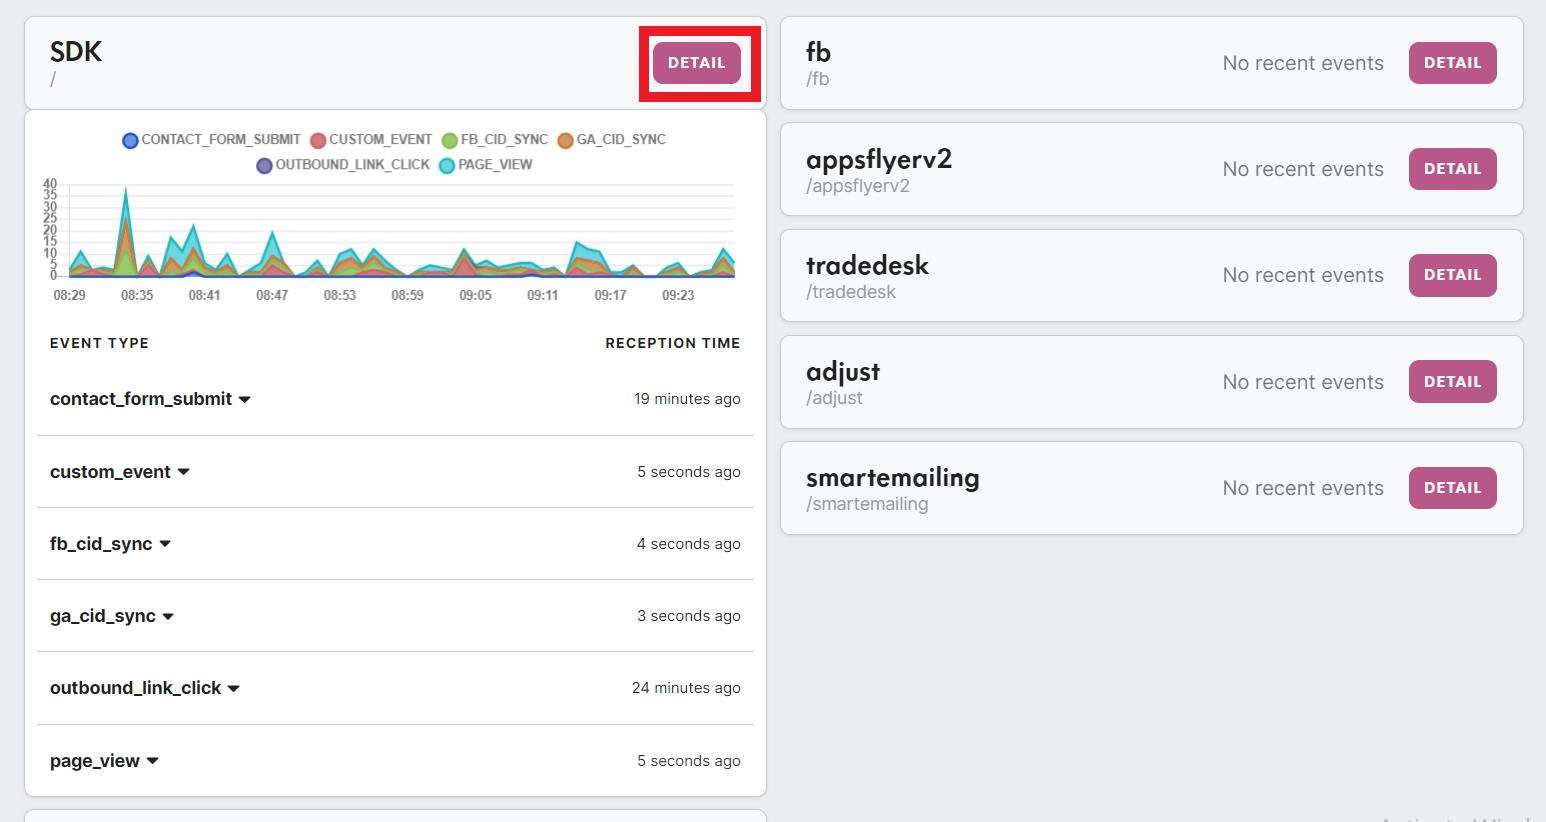
To set up alerts for ME, go to the ME Monitoring Dashboard App (https://me.<client-name>.meiro.io/app/monitoring)
Click on Detail in SDK tab to start the set up.
How do these alerts work?
- Alert rules are checked every hour.
- If there are events that fulfill the alert rules, then the email is sent to the configured e-mail address.
Guidelines:
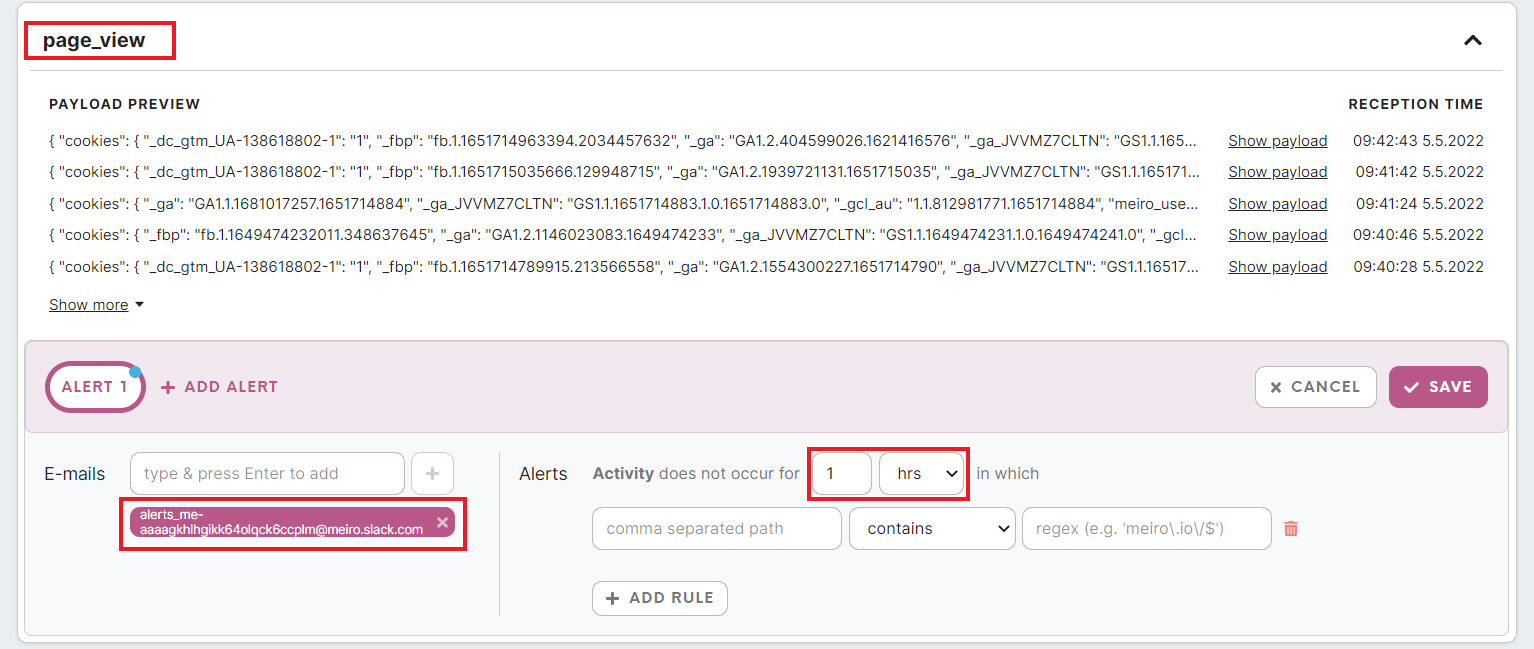
As a rule of thumb, we should set up an alert for page_view events.
Notification channel: Alerts should be sent to alerts_me-aaaagkhlhgikk64olqck6ccplm@meiro.slack.com.
Alert rule: Alerts should be sent when Activity does not occur for 30 minutes - 1 hour (this should be adjusted based on the level of traffic of the website)
Example:
No Comments