Tab: Segments
A segment is a group of customers with the same attributes and behaviour together for easier dissemination of information, targeting and analysis. Segmenting helps to specify data for a particular need.
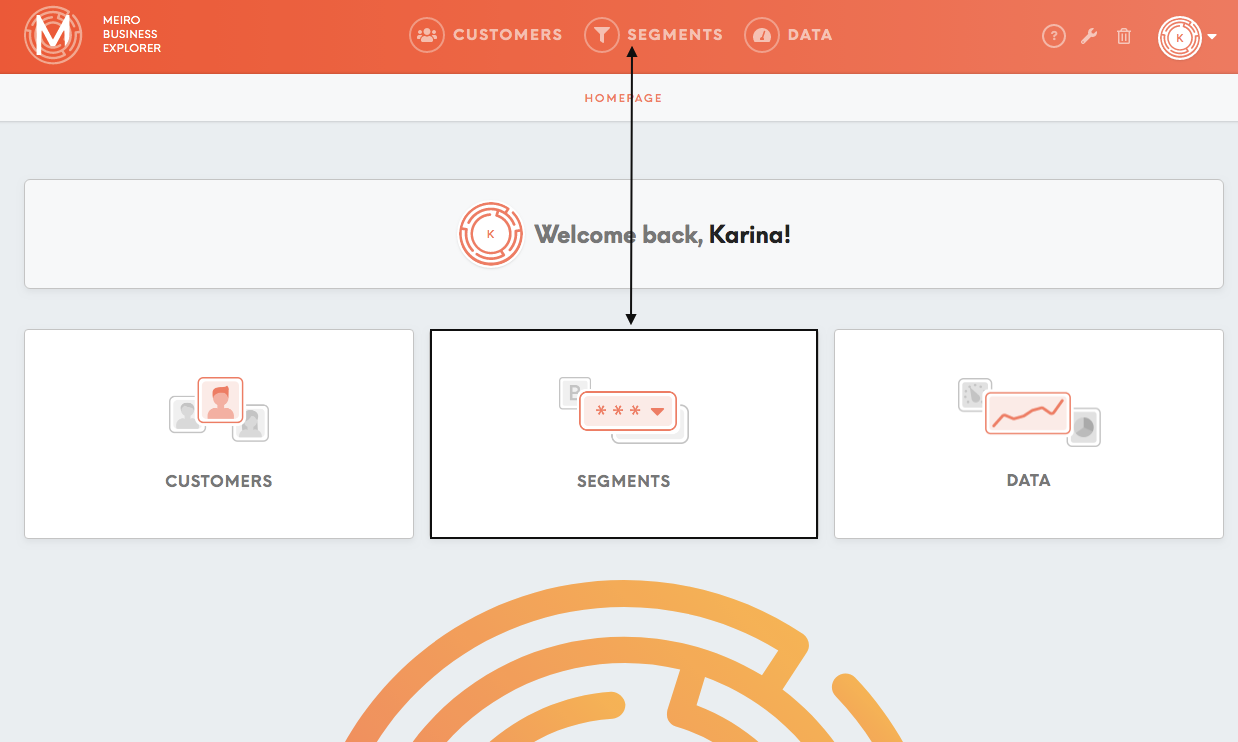
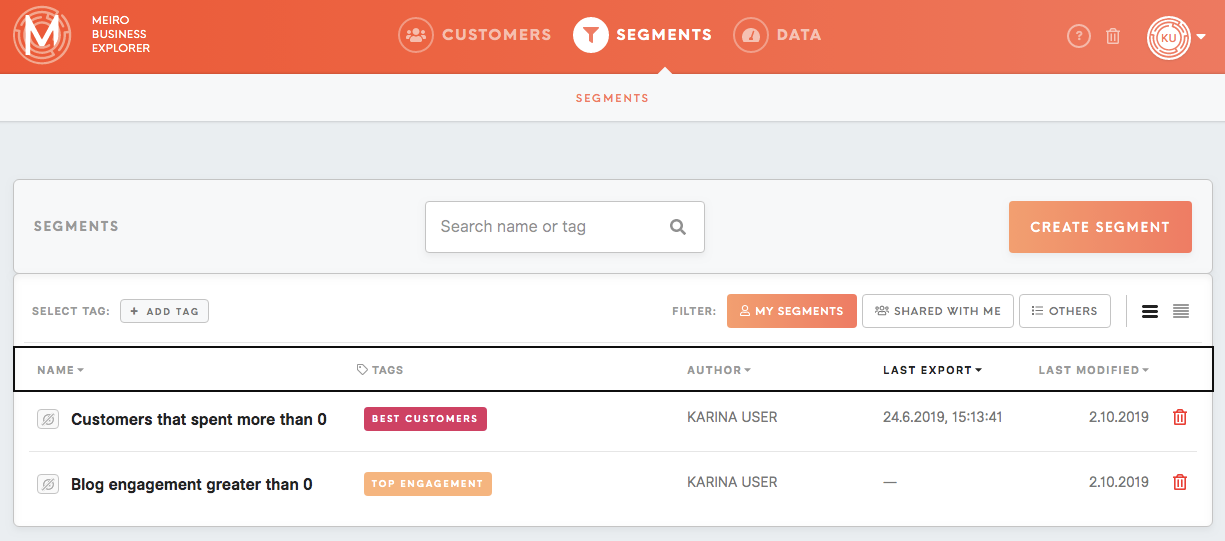
You can access the Segments tab by clicking on the icon in the home screen or on the tab in the top menu
The Segments tab lists all available segments. As an administrator, you will have access to all existing segments. As a user, you will only have access to the segments that you have been invited to. Segments that a user has no access to are greyed out. To get access to a segment, please contact a Meiro administrator.
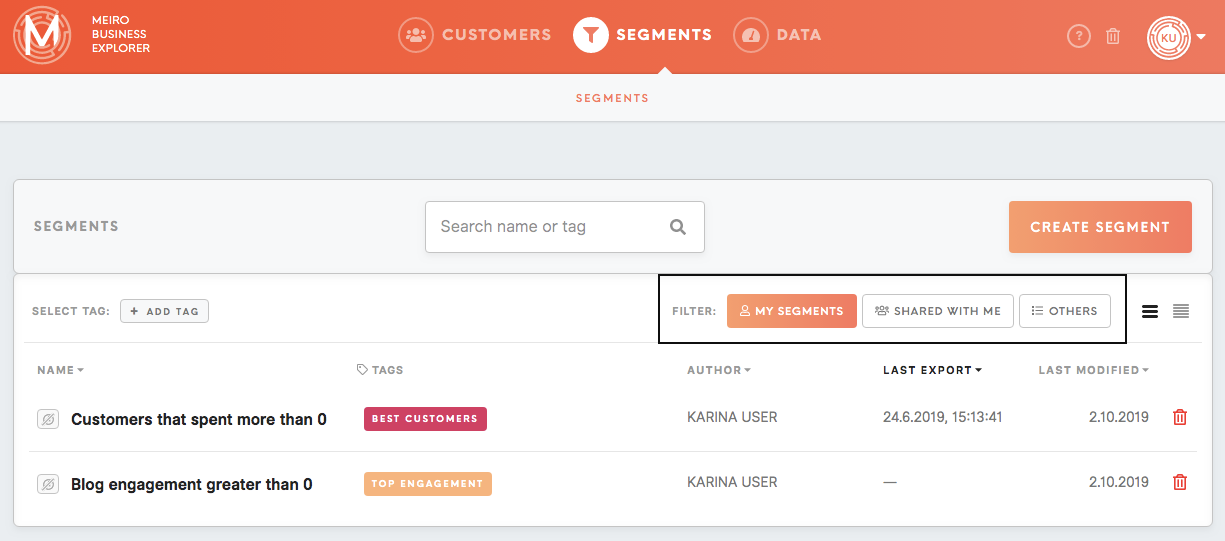
Segments can be filtered by:
- My Segments (segments user has created),
- Shared with me (segments user has been invited to),
- Others (all segments available).
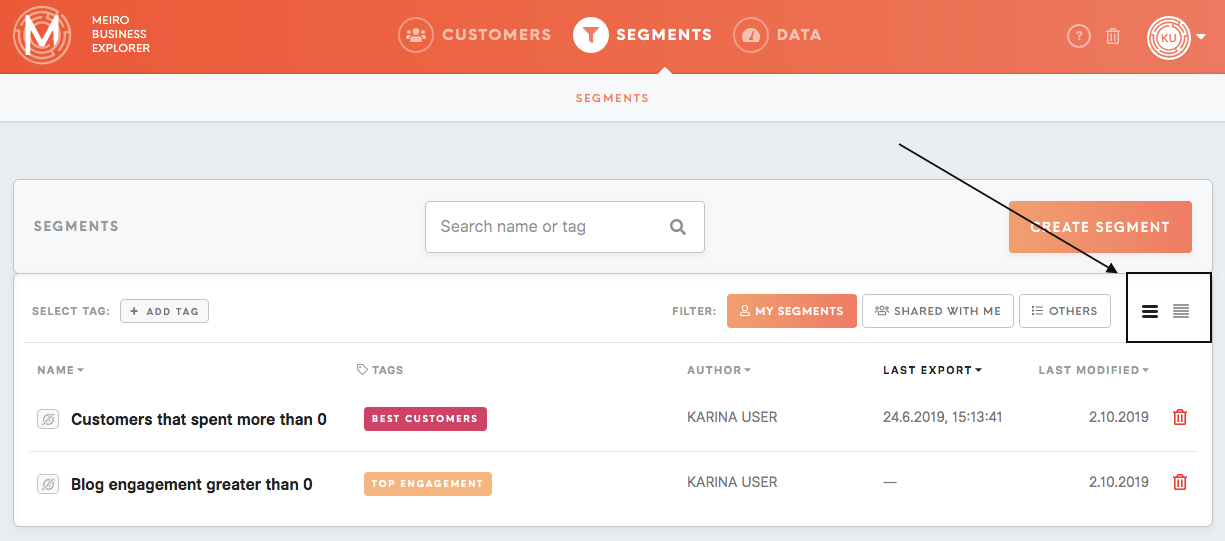
It is possible to choose a compact or wider view of the list of segments, depending on the user’s preferences.
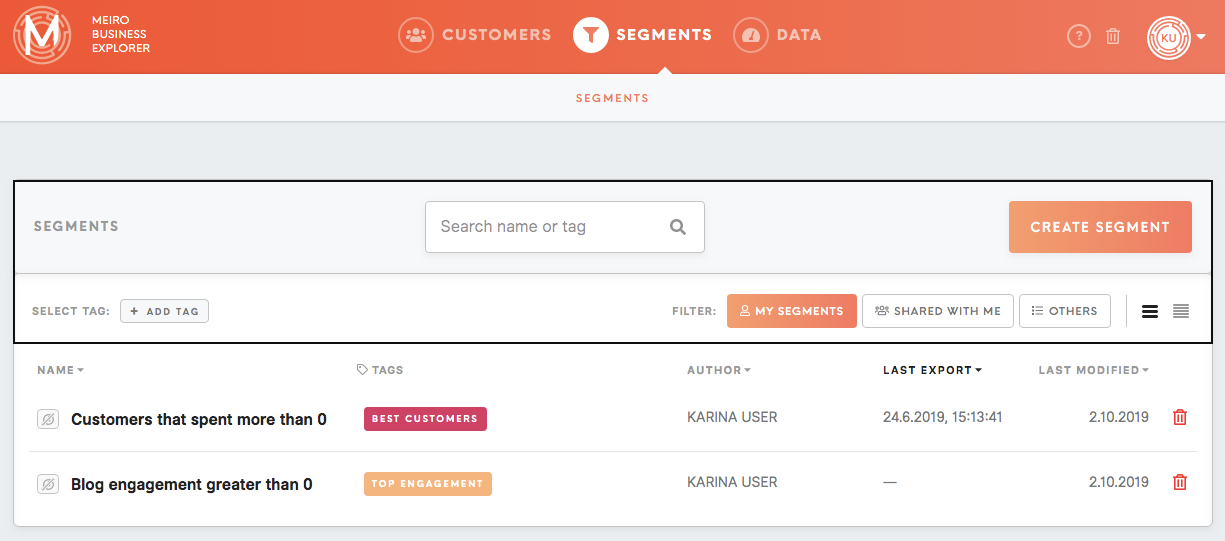
In this tab is possible to create a new segment (Meiro administrators and users with the level of access that enables segment creation) or search through existing segments (enter your search through the search box or choose a tag).
The Segments tab displays a segment’s name, tags, authors, last export timestamp and last modified date.
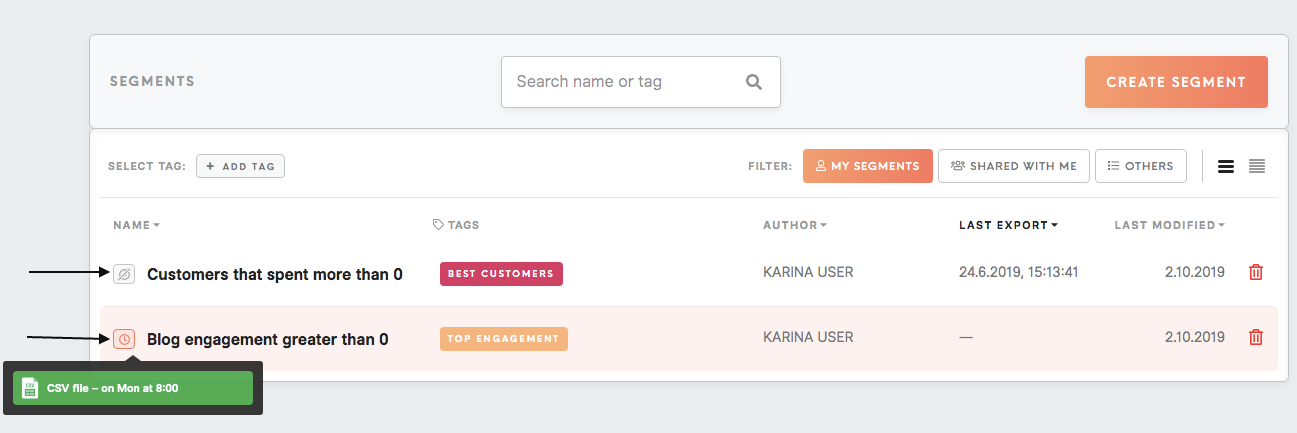
The icon next to the name of the segment shows on hover if segment has any schedules set.
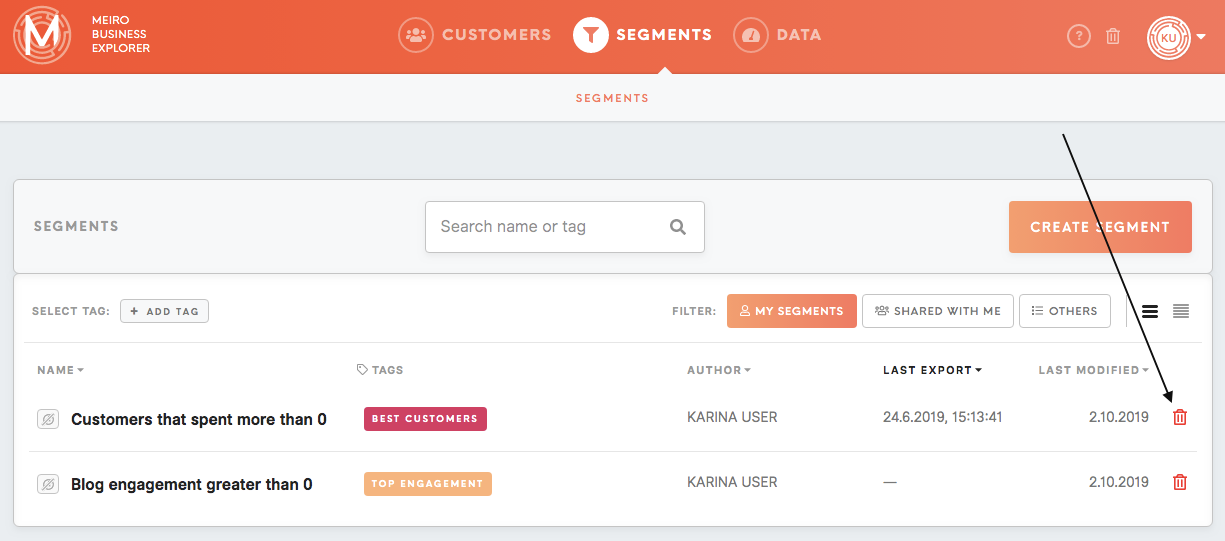
It is also possible to move a particular segment to the Trash tab (only possible for users with edit level of access). Segments can be always restored from the Trash.
You can open the full settings of a particular segment by clicking on it.
Segment Details tab
The topmost table on a Segments page displays:
Name Your Segment
This is the title of your segment. Here a view-only sign will be shown for users with a view-only level of access. To get edit-level of access, please contact Meiro Business Explorer administrator.
Users
Users who have access to the segment and/or have been invited to view are shown here. If you are the author of a segment or the administrator, you can invite new users or edit the access level for users that have been already invited (please remember administrator by default have an edit level of access that can not be decreased to view-only).
Notes
For annotation of additional information for later or to help cooperation on a segment with your team members. Here you can drop your comments, notes and communicate.
Delete/ Clone
As an administrator or a user with edit-level of access, you can also delete or clone a segment. The deleted segment can be always restored from the Trash tab.
Choose Conditions
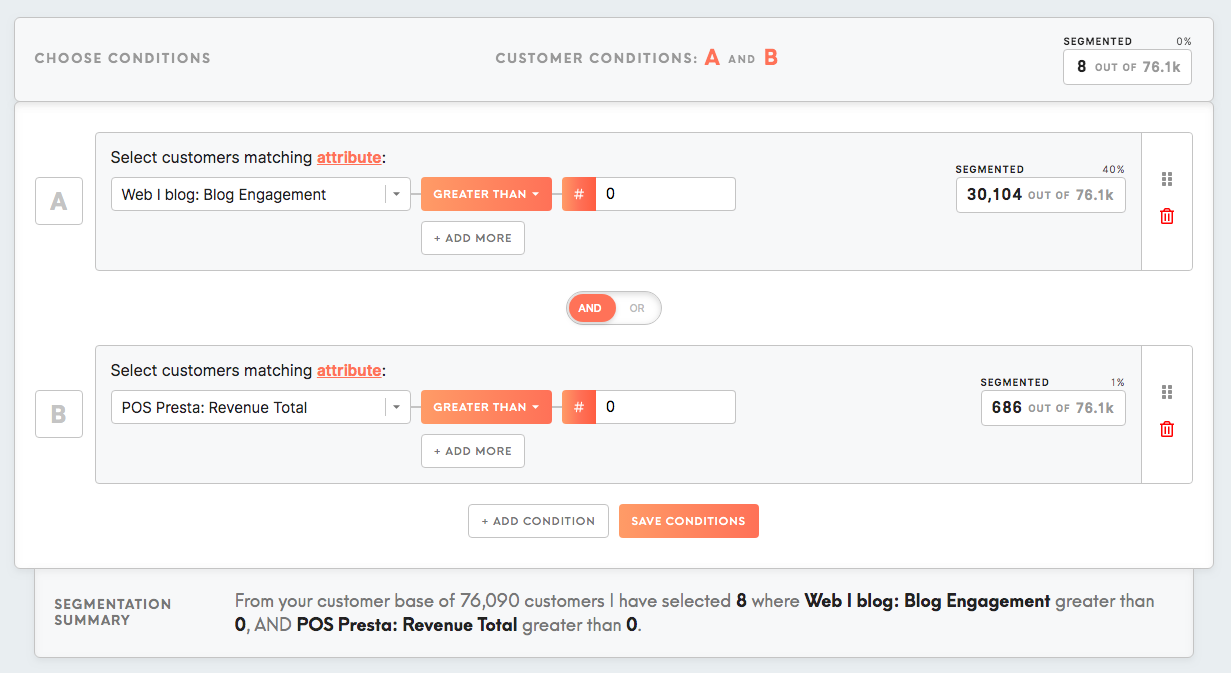
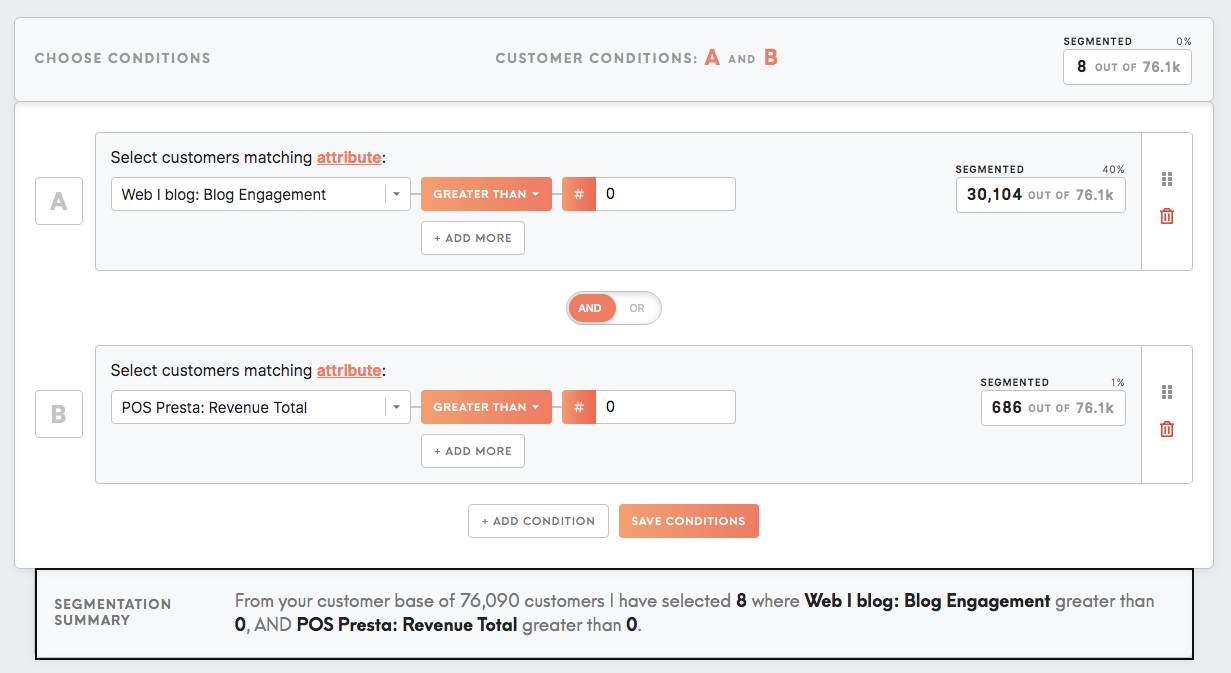
The following section allows you to edit the conditions set up for the segment. A segment is a personalised query that helps to filter customers by their attributes.
The same attributes that are available in the Customers tab can be used to create a segment.
For example, it is possible to filter customers who purchased the product at a particular amount and who also engaged in a blog.
You can choose attributes that are important to you in the Choose Condition section.
To learn more about choosing the right conditions, please refer to articles on how conditions work and the article “How to build your segment and use data to understand customers better”.
Segmentation Summary
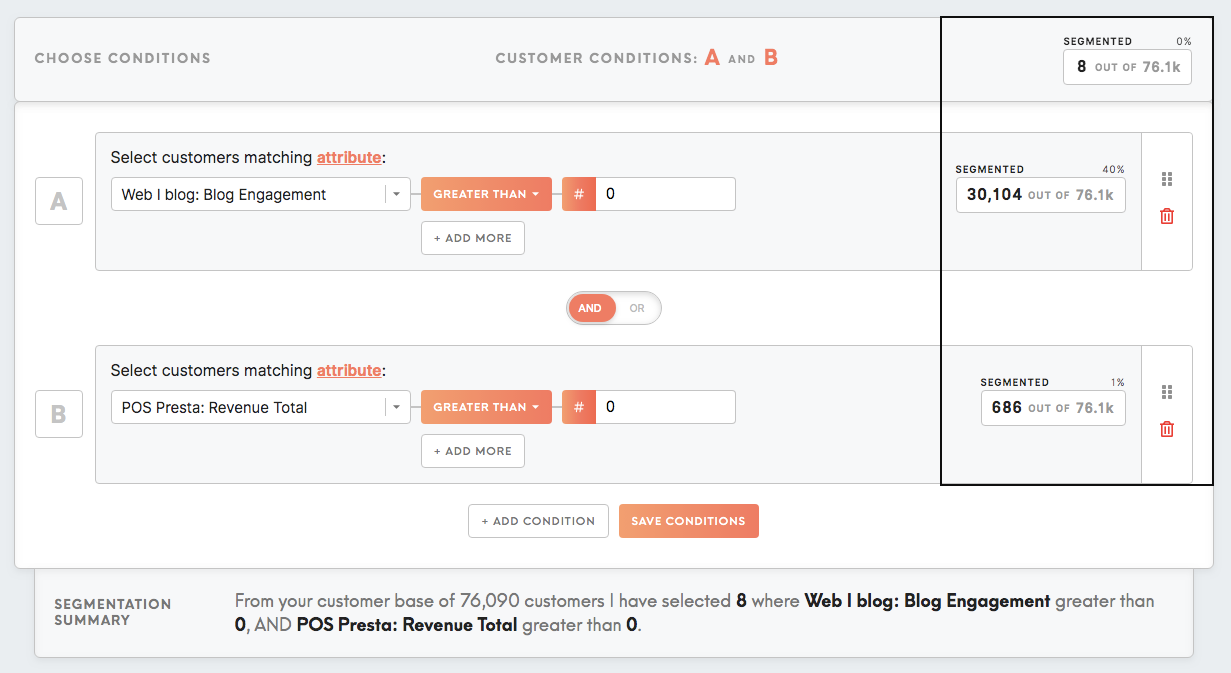
Segmentation Summary shows you the various conditions of your segment in text.
The segmented number/ percentage can be seen on the right side of a tab.
Choose Destination
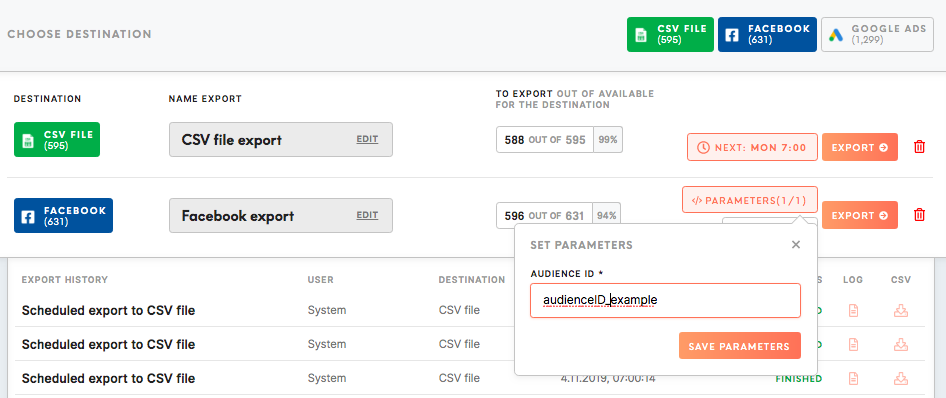
Choose a destination by clicking on its icon and export your segment to the destination of your choice.
A list of the available destinations is visible in the Sources and Destinations tab (under the Data tab). Exports destinations are set up by Meiro analysts, upon agreement with the client.
To learn about what can be personalised to customers needs, please refer to this article.
A Meiro administrator can choose as well exported attributes, as well as mandatory attributes (Administration tab, Sources & Destinations tab).
For some export destinations, it is also possible to set up export parameters.
It is possible to schedule a specific time and date an export. The schedule will be visible in the Segments tab as well.
For some destinations is possible to set precise parameters managed by an administrator in the Administration tab.
CSV exporting works with utf8 encoding. To understand how to set character encoding, please refer to this article, or any other available articles online.
Segment Preview
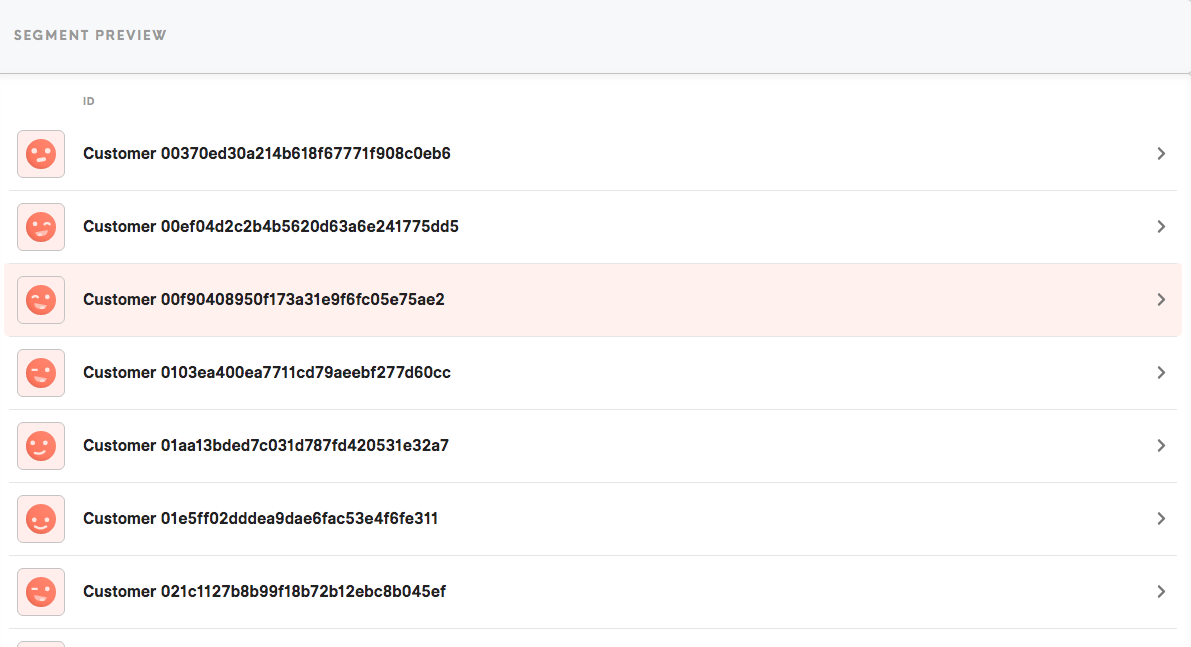
Browse through customer profiles related to your segment.
To learn more about customer profiles, please refer to this article.
Insights tab
The Insights tab shows you a broader analysis of your segment.
Insights contain attributes and conditions specifically calculated for the segmented audience.
Only an administrator can edit how attributes and conditions are calculated and configured within the Insights tab. To learn more please refer to the Administration tab.
Filter insights:
- By name.
- By data source of the attribute, the insight is calculated from.
See for how many customers your insights are calculated for. In the Segmented box, you will find "segmented number/ out of all customers | percentage for those".
Choose the way how insights are displayed: either 2-columns or 4-columns view.
By default, the view is always set up as 4-columns.
The 2-columns view can be suitable for bigger screens.
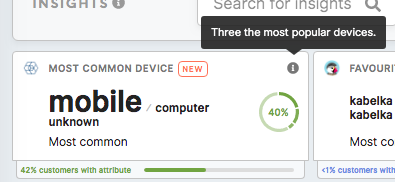
Each insight shows:
- The data source for the chosen attribute. It is assigned automatically as each attribute is calculated from a particular data source.
- Name of the insight and info note (optional). Name and description can be edited by the admin in the Administration tab.
- The condition specified for insight, as well as the result of the calculation. Attributes and conditions for insights can be edited the admin in the Administration tab.
- Percentages calculated for a segmented audience:
- Pie chart with the percentage for a chosen value of that particular insight (calculated from a segmented audience only).
- Bar chart for attribute chosen in the insight present within the segmented audience (calculated from a segmented audience only).
For each insight is possible to choose an individual colour. Only an administrator can edit colours for insights in the Administration tab.
If the description (if set up by the administrator) will be displayed under the info sign. Description can be at any time inserted/ edited/ deleted by the administrator in the Administration tab.
Recommended articles
How to build your segments and use data to understand your customers better
Customers who have email engagement in a particular country
Customers who visited the website, added items in the cart but left without a purchase

