The benefits of using Custom Blocks
What are Custom Blocks?
Custom Blocks are a versatile tool within email marketing platforms, offering marketing specialists the ability to create reusable email content elements effortlessly. With Custom Blocks, you can streamline the design process, ensuring brand consistency across all your campaigns.
Purpose of Custom Blocks
Custom Blocks allow marketing teams to create reusable email content blocks easily from a Visual editor. Whether it's a header, footer, promotional banner, or any other recurring element, Custom Blocks enable you to design, save, and reuse these elements across multiple email campaigns. This ensures brand consistency and saves significant time in the campaign creation process.
For instance, a call-to-action button can be saved as a block and then inserted into any message where you want to use it. After inserting the block, you can easily modify the button to change the link, label, and even the color. This gives non-technical users the power to create consistent, well-designed, and impactful messages.
Use Cases
- Simplified Template Configuration: Effortlessly configure complex email templates while allowing users to focus on essential elements like unified color schemes and font sizes, streamlining the design process for maximum impact.
- Brand Consistency: Maintain your brand with Custom Blocks, ensuring consistency across all your email communications. Allow certain parts to be modified while maintaining some blocks as unchangeable, for example, the unsubscribe link.
- Professional Blocks: Improve your email campaigns by setting certain blocks as fixed, such as a heading element, with limited options for customization, like choosing from large, medium, and small font sizes. This will ensure that your brand message stands out in every inbox.
Want to learn more? Check out the Preventing email clipping and maintaining styling article to explore optimizing email size and preventing rendering issues.
Custom block creation
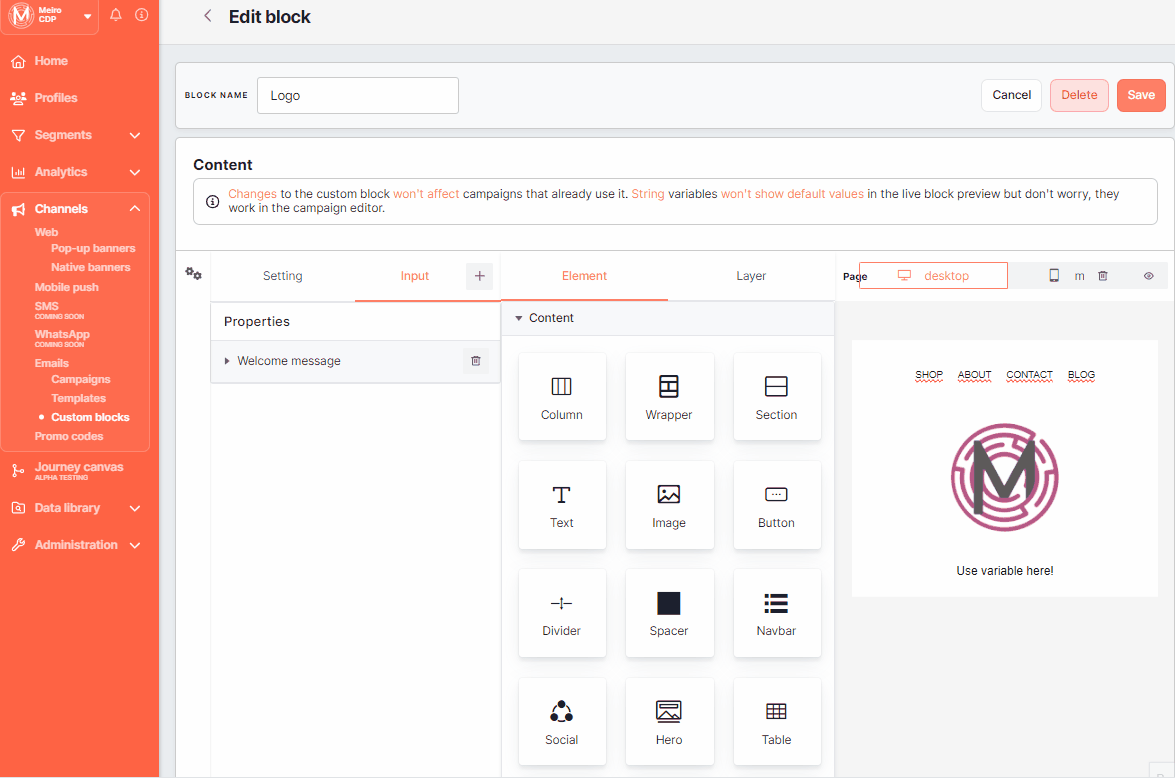
Access the "Custom Blocks" tab within the Channel section to craft your custom blocks. Then, click on the "Create" button to initiate the process.
With the help of intuitive drag-and-drop functionality, tailor your block to perfection.
Remember: The custom block can contain both unchangeable and editable elements. To make certain elements editable, you need to specify properties under the 'inputs' tab. When using this custom block in an email campaign, users will have the opportunity to change the text, links, images, or any other elements that were specified with properties.
Setting tab

Provide a detailed description and specific information for your custom block.
Content editable
You can enable the Content editable option, which allows users to change the text content in the block directly (e.g., renaming a button or editing a message).
If turned off, the text content becomes locked, but users can still adjust block settings (e.g., colors, sizes, images, and other properties).
Static logic enabled
The Static logic enabled option allows widget blocks to render conditional (if) and loop (for) logic using static input values, rather than dynamic data. This enables users to preview how the block will appear during editing, based on the configured inputs.
This option is available only when Content editable is turned off.
When enabled:
-
Loop (
for) and conditional (if) logic are rendered using values from the Input tab. -
Template syntax (e.g.,
{{variableName}}) can be used within blocks for static data binding. -
Useful for building repeatable layouts, such as product lists, where a static preview helps visualize the final result.
This option is useful when content should be previewed using static input values, enabling visualization of conditional or repeated elements during block editing.
Input tab
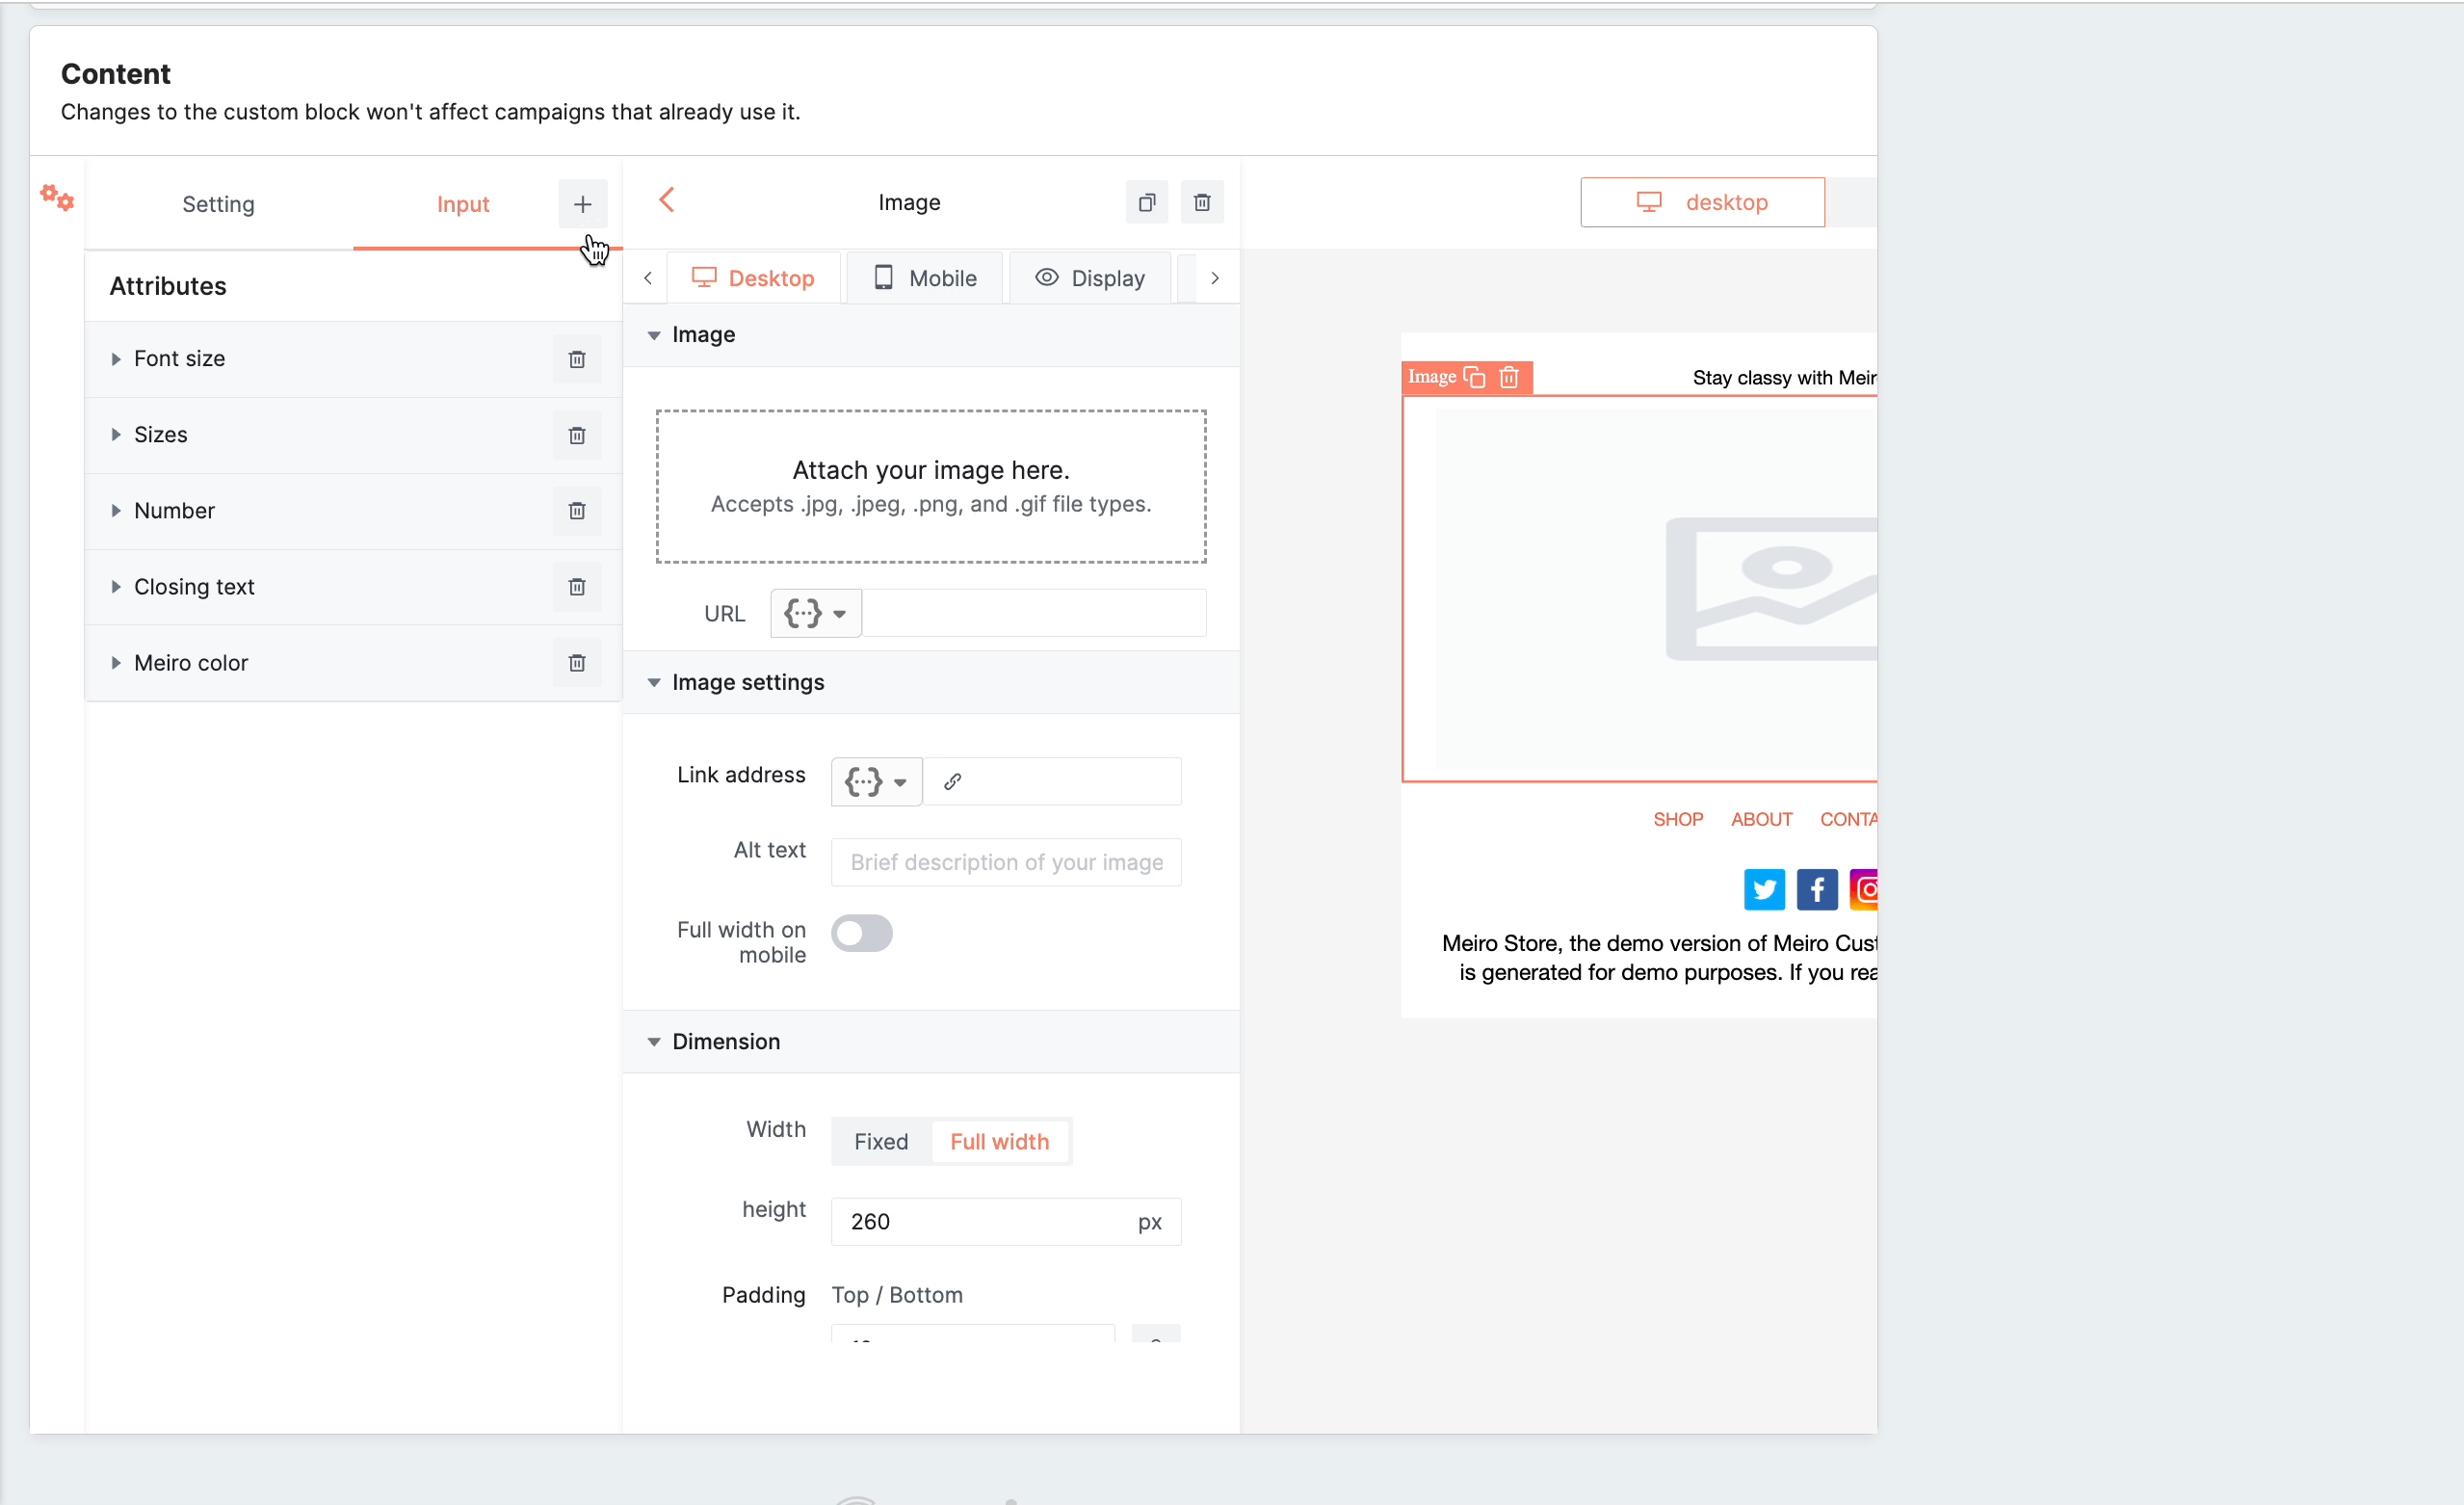
In the Input tab, define primary properties that can be applied to various custom blocks within your CDP. Easily customize properties by choosing from a variety of types, such as Pixel, Enum, Color, and Image.
Provide clear labels, key values, and detailed descriptions for each property, enhancing clarity and usability. Add specific settings to properties, such as selecting primary colors or uploading images, to suit your unique requirements.
Creating Properties
Once configured, seamlessly reference these properties in the Visual editor of this or any other Custom Block using the syntax $var(key-value).
Here are examples of how to use different types of the properties:
Pixel
To apply the same size to various elements throughout the template, choose the pixel type and assign a name to the key. You can then use this key in the settings of a block, such as for text or text within a button. Set the default size for this property (e.g. 16px).
Reference the size of any text in the block as $var(size) in the source code of the element:
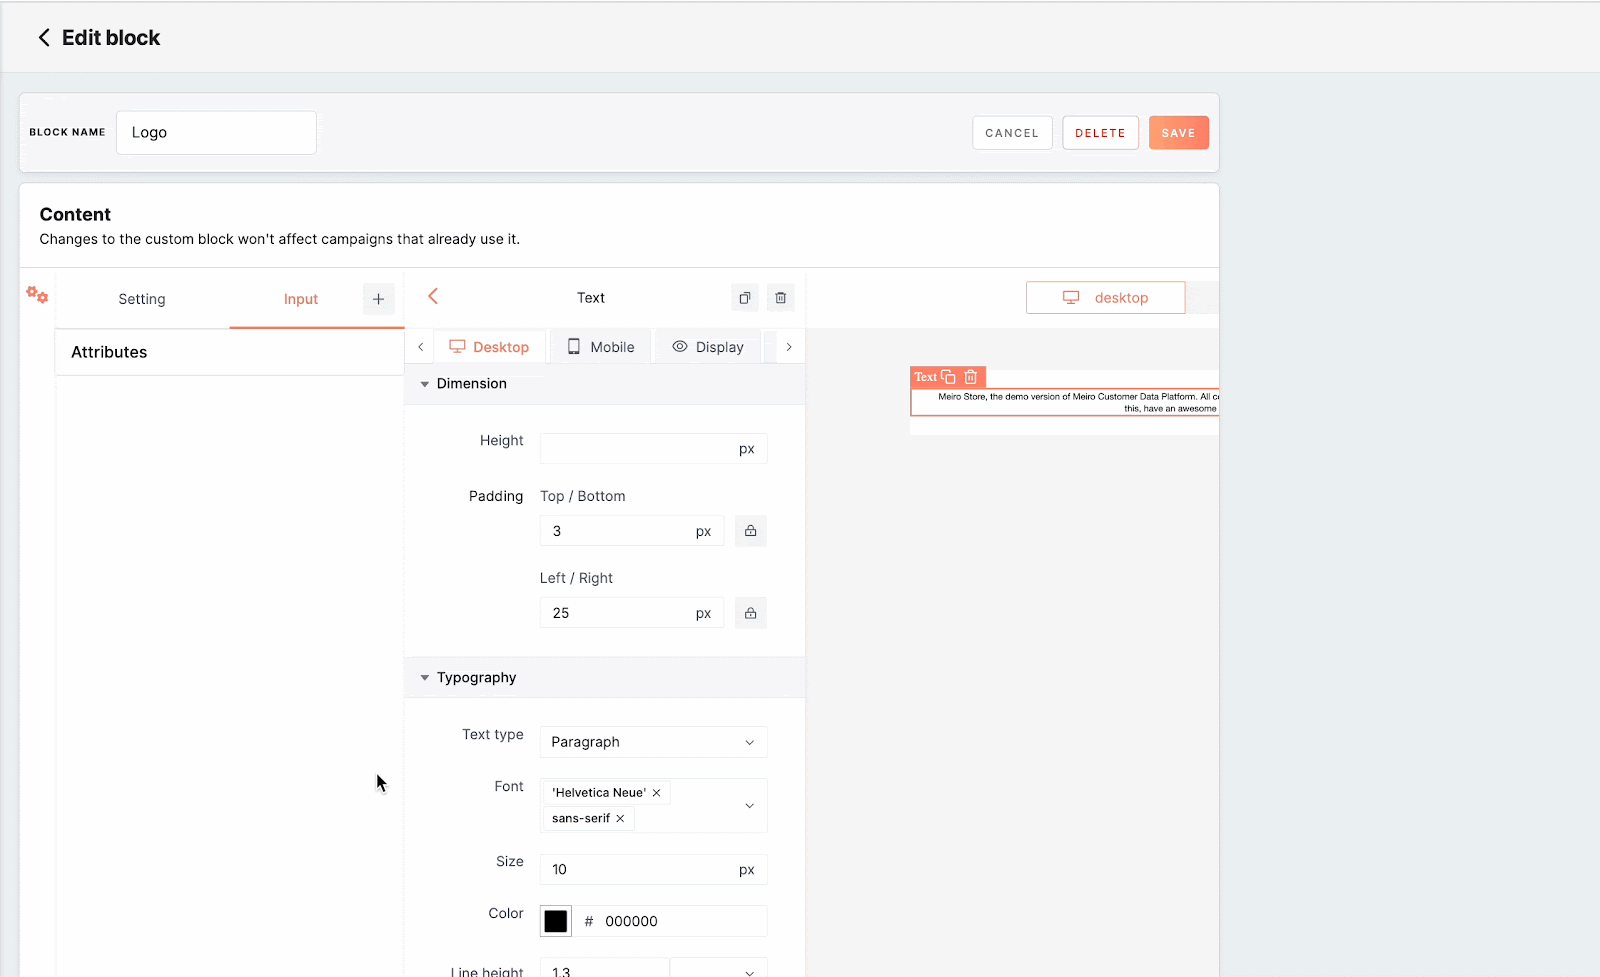
Using this property will allow users to adjust the size within the settings when using this custom block in the email campaign.
String
To apply uniform text throughout your template, select the String property type and set a default value (e.g., "text"). Next, assign a descriptive name to this key, which will serve as a reference in each block's settings.
For example, you might define a welcome message property as $var(welcome-message) in the source code of a text element. By using this property, you enable users to customize the text in the settings whenever they use this custom block in an email campaign.
Remember: The default value set for the String property will not appear within text elements in Block Studio. However, it will be displayed when creating an email campaign, allowing for easier customization during the campaign design process.
Enum
The enum type is used to apply different sizes to various elements in the template. Users can then switch between a dropdown of preset options. For instance, when a user adds a custom block with a text block inside, they can choose whether the text should be in large, medium, or small size.
To use the enum type, you should assign a name to the key and add different options with their respective values. Then select the default option for this property and refer to it in the source code of the element through $var(key) just as in the example:

Using this property will allow users to adjust the font sizes within the settings when using this custom block in the email campaign.
Color
If you want to apply a universal color across the template, choose the color type and select the default color. Give a name to the key, which you will then use in the settings of each block.
For example, refer to the primary color property as $var(primary-color). This will eliminate the need to manually select colors from the palette.
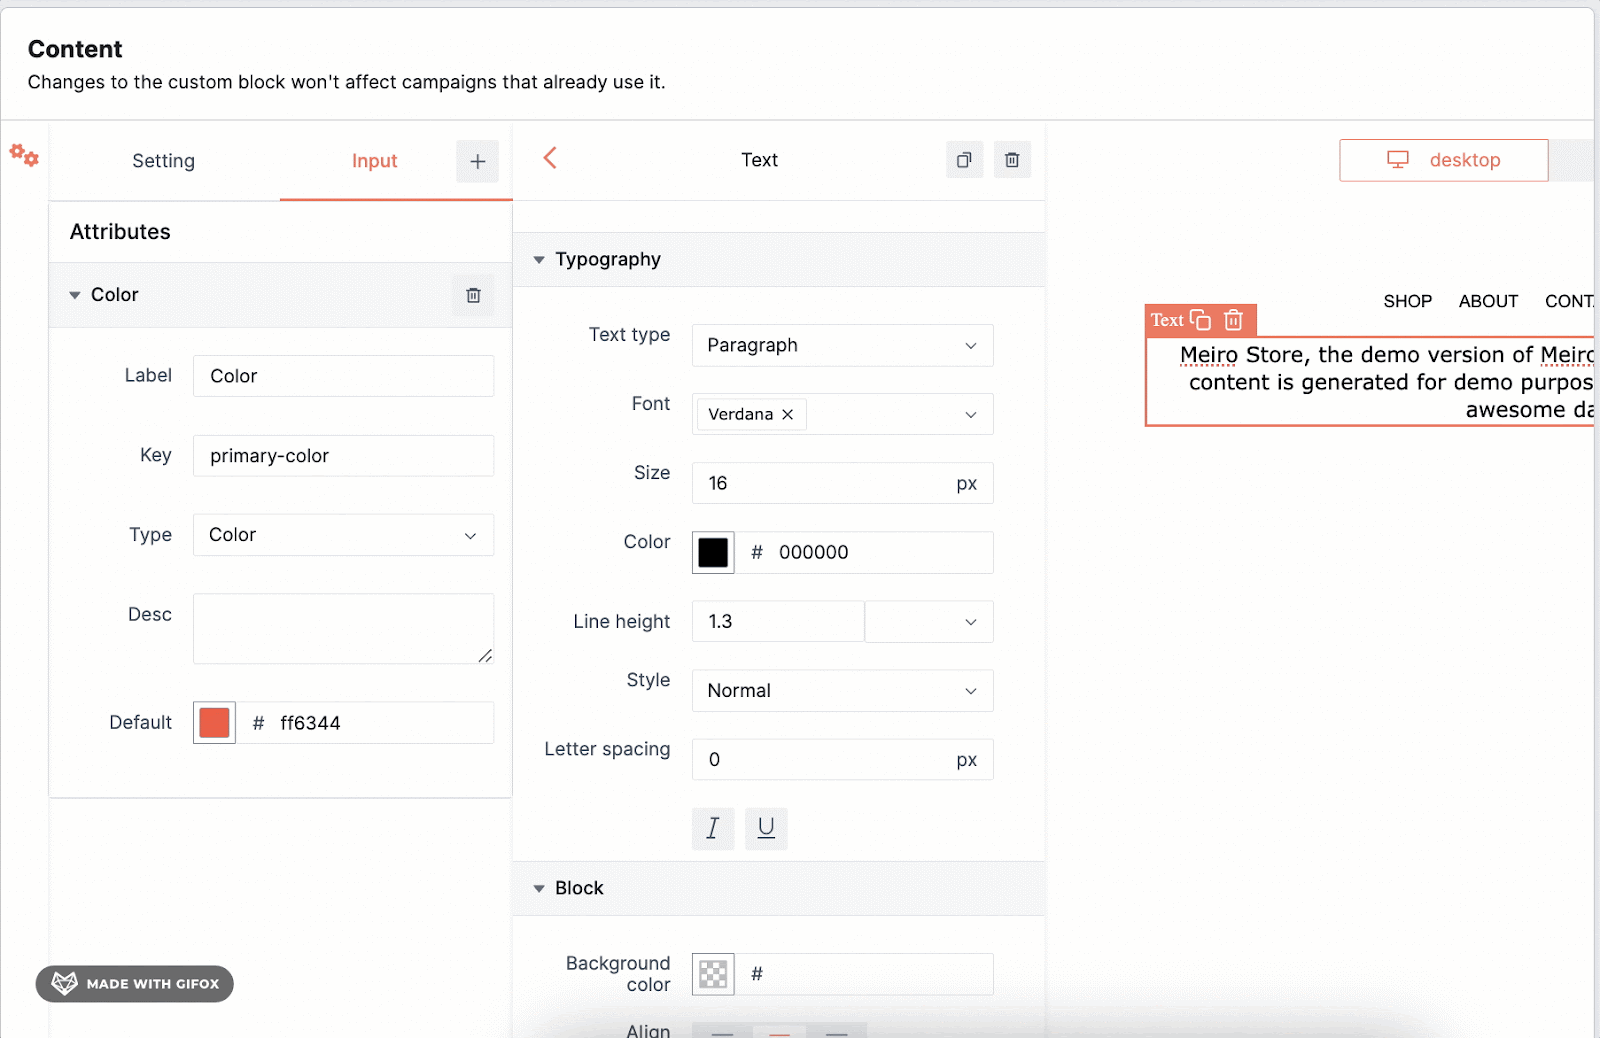
Using this property will allow users to adjust the color within the settings when using this custom block in the email campaign.
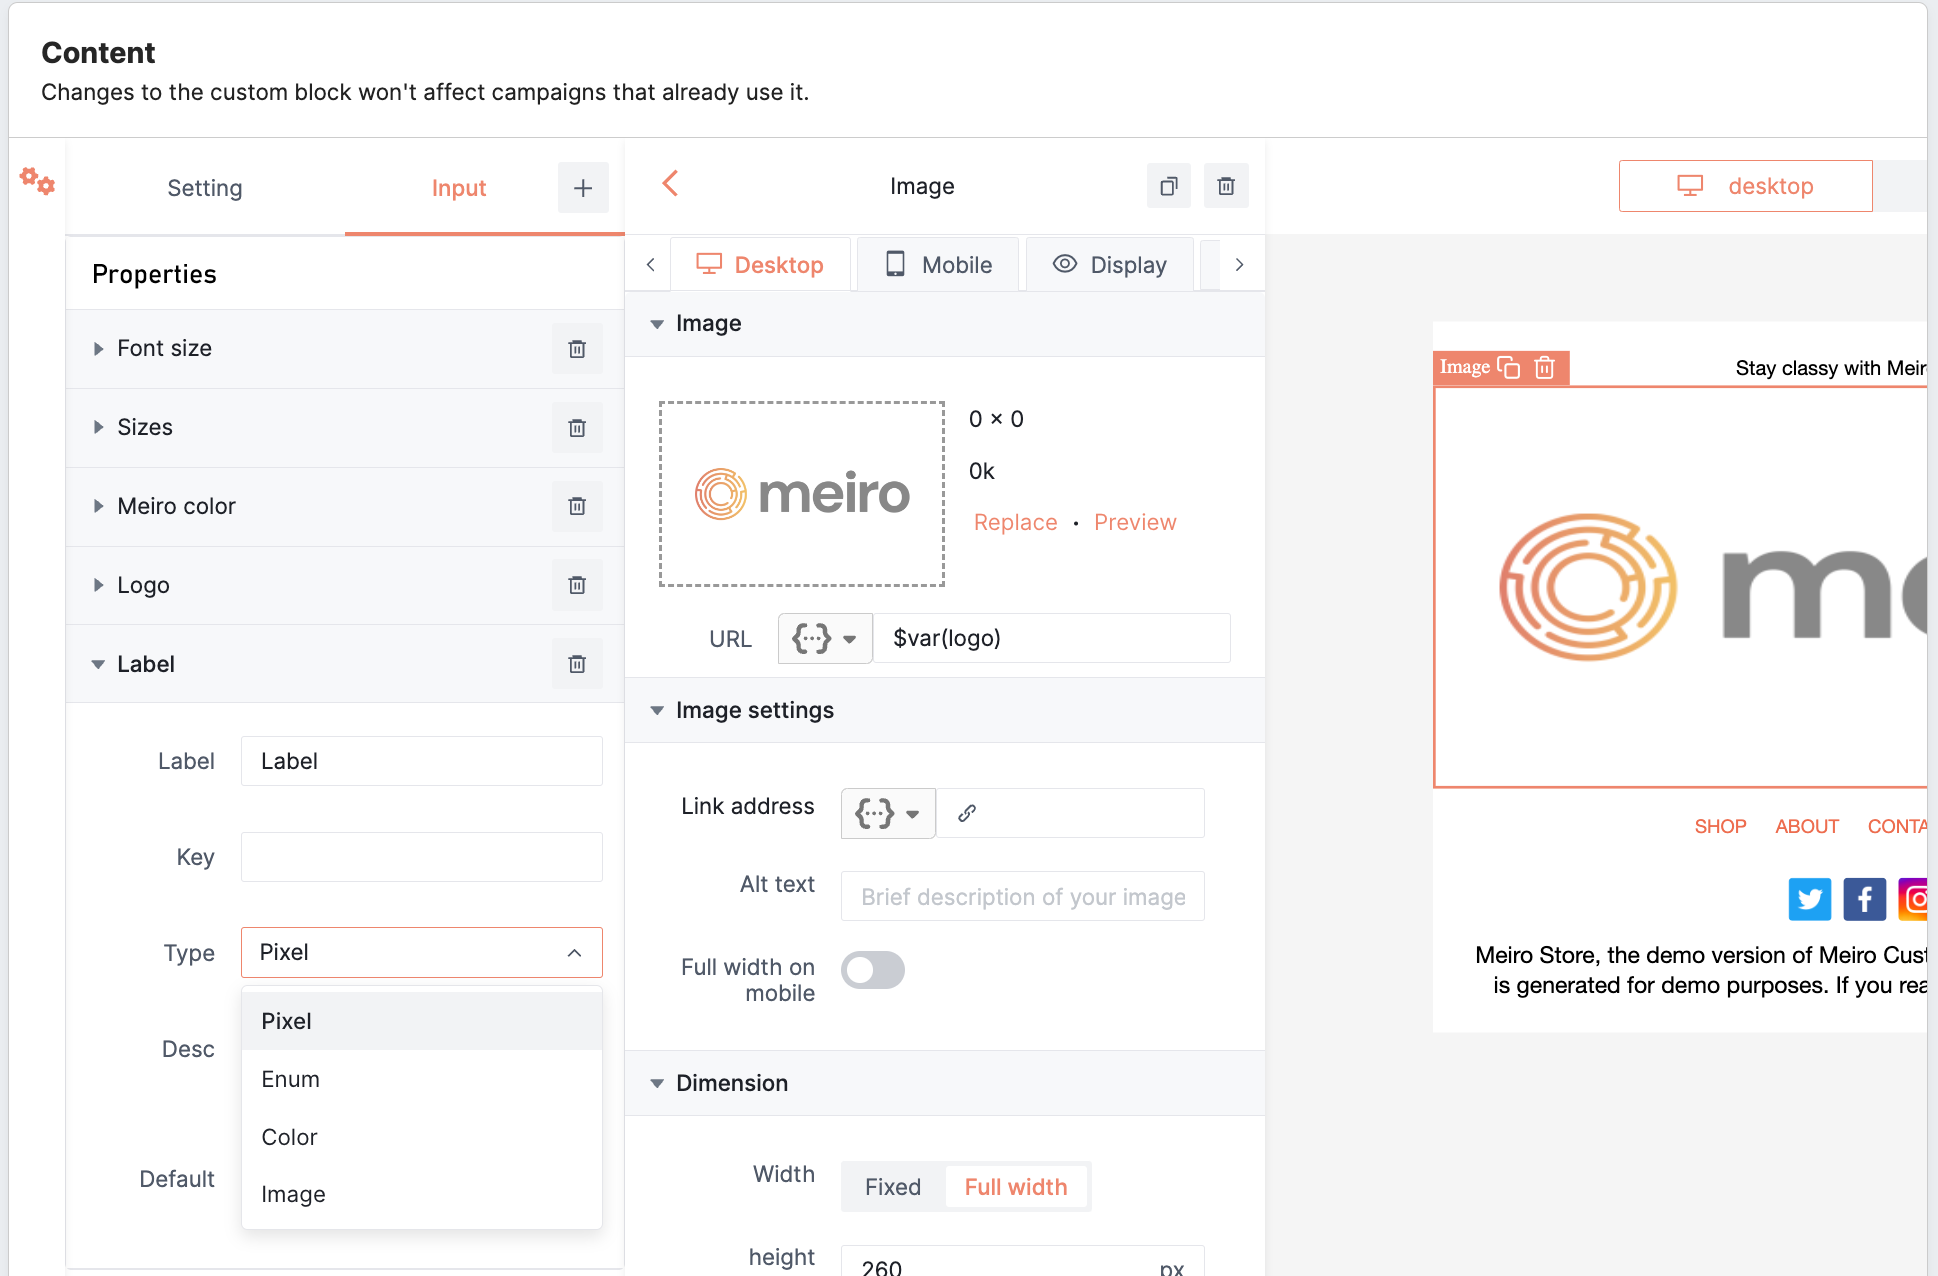
Image
If you want to apply a universal image, for example, a logo, across the templates, choose the image type and give the name of the key. Then, upload the image. You can reference this image within the template by using the key name, for example $var(meiro-logo). This way, you won't need to upload the image multiple times if it's used in different places.
Using this property will allow users to change images within the settings when using this custom block in the email campaign.
Product Picker
The Product Picker lets you design fully reusable custom blocks that dynamically pull products from your XML feeds.
Learn more: Before using the Feed Item Picker, make sure your data feed is uploaded to the CDP in the correct format. For detailed instructions on how to structure and upload the feed file, refer to this guide Loader CDP Feed Items.
In Block Studio, you can add the Product Picker as an input to your block settings. It allows users to select one product during campaign setup.

When setting up your custom block, you’ll create a setting with a key (e.g., product). Then, you can display the product’s details in the block using simple tags like:
-
$var(product.name) -
$var(product.title) -
$var(product.custom_data.price)
Warning: The exact format of these variables depends on how your product feed is set up. For example, if the price is stored in a custom field, you need to use $var(product.custom_data.price) instead of $var(product.price).
For more details refer to this article.
Once the product is selected in the campaign editor, the content will update automatically to show the right info from the product feed.
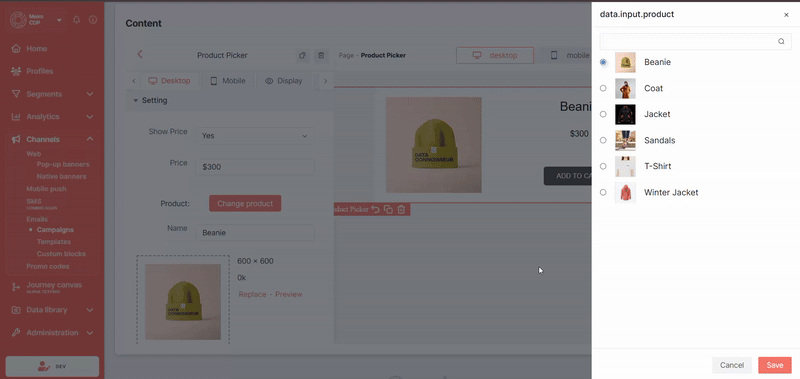
Using this property allows users to pick an single product in the block settings during campaign setup, enabling flexible product-based customization in email templates.
Use it to simplify your workflows and get your emails to market faster - with less effort and no dev support needed.
Learn more: For further guidance on available block features within the Visual editor, refer to this article.
How custom blocks work
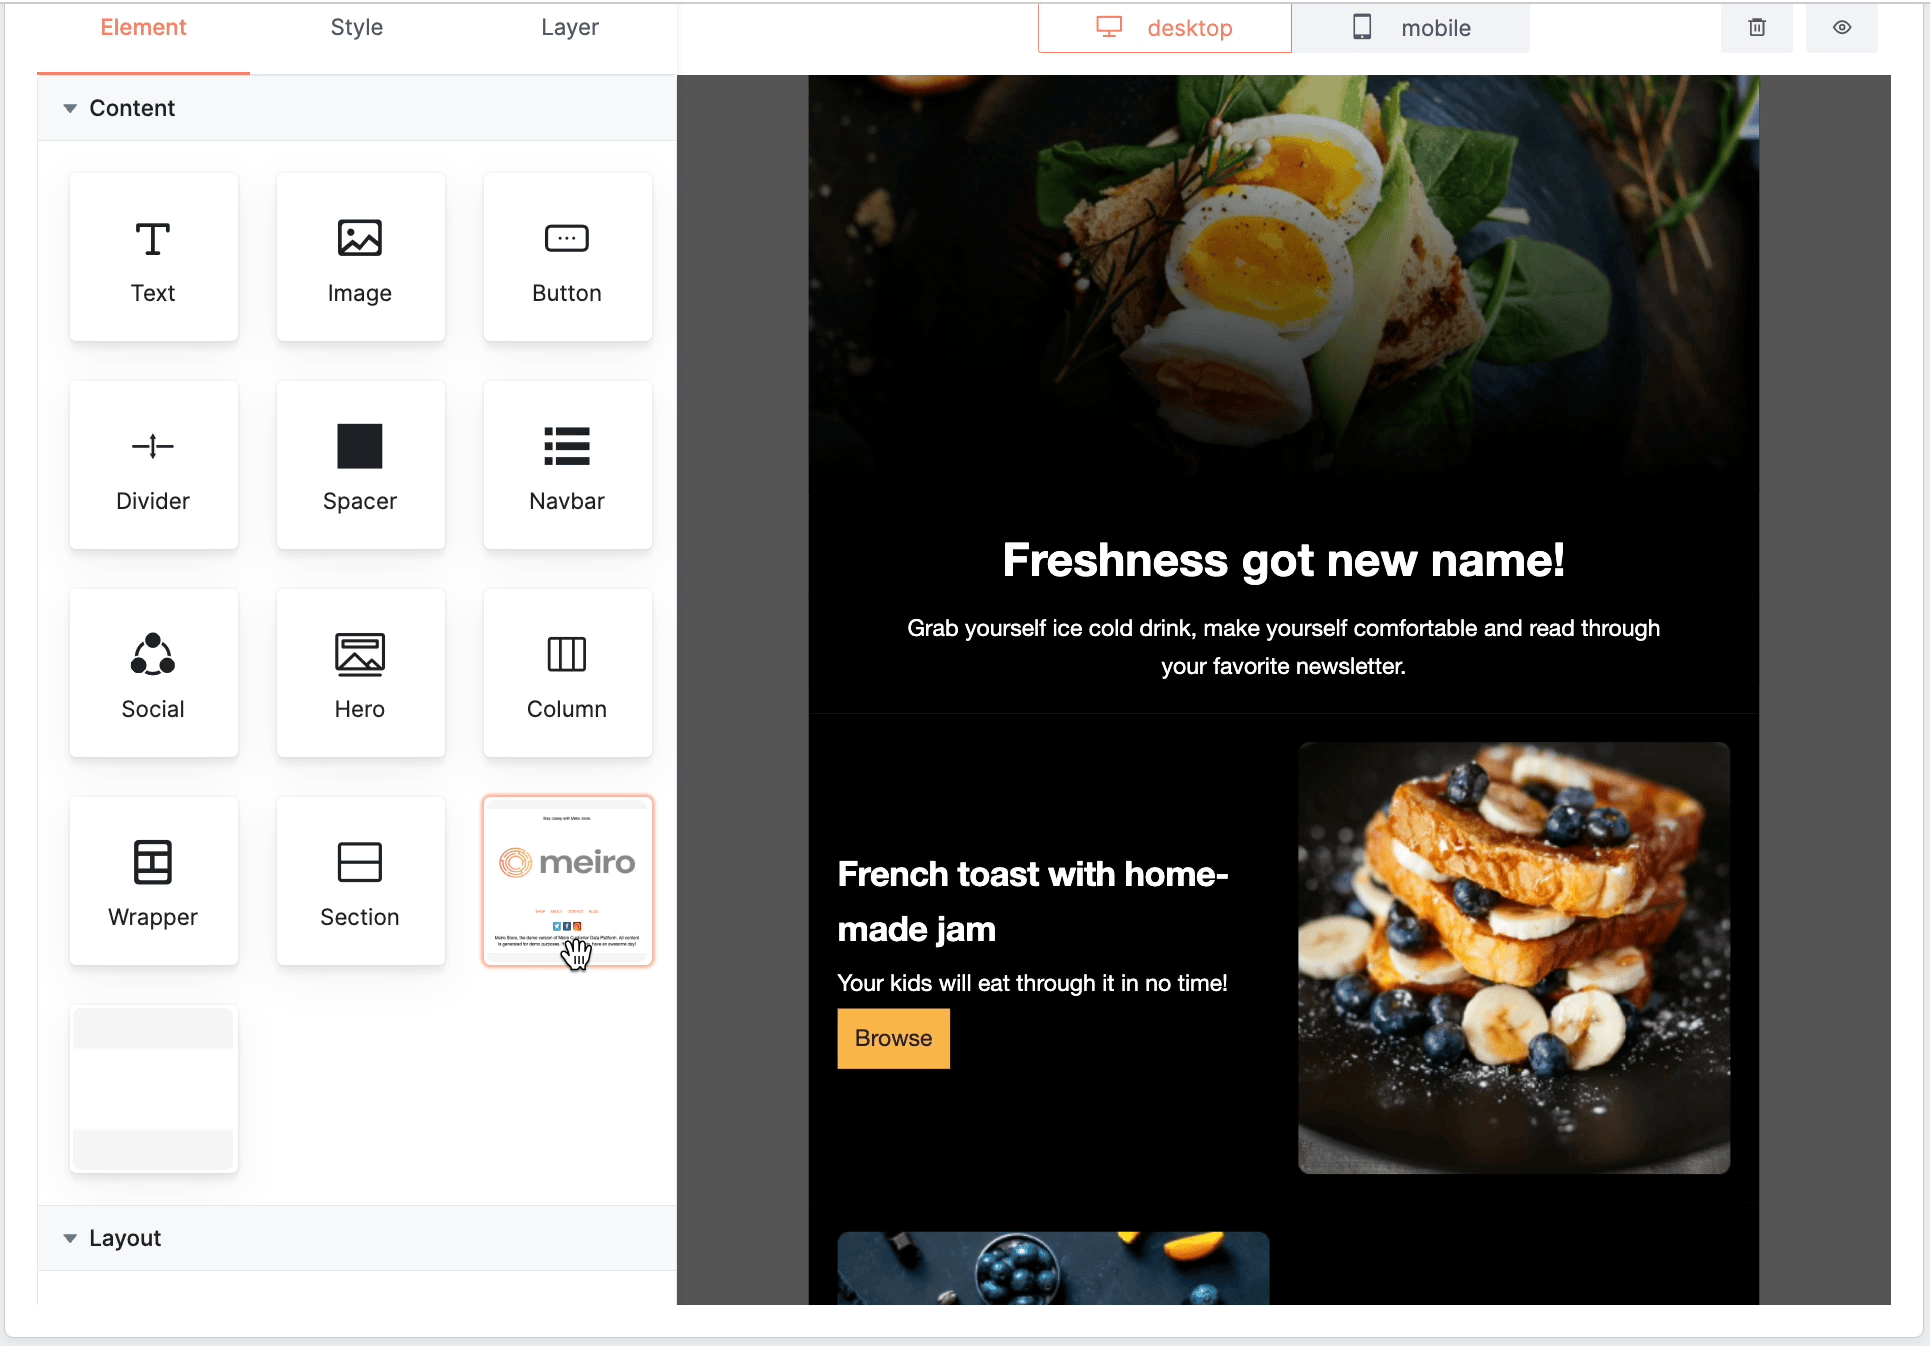
Locate all created custom blocks at the end of the list in the “Content” section of your Email campaign or Template. Use intuitive drag-and-drop functionality to seamlessly integrate custom blocks into your templates or campaigns.
When using this custom block in an email campaign, users will have the opportunity to change the text, links, images, or any other elements that were specified with properties. Any changes you make will only affect that particular campaign. If you want to change the custom block that will be applied globally, you can make adjustments under the Channel/Custom Blocks tab.
Remember: deleting a custom block from the Channel/Custom Blocks tab will not affect campaigns or templates using it.