Attributes setup
Entities setup is usually done by the Meiro team.
In the Administration/Entities/Attributes tab, it is possible to set attributes that will be used through Meiro Business Explorer. A full list of attributes will be visible to users in the Data tab/Library/ Attributes tab.
1. Create an attribute
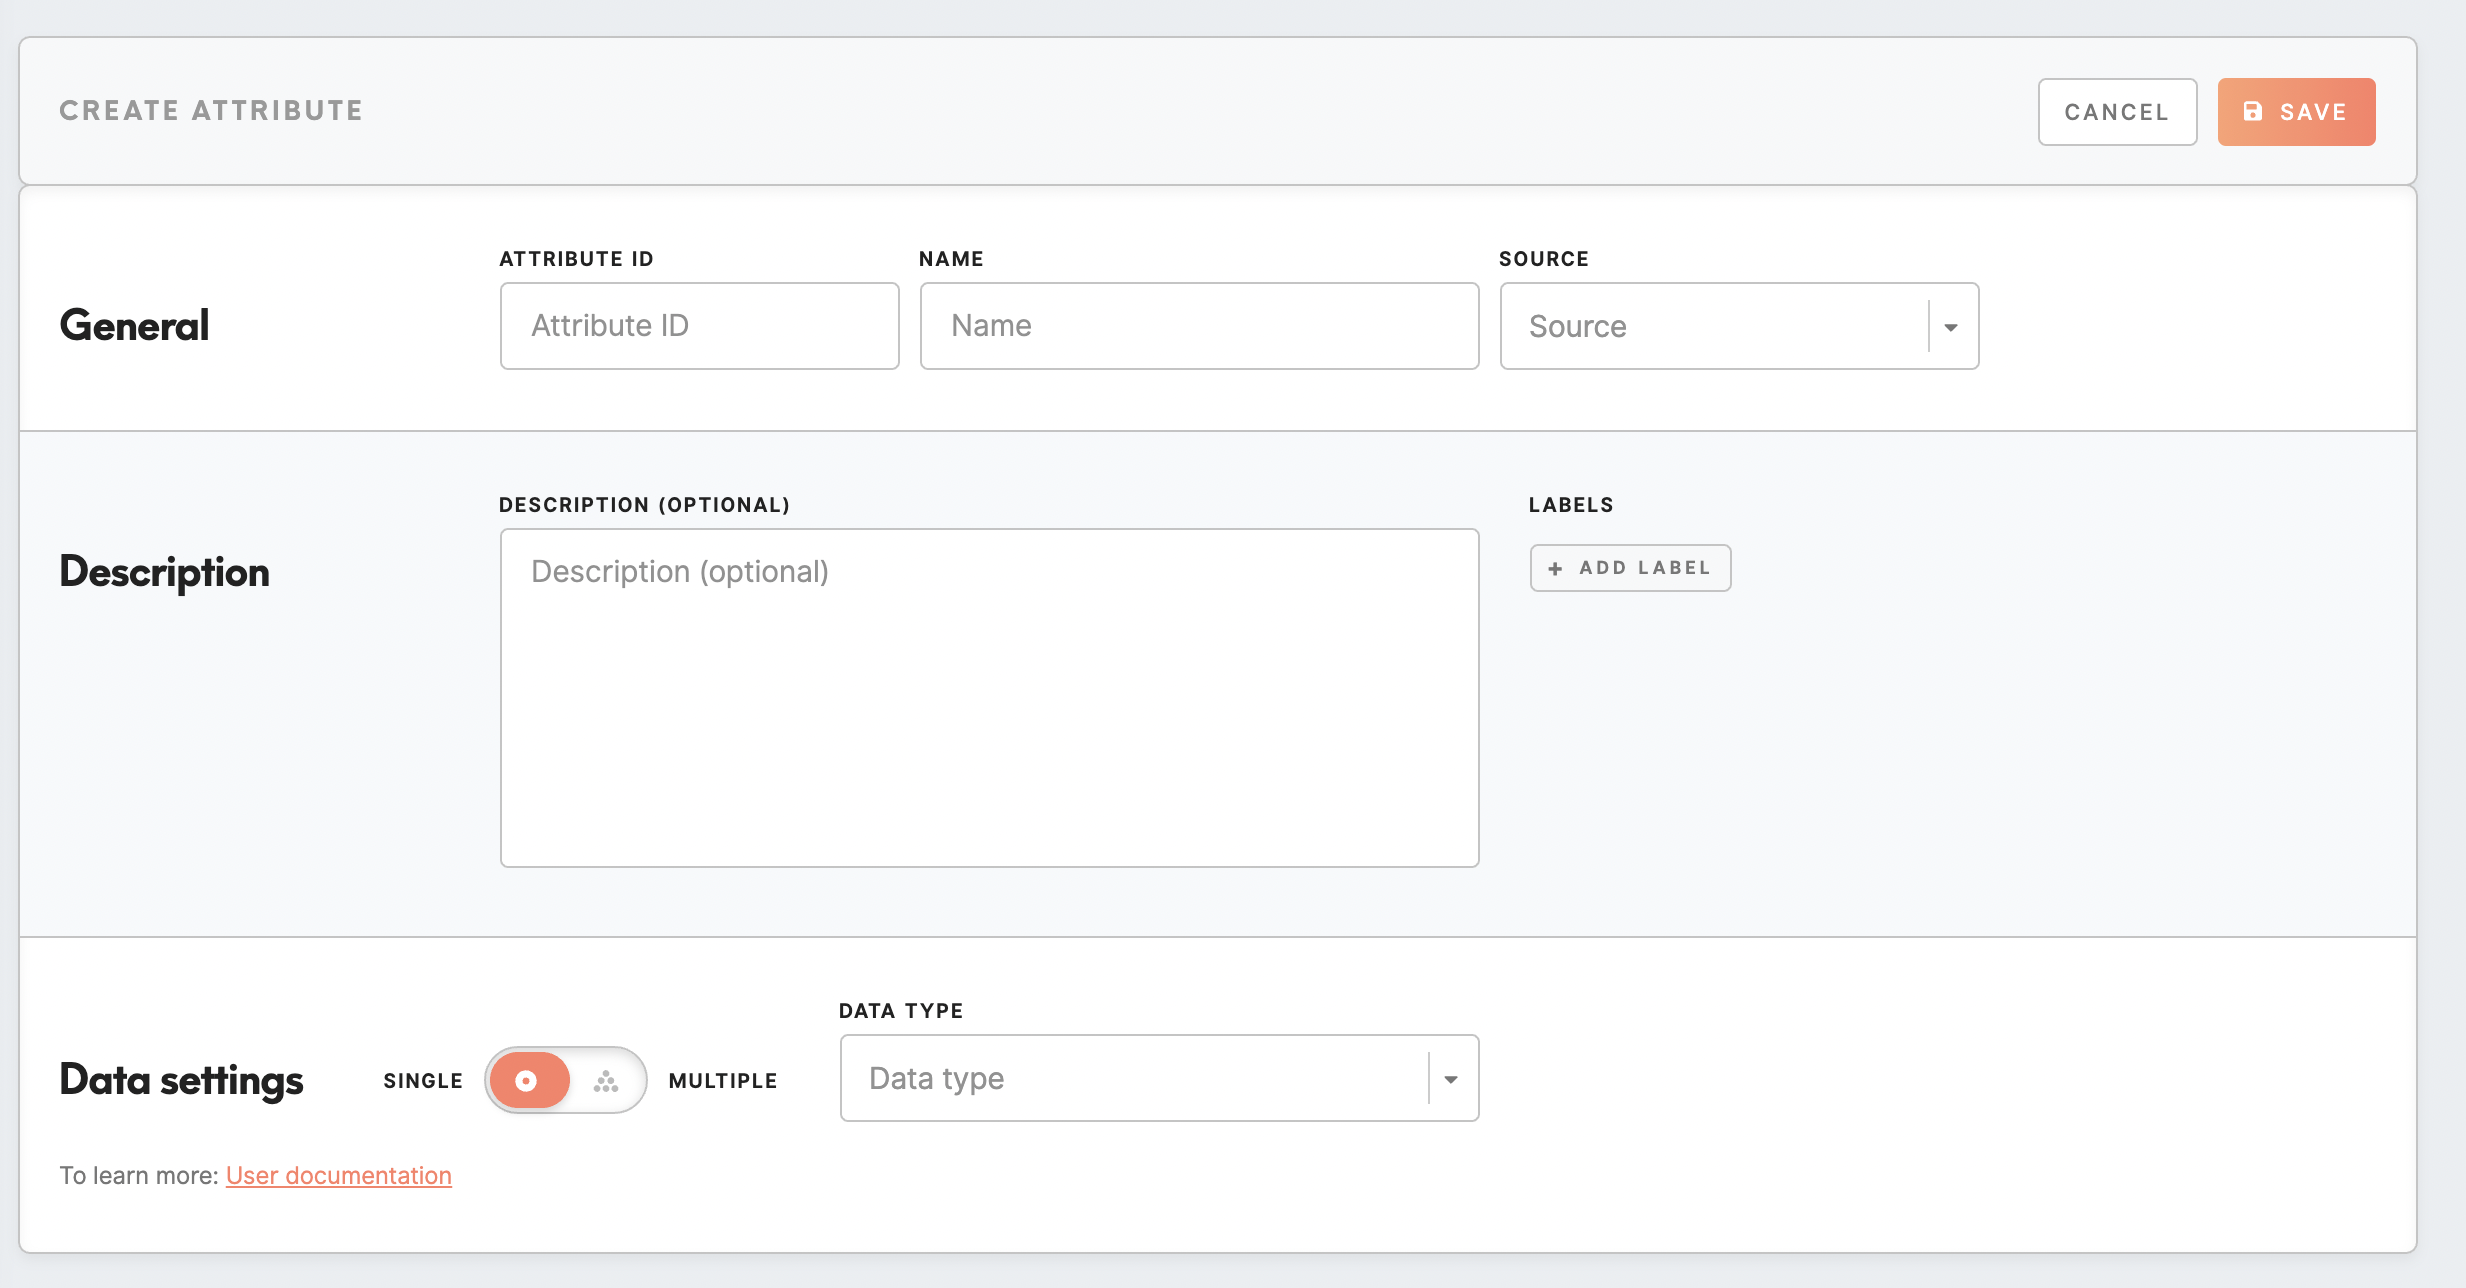
To create an attribute, please click on the Create Attribute button and fill out the form.
|
General |
|
|
Attribute ID (required, not editable later) |
Insert a unique identifier of the attribute, attribute ID. It can not be the same as any other attribute. It is needed for further All operators on the string are case-insensitive. Attribute ID will also be visible under the attribute's name in the Data Library tab. It is possible to search for the attribute by its ID. |
|
Name |
Name your attribute. The name will be visible across Meiro Business Explorer. If |
|
Sources (not editable later) |
Pick the right data source for this attribute. It will not be possible to edit it later. |
|
Description |
|
|
Description |
It is an optional field to draw a description of an attribute. A list of attributes and descriptions will be visible within the Data |
|
Labels |
Assign the right label to your attribute. Labels help to manage attributes across the Meiro interface. Learn more: To learn about labels, please go to this article. |
|
Data Settings In the Data Settings section, you can set:
Warning: After saving those fields it will not be possible to edit them. To make a change after saving attributes would need to be hidden and a new one created. |
|
|
Single/ Multiple |
It defines if the attribute can or can not hold single/ multiple values. The "single" attribute will always have exactly one value per customer, and "multiple" can have multiple values per customer. |
|
Data type |
Pick the right data type for your attribute. For compound data types are mandatory to specify:
|
|
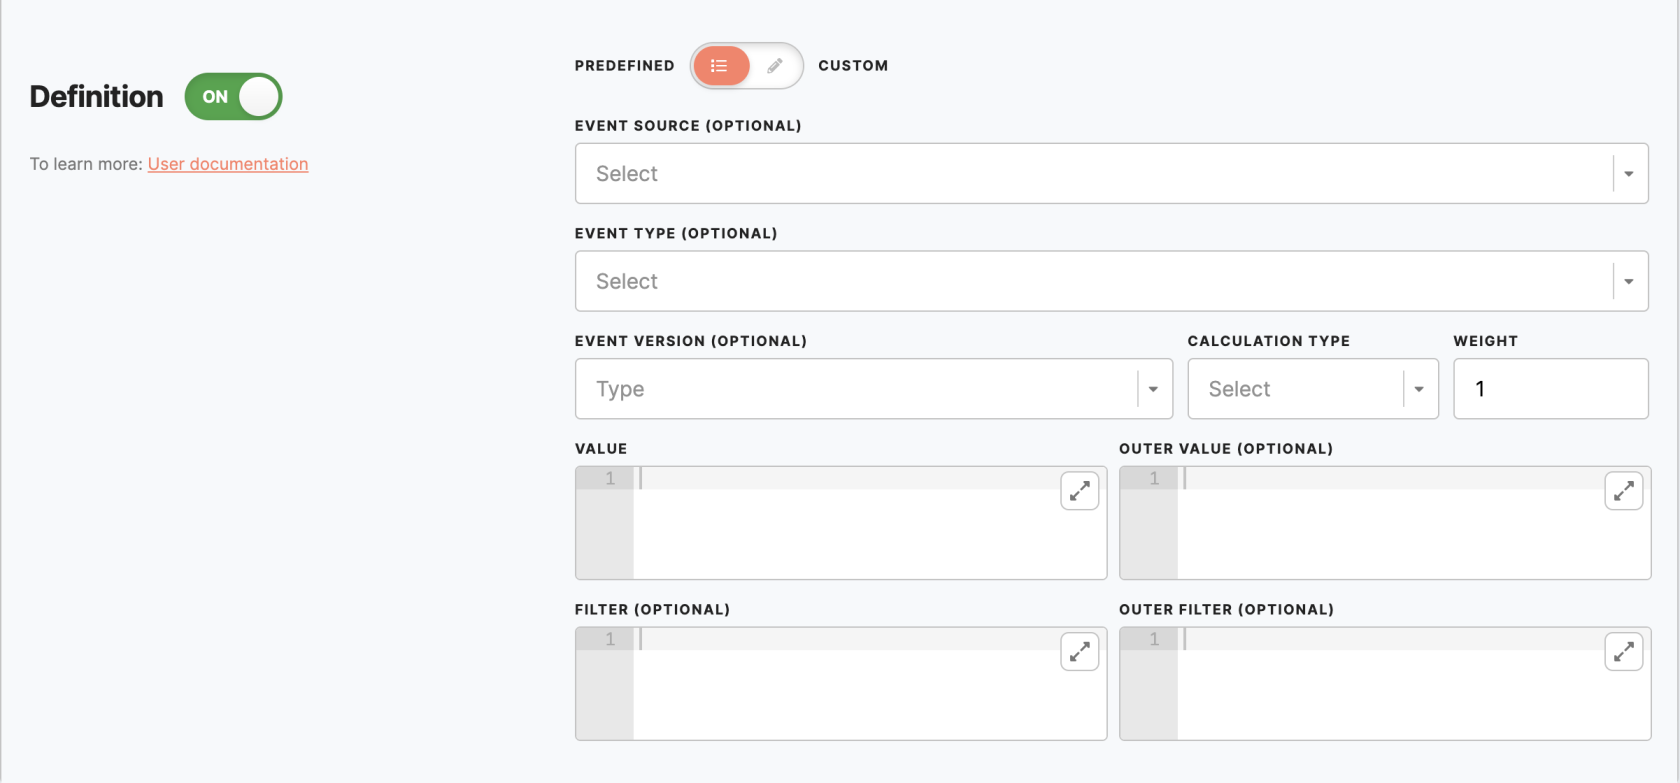
Definition The definition of an attribute dictates how the value of the attribute for a customer should be calculated. The calculation result should be in the correct form to be in check with the data type. You have at your disposal several predefined calculations like most frequent, count, list, min, max, avg, and least frequent. On the other side, you can set up a totally custom attribute using SQL queries. |
|
|
Predefined |
Event source: Select on what sources this attribute will be calculated, select from the drop-down list. If left empty, the attribute will be calculated from all sources.
Event type: Select on what event types this attribute will be calculated, select event type from the drop-down list. If left empty, the attribute will be calculated from all event types from the selected sources.
Event version: Insert event version. It is possible to insert a single version or multiple versions. If left empty, the attribute will be calculated from all versions of the selected events.
Calculation type (required): Select calculation type from the drop-down list (for example least/ most frequent, sum etc.) Weight (required): By default 1.
|
|
Custom |
The custom option allows managing attribute definition through a SQL query. |
Remember: Newly created attributes will appear with the New badge that will stay for the next 7 days.
2. Edit/show-hide attribute
You can edit attributes at any time and if necessary, you have the option to hide an attribute from the Meiro interface.
It is not possible to edit Attribute ID, Sources, and Data Settings. If changes are needed for those, It is recommended to hide the incorrect attribute and create a new one.


