Attributes setup
Entities setup is usually done by the CDP technical consultant.
In the Administration/Entities/Attributes tab, it is possible to set attributes that will be used through Meiro Business Explorer. A complete list of attributes will be visible to users in the Data Library/ Attributes tab.
Attributes marked with the ‘system’ tag cannot be edited or hidden. However, you can still attach any labels if needed. To create a new attribute based on an existing system attribute, use the 'Copy' button on the detail page
1. Create an attribute
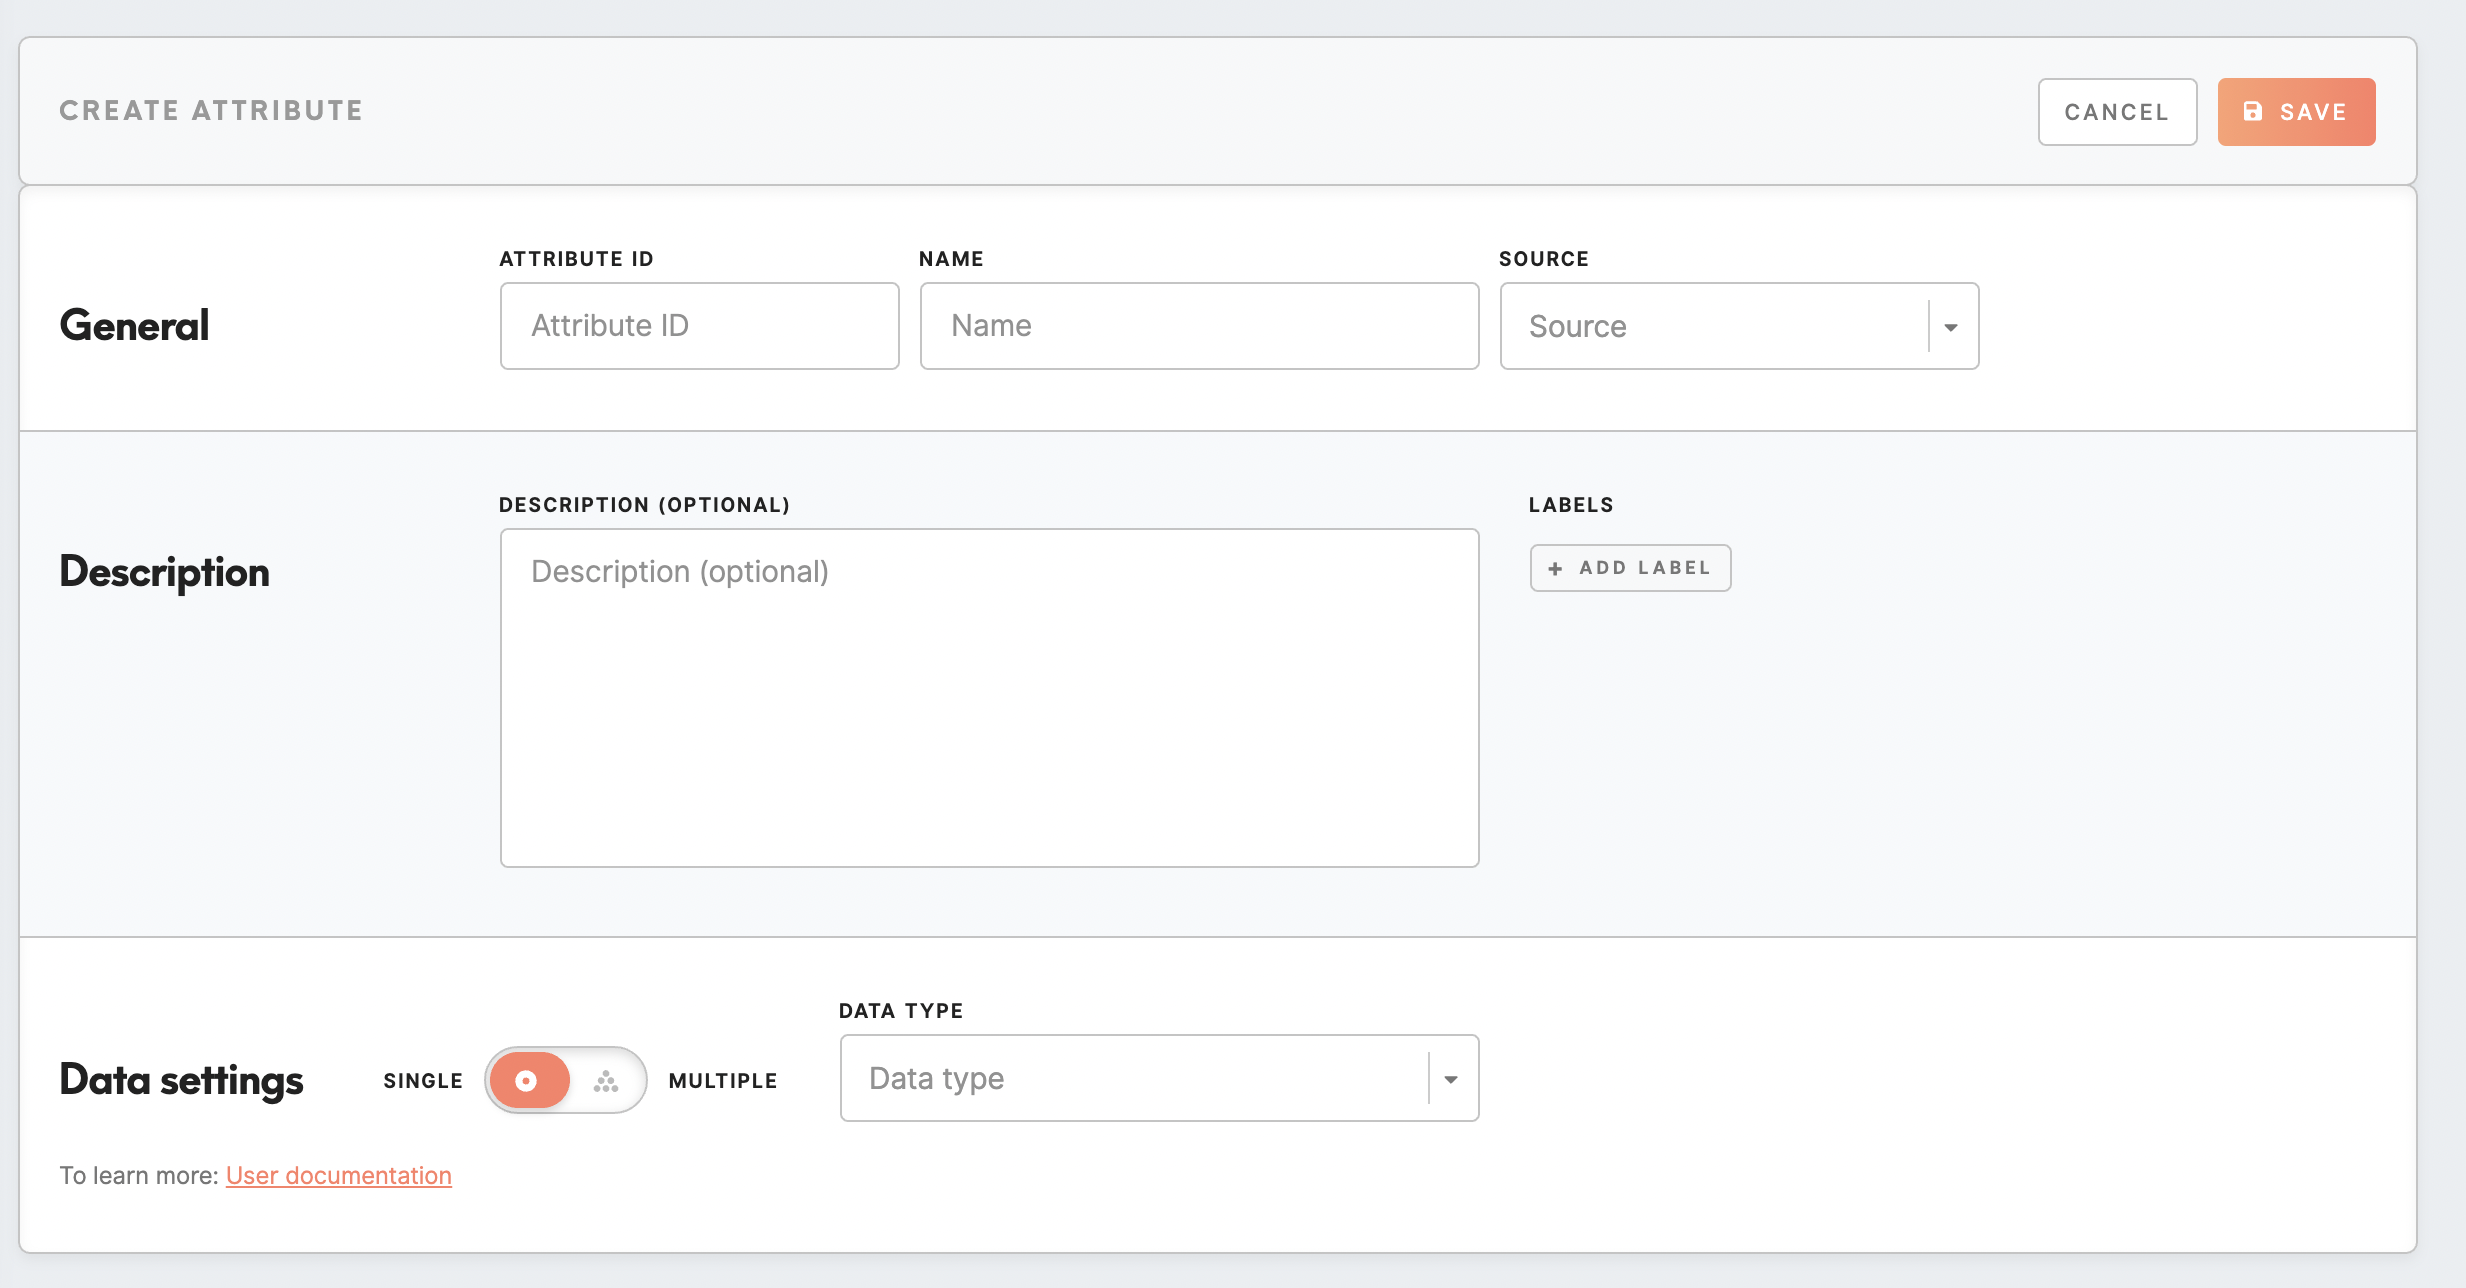
To create an attribute, please click on the Create Attribute button and fill out the form.
General
|
Attribute ID (required, not editable later) |
Insert a unique identifier of the attribute, attribute ID. It can not be the same as any other attribute. It is needed for further reference, and it will be visible in the Meiro Integrations in exports as a column name. All operators on the string are case-insensitive. Attribute ID will also be visible under the attribute's name in the Data Library tab. It is possible to search for the attribute by its ID. |
|
Name |
Name your attribute. The name will be visible across Meiro Business Explorer. If needed, it is possible to edit the name later on. |
|
Sources (not editable later) |
Pick the right data source for this attribute. It will not be possible to edit it later. |
Description
|
Description |
It is an optional field to draw a description of an attribute. A list of attributes and descriptions will be visible within the Data Library/ Attributes tab. |
|
Labels |
Assign the right label to your attribute. Labels help to manage attributes across the Meiro interface. Learn more: To learn about labels, please go to this article. |
Data settings
In the Data Settings section, you can set:
-
A single value (attribute for a customer will always have only 1 value) or multiple values.
-
Define the attribute as a single scalar value (number, string, boolean...) or compound (composed by dimensions. Each dimension has its own id, name, and scalar data type.)
Warning: After saving those fields it will not be possible to edit them. To make a change after saving attributes would need to be hidden and a new one created.
|
Single/ Multiple |
It defines if the attribute can or can not hold single/ multiple values. The "single" attribute will always have exactly one value per customer, and "multiple" can have multiple values per customer. |
|
Data type |
Pick the right data type for your attribute. For compound data types are mandatory to specify:
|
Definition
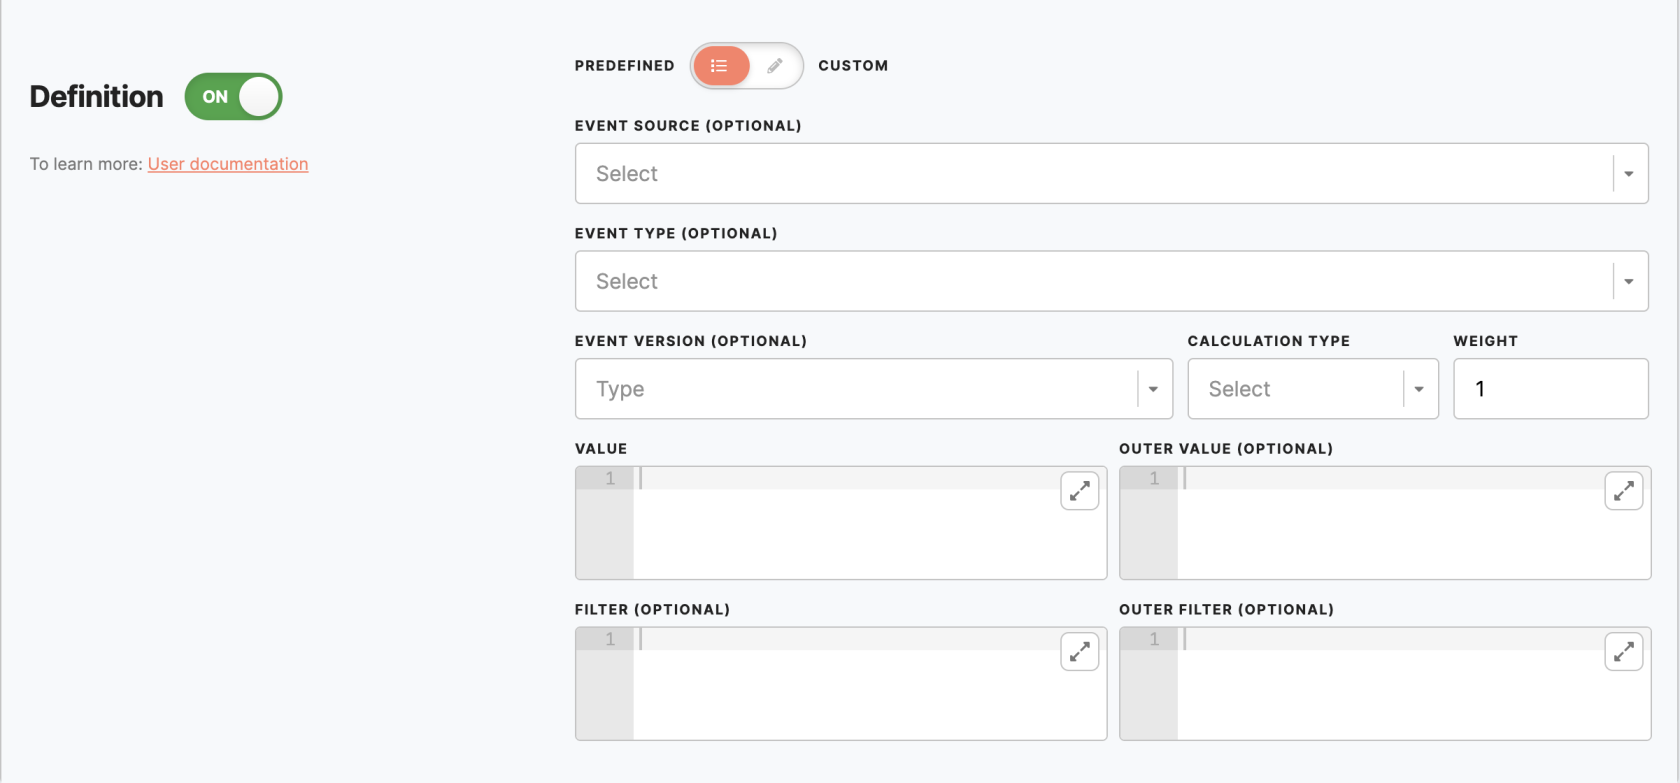
The definition of an attribute dictates how the attribute's value for a customer should be calculated. The calculation result should be in the correct form to be in check with the data type. You have at your disposal several predefined calculations like most frequent, count, list, min, max, avg, and least frequent. On the other side, you can set up a totally custom attribute using SQL queries.
|
Predefined |
Event source: Select on what sources this attribute will be calculated, select from the drop-down list. If left empty, the attribute will be calculated from all sources.
Event type: Select on what event types this attribute will be calculated, select event type from the drop-down list. If left empty, the attribute will be calculated from all event types from the selected sources.
Event version: Insert event version. It is possible to insert a single version or multiple versions. If left empty, the attribute will be calculated from all versions of the selected events.
Calculation type (required): Select calculation type from the drop-down list (for example, least/ most frequent, sum, etc.) Weight (optional): By default 1. In the cases where there are multiple "subevents" within a single customer event, the "weight" number becomes crucial as it addresses the issue of varying counts or weights for each subevent.
Value (required): put in any field transformation from the selected data source and event type. Outer value: Optionally, you can provide additional operations or transformations on top of the "Value" field. If left empty, the "value" string will be automatically populated. Operations can only be applied to the "value" field; other values would turn down plumbing. Filter: you can provide a filter that will be applied to the events. Outer filter: filter applied on top of the value. |
|
Custom |
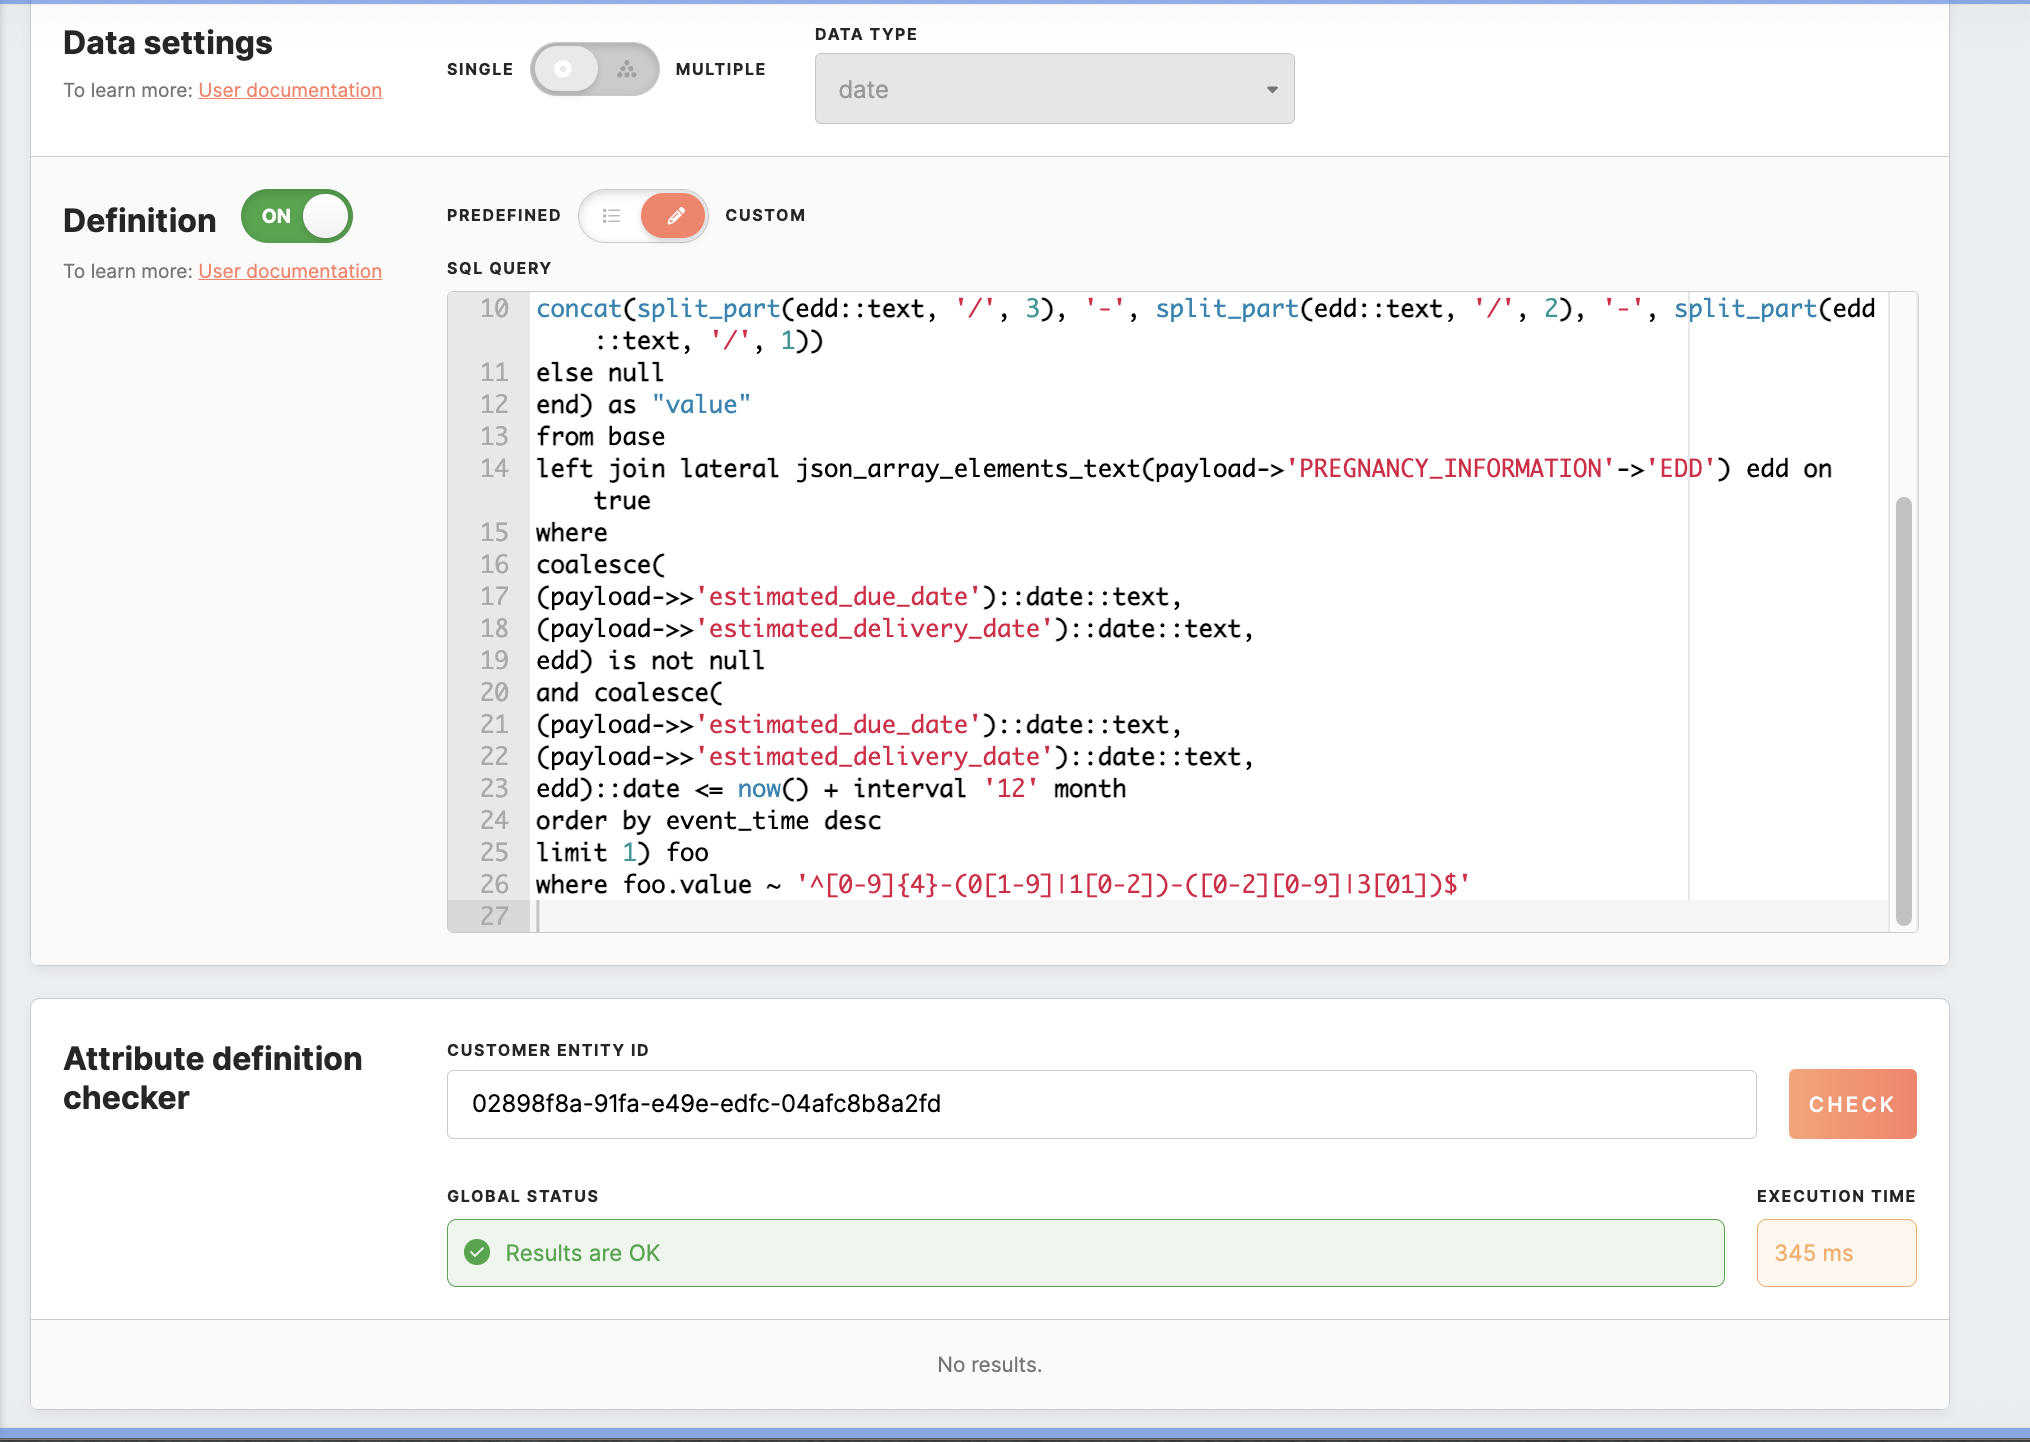
The custom option allows managing attribute definition through an SQL query. The query should extract data from table ‘base,’ and the result should have only one column named ‘value.’
|
Attribute definition checker
The Attribute definition checker allows you to validate and adjust prefilled attribute fields for accuracy before saving.
First, ensure that all required fields in the attribute’s form are filled out. After providing the profile ID, click the "Check" button to validate data for the specified profile. If any errors are detected during the validation, you will be promptly notified.
This enables you to make any necessary corrections before saving the attribute.
Remember: Newly created attributes will appear with the New badge that will stay for 7 days.
2. Edit/show-hide attribute
You can edit attributes anytime; if necessary, you can hide an attribute from the Meiro interface. When an attribute is hidden, it is not calculated anymore in plumbing.
Attributes marked with a system tag cannot be edited or hidden.
It is not possible to edit Attribute ID, Sources, and Data Settings. If changes are needed for those, It is recommended to hide the incorrect attribute and create a new one.
3. FAQs
|
Why do I sometimes encounter both "results are ok" and "no results" when validating an attribute? What do these responses indicate? |
When you see both "results are ok" and "no results," it signifies that the query itself is well-formed and capable of producing results. However, the customer entity ID you've specified in the query does not have this attribute value. |


