Web banners: use cases library shopping intention
|
To work with 1. Meiro Events must be implemented. 2. Meiro Events API connection must be set in the Administration/ 3. The Channels/Web 4. For Additional prerequisites for this use case: For this use case to work, it is necessary to investigate with the Meiro team possible solutions and analyze data architecture.
Warning: If any attribute value needs to be used in a web banner template, the Audience API configuration must be updated by the Meiro team. More information is in the Audience API documentation. Reach the Meiro team. |
Warning: This use case covers data information stored in CDP Database as an attribute. Audience API is a tool that allows us to extract data from DB for particular customers. More information in the Audience API documentation. If you store data information in cookies or local storage, more code changes may be required. Turn to the Meiro team for help.
Remember: web banner is real-time personalized for each customer based on data extracted by the Meiro Audience API. Example below.
1. The use case that can be covered
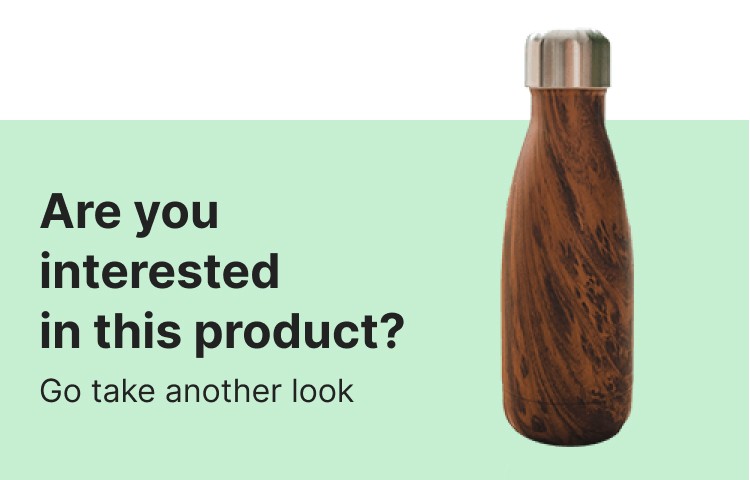
The goal of a shopping intention web banner template is to remind a specific audience about the products that they have recently browsed for but did not add to the shopping basket. The web banner will show the product based on the attributes previously settled by the user (e.g., the most expensive viewed product).
2. Example of conditions to set
Warning: Please keep in mind that each client may have a different setup. Below is just an example of the possible setup. For more details, please contact the Meiro team.
2.1 In the Custom Segments tab, create a segment that defines the audience for which the custom attribute, which is a prerequisite for this use case, is known. In this case, the web banner will be displayed for this specific audience (with respect to other conditions set within the web banner tab).
2.2 In the Web banners tab, insert a segment that this web banner should be displayed to (described in the point above).
Learn more: methods of inserting segmented audience in the web banner conditions.
2.3 Define when a web banner should be displayed with additional conditions (e.g., on which URLs, devices, etc.)
3. Variables
Variables that are highlighted in the HTML code are dependent on the structure of the response to the HTTP condition, and it is possible to adjust them to custom use cases.
- var getProductFromResponse - is a function that will get data from the audience API and return, for example, image, name, price, and product URL to the web banner. It can be fully customized depending on what data is stored under the audience API and needs to be verified for each use case.
4. HTML code
<!DOCTYPE html>
  <html lang="en">
    <head>
      <meta charset="UTF-8" />
      <meta name="viewport" content="width=device-width, initial-scale=1.0" />
      <style>
        body {
          margin: 0;
          font-family: sans-serif;
          color: #222222;
        }

        .banner {
          display: flex;
          flex-direction: column;
          align-items: center;
          box-sizing: border-box;
          width: 100%;
          cursor: pointer;
          border-radius: 8px;
          padding: 15px;
          border: 1px solid #777777;
          background-color: white;
        }

        .text-container {
          align-self: stretch;
        }

        .text-container h1 {
          margin: 0;
          font-size: 20px;
          font-weight: 600;
        }

        .text-container p {
          margin-top: 5px;
        }

        #product-thumbnail {
          width: 100px;
          margin: 10px;
          border-radius: 4px;
        }

        #product-name {
          font-size: 12px;
          font-weight: 500;
        }

        #product-price {
          font-size: 14px;
          font-weight: 600;
        }

        .cta-button {
          height: 40px;
          border-radius: 20px;
          cursor: pointer;
          border: none;
          margin-top: 10px;
          padding: 0 20px;
          background-color: #fe7f66;
          color: white;
          font-size: 14px;
          font-weight: 600;
          transition: all 0.15s ease;
        }

        .cta-button:hover {
          background-color: #eb6c52;
        }
      </style>
    </head>
    <body>
      <div class="banner" onclick="goToProduct()">
        <div class="text-container">
          <h1>Are you interested in this product?</h1>
          <p>Go take another look!</p>
        </div>
        <img id="product-thumbnail" src="" />
        <div id="product-name"></div>
        <div id="product-price"></div>
        <button class="cta-button">View product</button>
      </div>
      <script>
        var attributeId = "most_expensive_viewed_product"
        var getProductFromAttributeValue = function (attributeValue) {
          const product = JSON.parse(attributeValue[0])
          return {
            name: product[1],
            price: product[2],
            url: product[3],
            imageUrl: product[4],
          }
        }
        var displayPrice = function (price) {
          return price + " €"
        }

        var productUrl

        if (window.parent && window.parent.MeiroEvents) {
          var bannerID = window.parent.MeiroEvents.getWebBannerId()
          var responses = window.parent.MeiroEvents.getWebBannerHttpResponses(bannerID)
          var product = getProductFromAttributeValue(
            responses[0].data.returned_attributes[attributeId],
          )

          document.getElementById("product-name").textContent = product.name
          document.getElementById("product-thumbnail").setAttribute("src", product.imageUrl)
          document.getElementById("product-price").textContent = displayPrice(product.price)

          productUrl = product.url
        }

        function goToProduct() {
          if (window.parent && window.parent.MeiroEvents) {
            window.parent.MeiroEvents.goToWebBannerUrl(productUrl)
          }
        }
      </script>
    </body>
  </html>

