Pop up web banners: quick tutorial step by step
|
Prerequisites
To work with web banners, first, they need to be set by the Meiro team: 1. Meiro Events must be implemented. 2. Meiro Events API connection must be set in the Administration/ Settings tab. 3. The Pop up web banners tab must be enabled by the administrator for your user role. |
1. Go to the Personalization tab/ Pop up web banners tab. Find here all pop up web banners that have been already set.
2. Click on the "Create button".
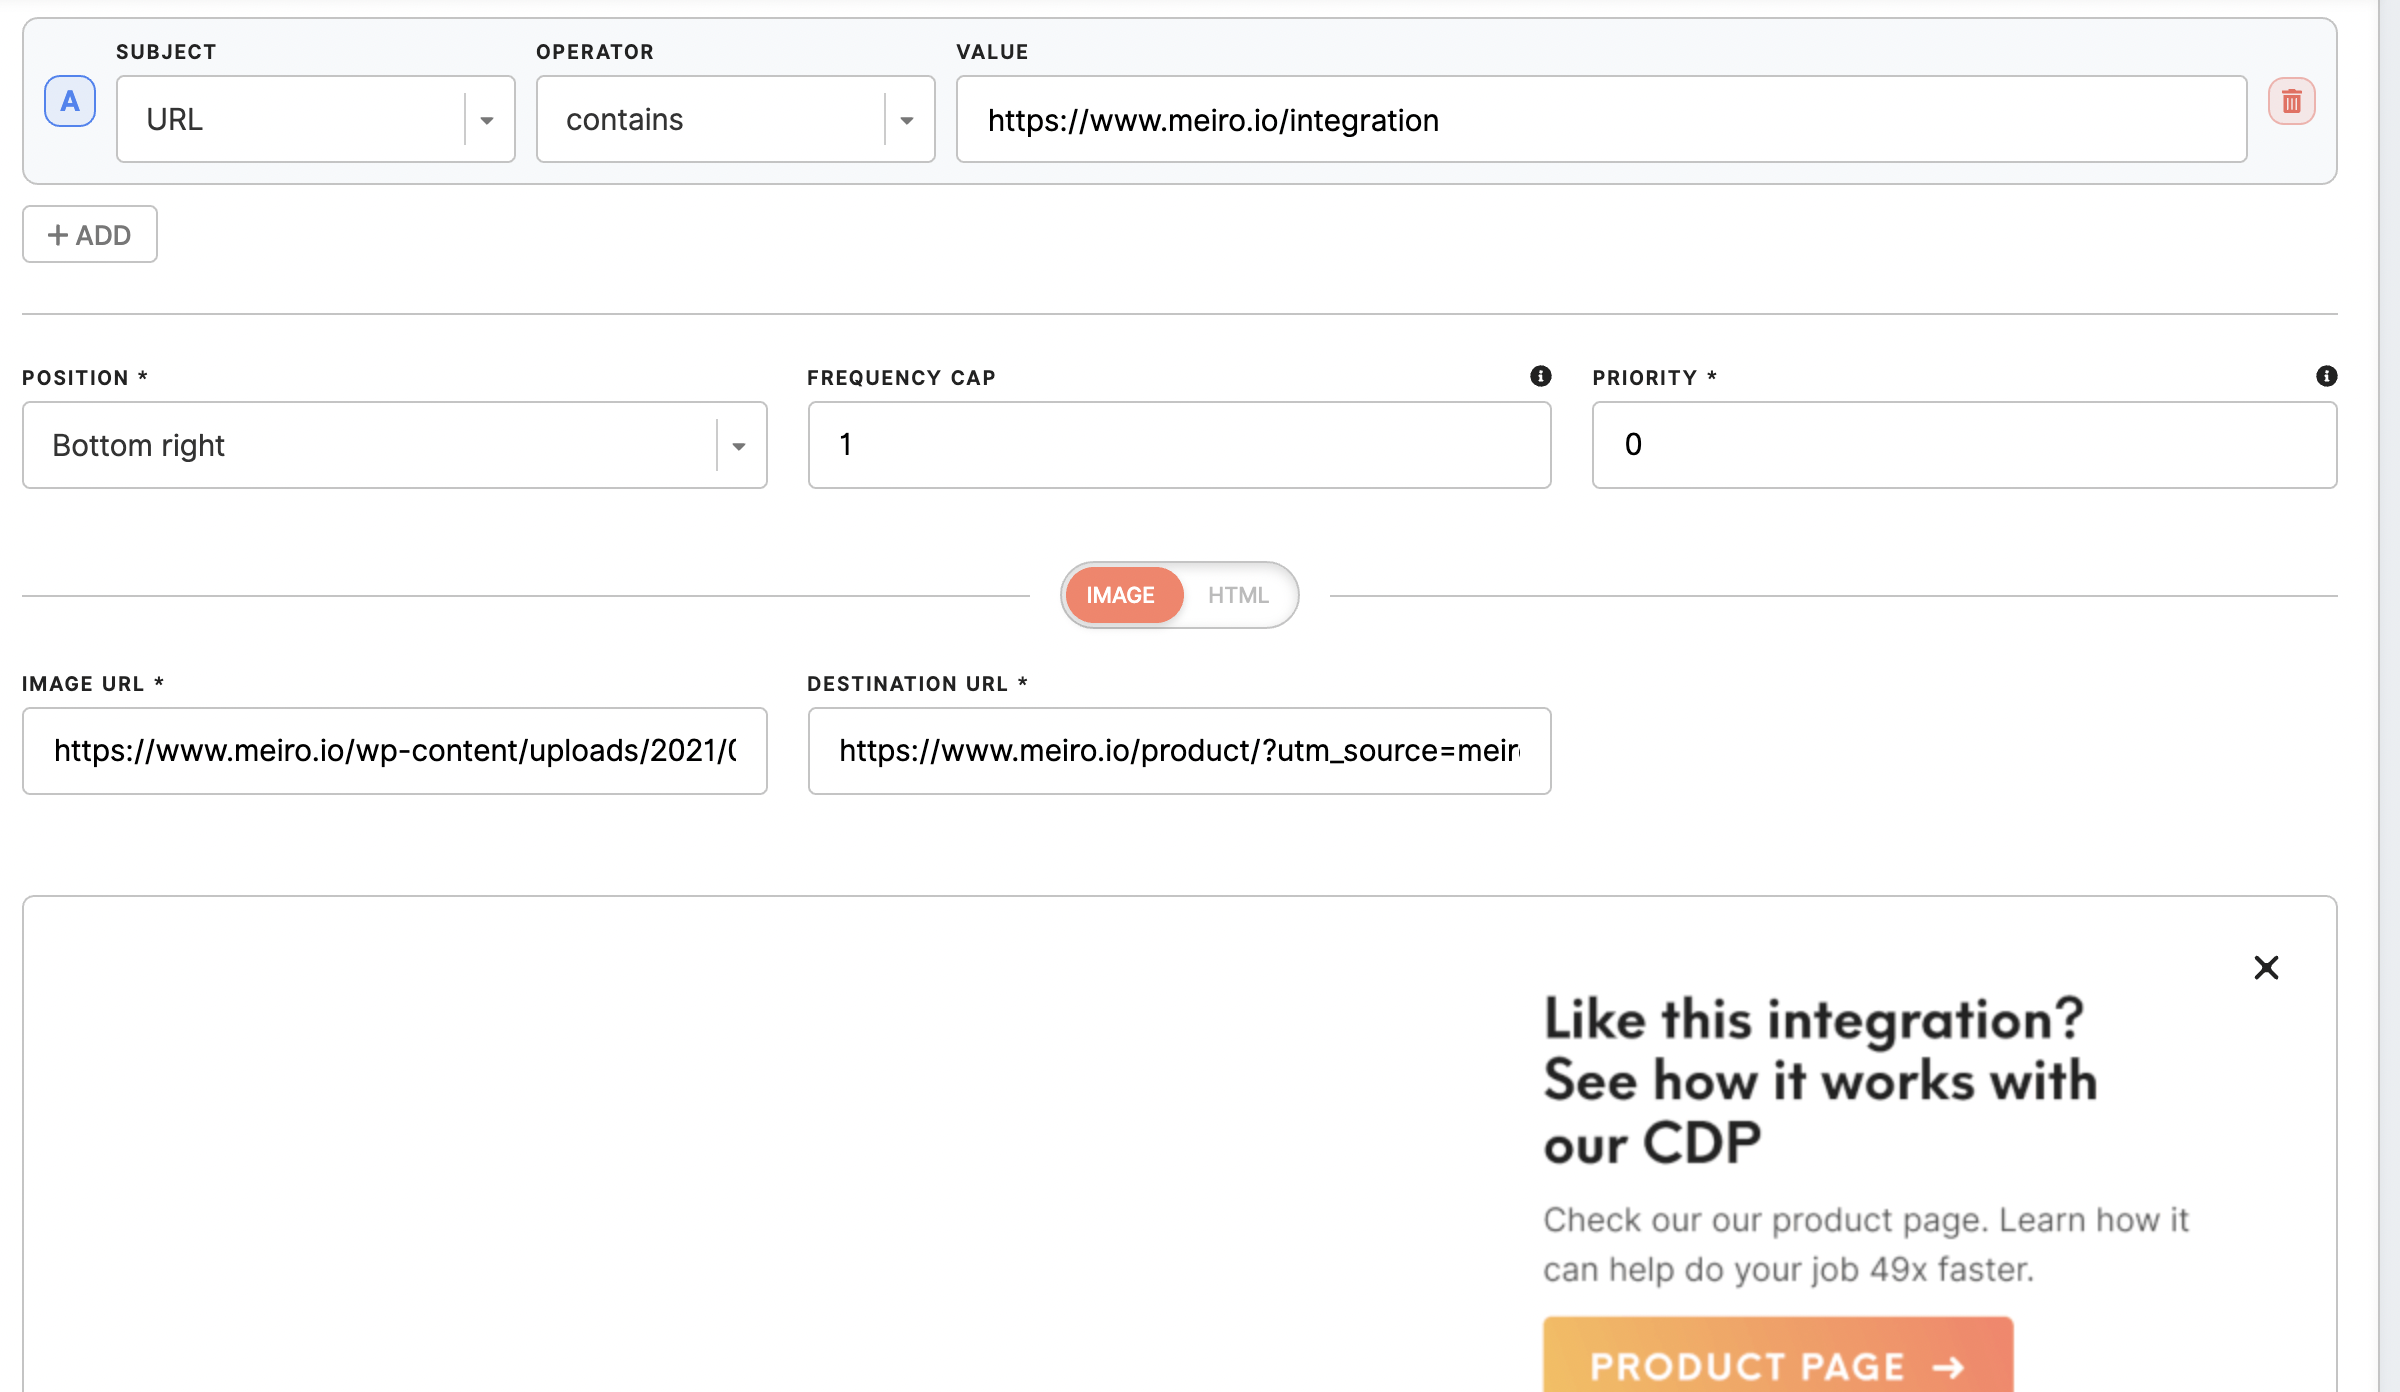
3. On the “create pop up web banner” screen, you can create a banner and set up the display conditions for it. On the bottom, you can see a preview of what your banner will look like on the website.
E.g.
Insert the URL on which one you wish to display a pop up web banner, link to a pop up web banner, and the destination where the user will be directed when clicking on a pop up web banner.
Learn more: pop up web banner form & conditions.
Learn more: web banners library.
4. To save changes, click the “Save” button. The banner will be immediately included in the Meiro SDK and can start being displayed to users.
Warning: the SDK is cached in the user’s browser with an expiration limit—this might be up to 30 minutes, depending on the setting for a particular instance. This means that if the user has just opened your website and received the SDK, they will not receive any changes to the SDK for the duration of the expiration interval. Therefore, while some users will see the new banner immediately, it might take some time for all users to see it.