Mobile Push channel configurations
The Administration/Configurations/Channels tab in Meiro Business Explorer enables businesses to configure channels for running campaigns. This guide provides a step-by-step tutorial on configuring the Mobile Push channel in Meiro Business Explorer.
|
Learn from this article: |
Generate Firebase JSON file
Before configuring the Mobile Push channel, it is required to set up a Firebase account and generate a Firebase JSON file. Below is the sequence of steps to follow for setting this up:
- Once you have created a Firebase project, you can set up an app in Firebase for iOS or Android.
- In the Firebase console, open Settings -> Service Accounts -> click ‘Generate new private key’.
3. Click on the ‘Generate key’ to download the ServiceAccount.json file. This file is required to allow Meiro Business Explorer to access your Firebase project.
Configure Firebase account on MBE
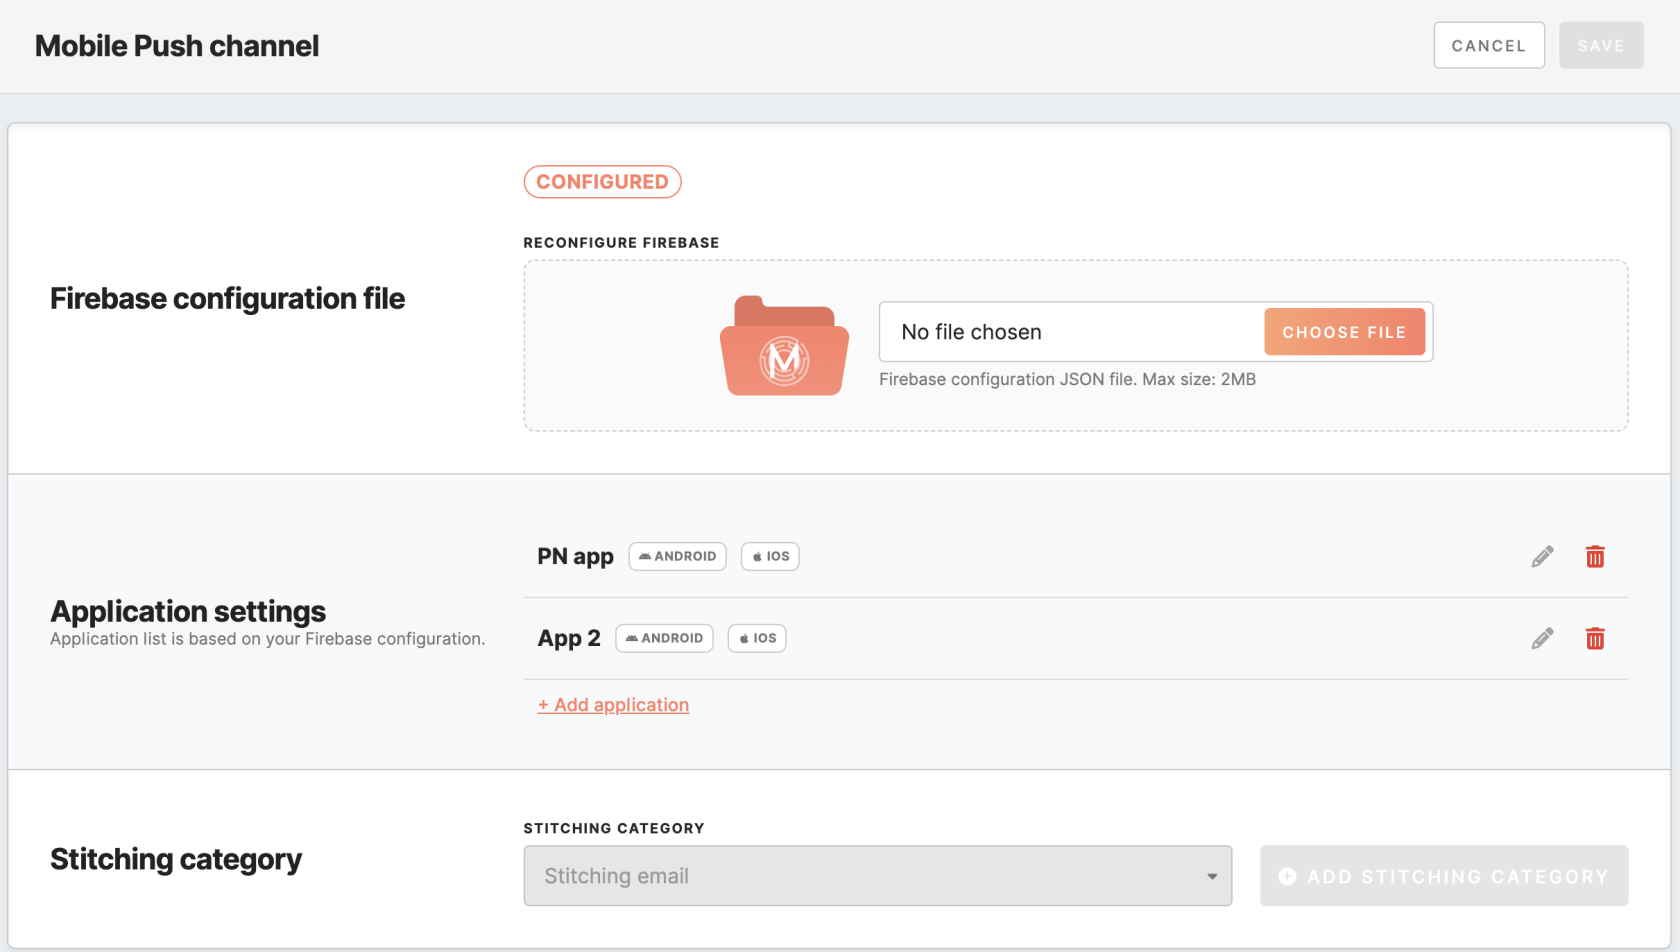
To set the Mobile Push channel, the user must first configure the Firebase account under the Administration/Configurations/Channels tab. To configure the Firebase account, please upload the ServiceAccount.json file from the previous step.
Application settings
To activate the Mobile Push channel, you must add at least one mobile app.
Adding application
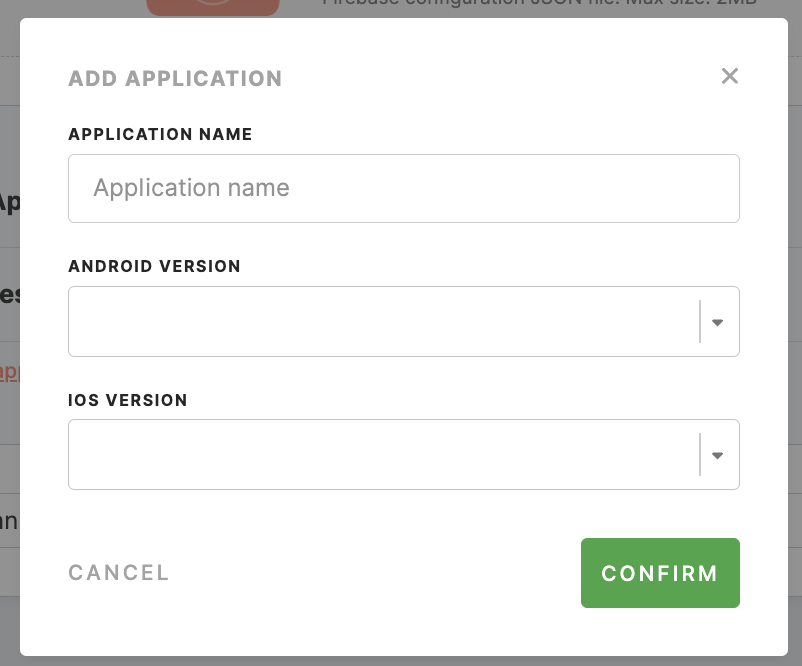
Click the “add application” button, which will take you to the mobile application settings page. Fill in the information in a new window.
|
Application name (required) |
This is the name of your mobile application. You must provide a unique and descriptive name for the application. |
|
Android version / iOS version (at least one is required, or both) |
The App ID is a unique identifier for your mobile app. It is provided by the platform you use to manage your mobile app, such as the Google Play Store for Android apps or the Apple App Store for iOS apps. |
Adding application
In this section, you can find a list of previously added mobile apps, each with the following details:
|
Name |
The name of the mobile app. |
|
Android/ iOS icon |
The icon appears if the mobile app is configured for Android, iOS, or both. |
|
Edit / Delete |
You can use these options to edit the app's settings or delete an application. |
Set stitching category
At the next stage, choose the stitching category related to the FCM registration token, keeping in mind that it cannot be changed later on. This stitching category helps to associate push notification-related events with the correct registration tokens. Omitting this step would make linking Mobile Push events with other events impossible.
You can either pick an existing category or create a new one using the “add stitching category” button if a suitable category is unavailable.
Remember: Be sure to use stitching rules based on the shared identifier user_id to link push notification-related events.


