Mobile Push: create form
The Personalization/ Mobile Push tab allows sending personalized push notification messages to a segmented audience originating from Firebase-enabled mobile applications.
|
Prerequisites for Mobile Pushes
To work with Mobile Pushes, first, they need to be set by the Meiro team:
- For Mobile Push, it is required to configure the "Firebase account" in the Administration/Accounts tab.
- Meiro Events must be implemented.
- It is required to set the “Registration token attribute ID” in the destination settings of Mobile Push.
- The administrator must enable the Mobile Push tab for your user role.
|
Mobile Push form
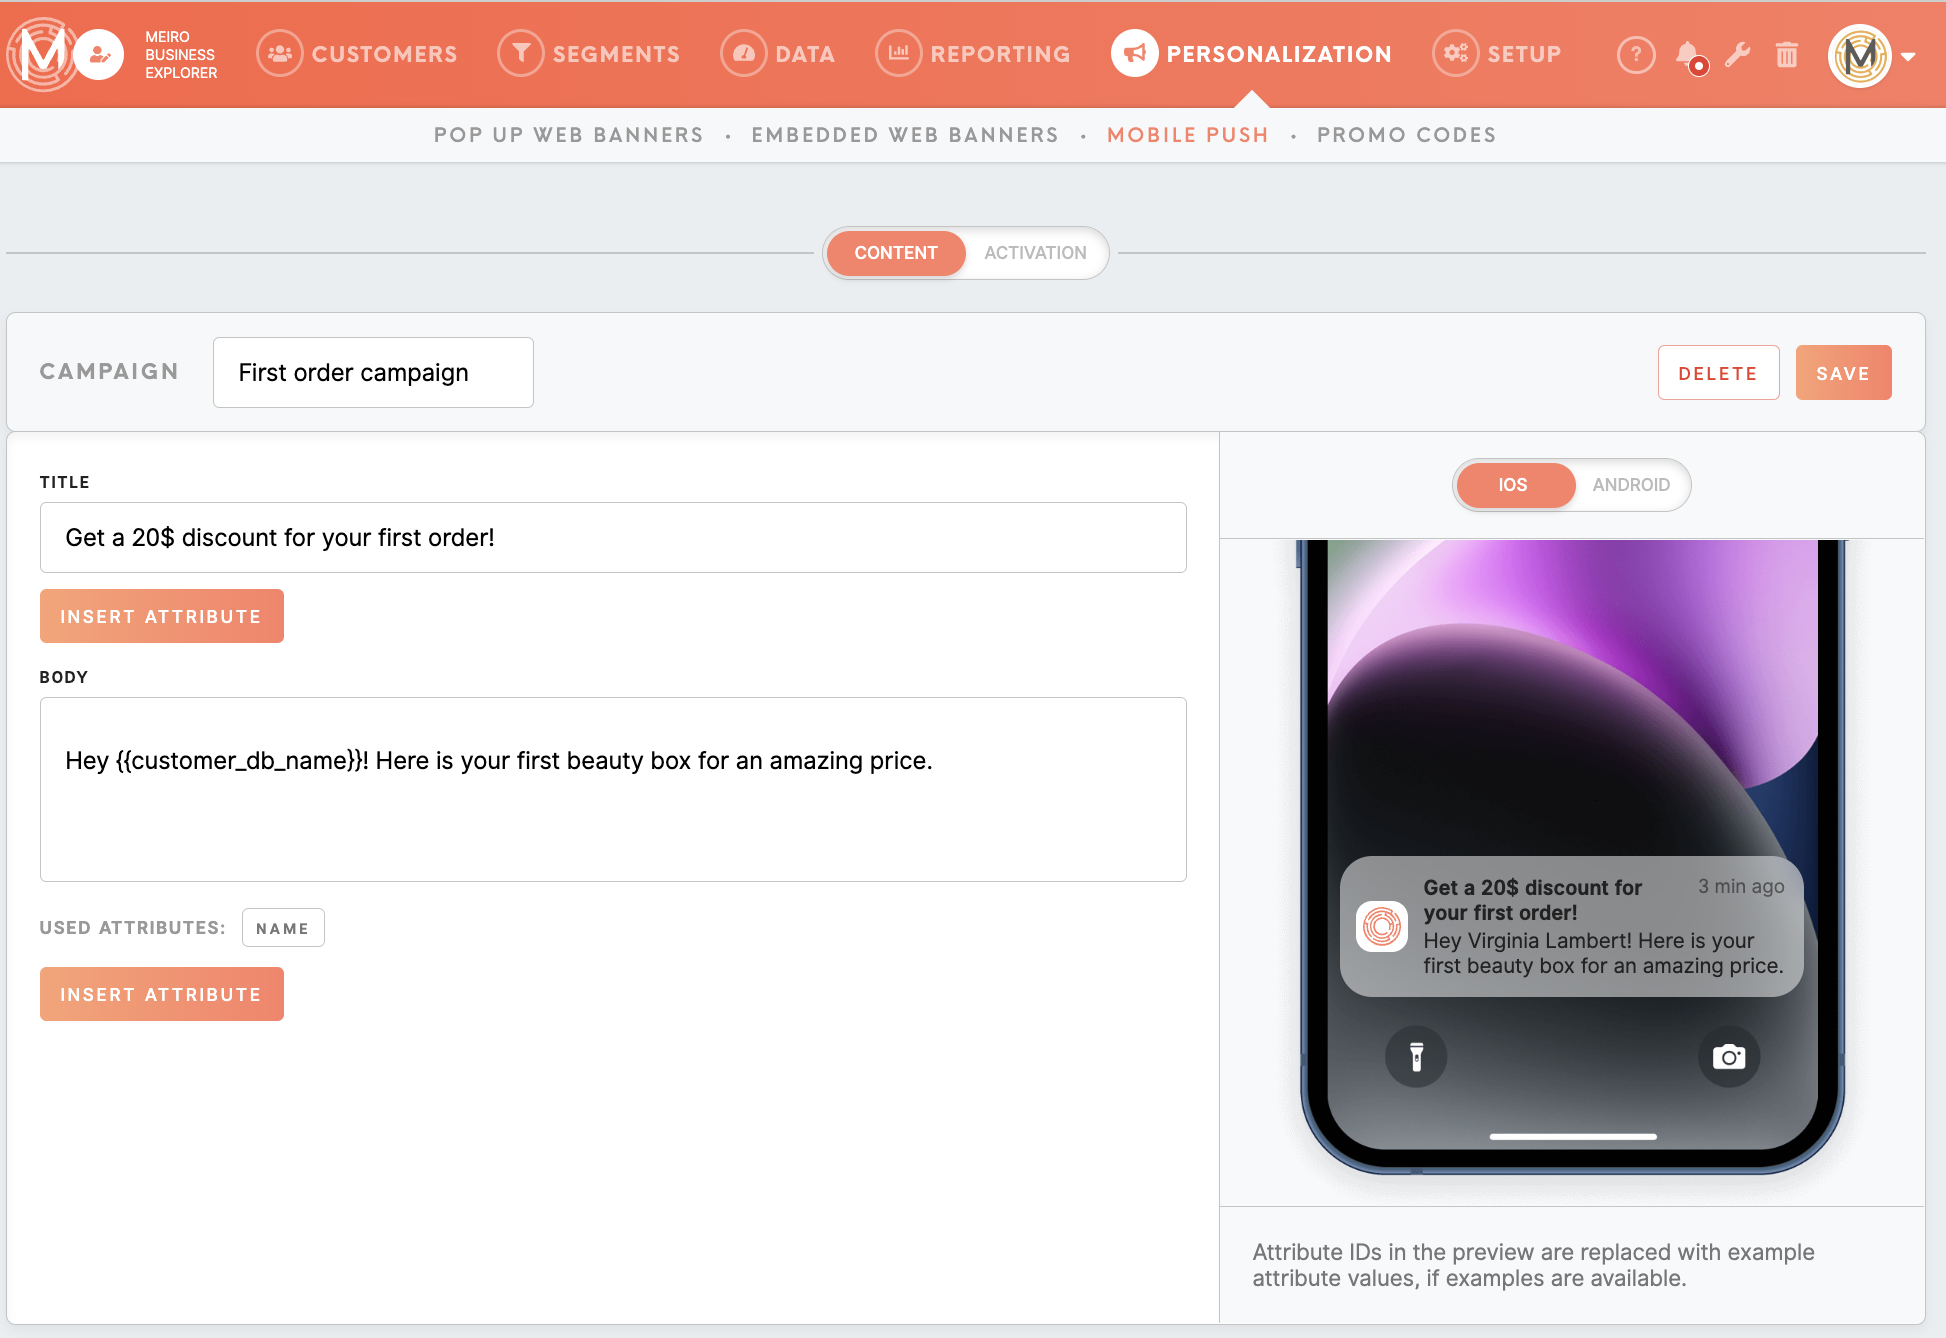
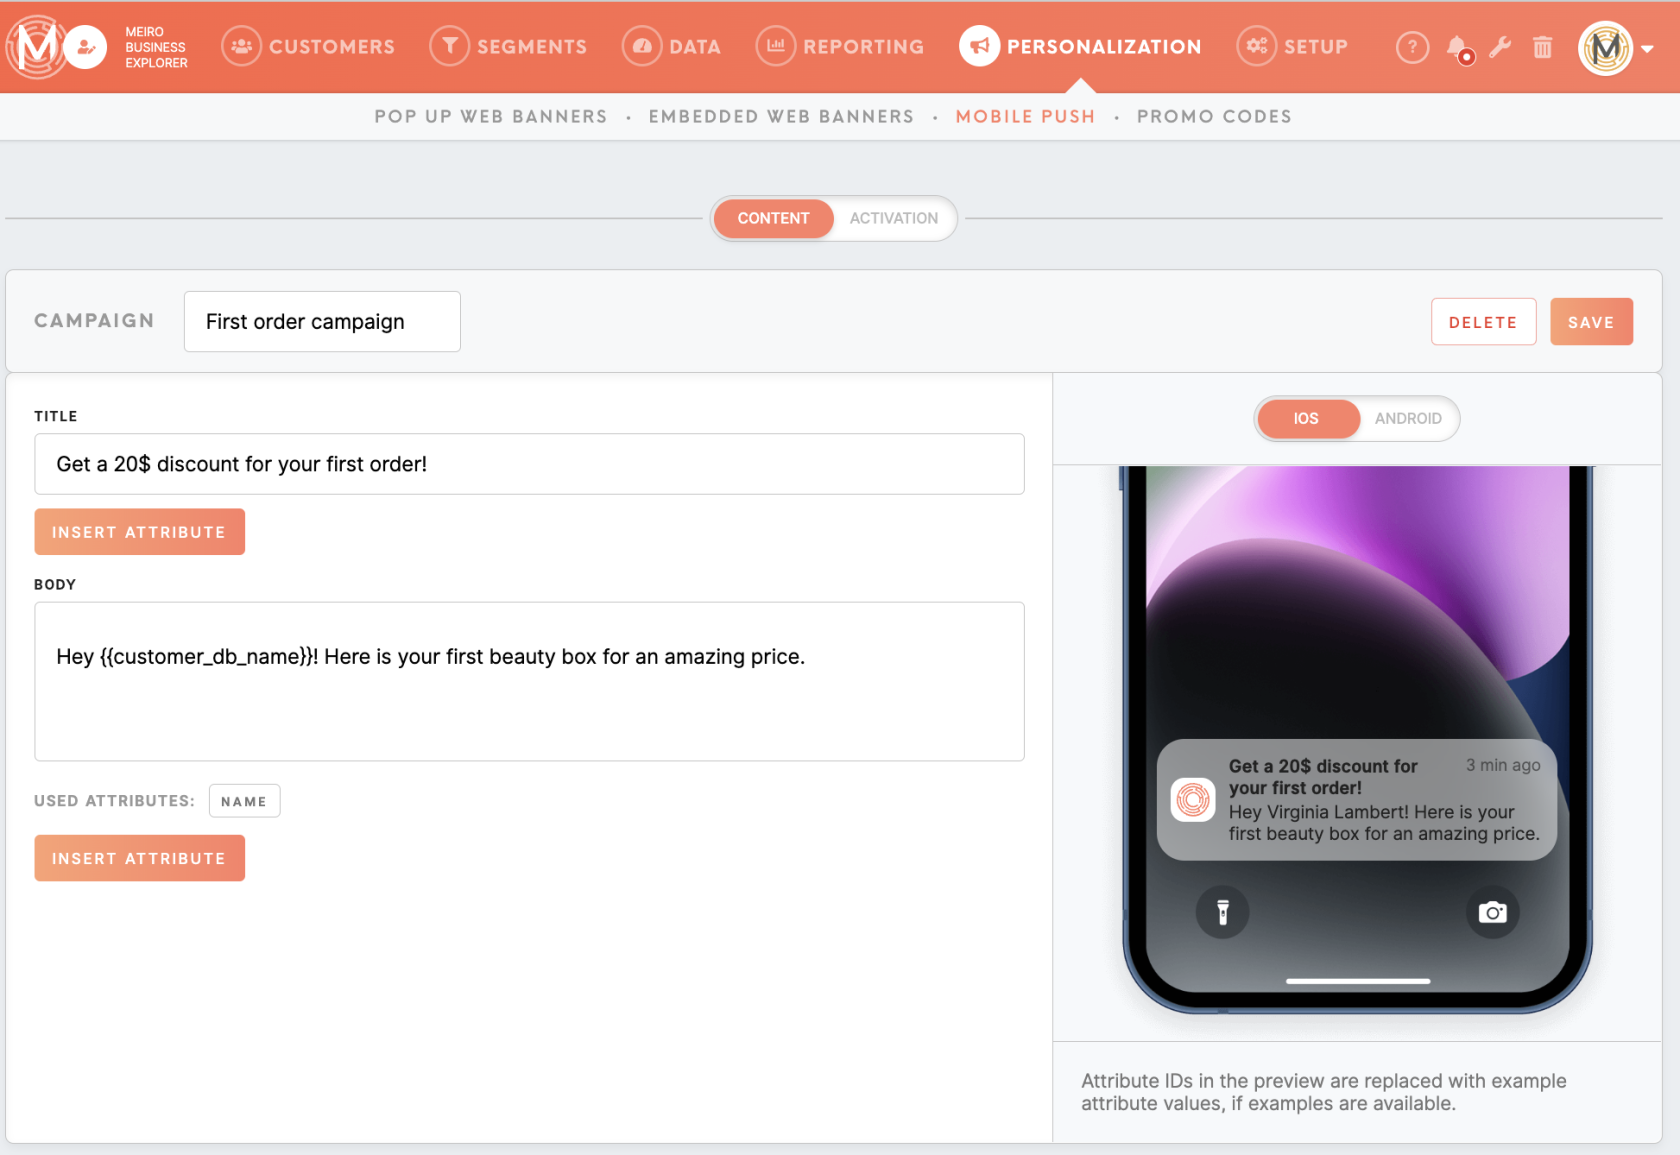
Clicking on the 'create Mobile Push' button on the top will bring you to push notification settings. It is possible to insert content for Mobile Push, select a segment or segments created beforehand, send a notification immediately to the customers, or set a schedule per segment.
How it works
1. Content tab
1.1 Content section
|
Campaign
(required)
|
Name of mobile push notification that will be visible in the list on the Personalization/ Mobile Push tab.
Remember: the name of the Mobile Push campaign is unique and can't be used in other notifications.
|
|
Title template
(required)
|
Title of Mobile Push that will be sent to the user's device. It is delivered in bold type to grab customer’s attention.
|
|
Body template
(required)
|
A message that the user wants to render as a notification to the customers’ mobile phones.
|
1.2 Attributes
To personalize a Mobile Push, you can use attributes in the title and body of the Mobile Push template. You may use the attribute picker under the ‘insert attribute’ button to refer to a needed attribute. It is allowed to use single-value attributes only, both scalar and compound.
The syntax for referencing attributes is as follows:
If an attribute value is undefined, it is rendered as an empty string.
Learn more: about use cases of Mobile Push, where examples of attributes are presented.
1.3 Preview section
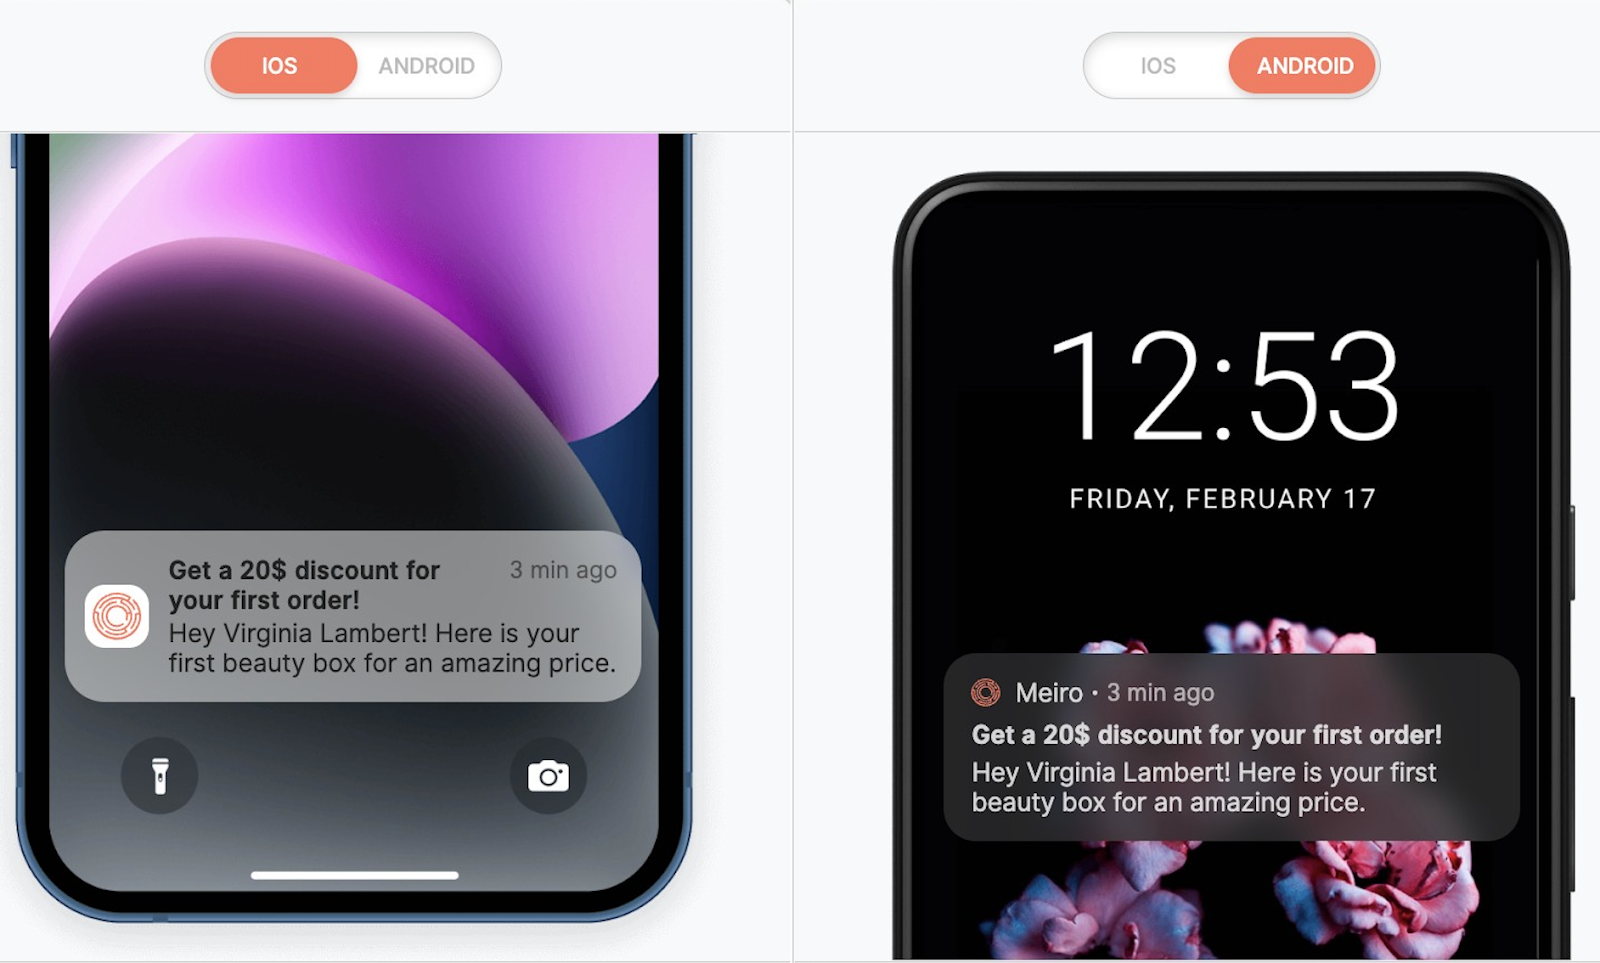
Users can see a dynamic text appearing on the preview on the right. It is possible to switch previews between iOS and Android.
Warning: If the PII attribute is used in the Mobile Push, it will be displayed on the preview to the user, regardless of the user’s right to see the PII attribute in “Attribute visibility protection”.
Click on the Save button to apply your setting to Mobile Push and enable the activation tab.
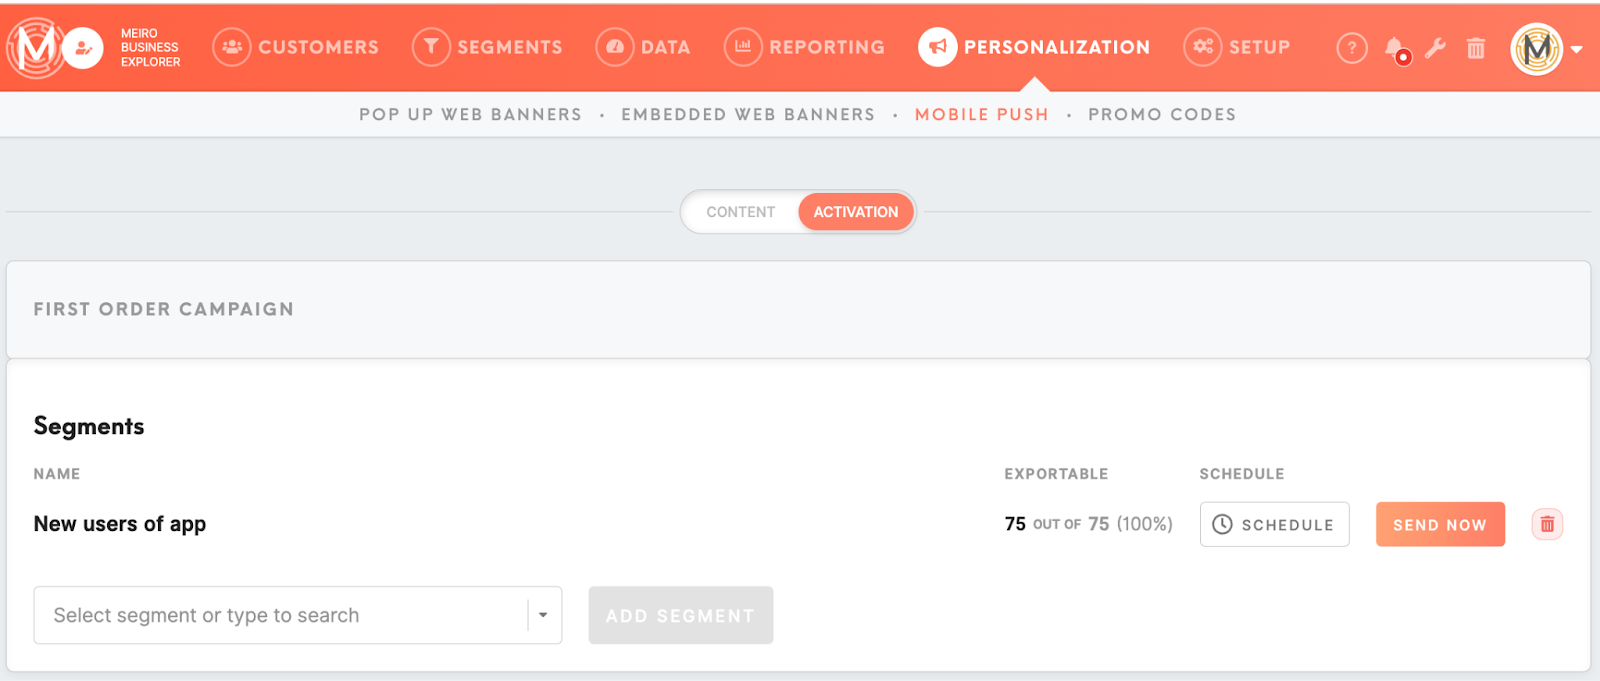
2. Activation tab
2.1 Segment section
|
Segment selection
(required)
|
A dropdown list that allows selecting a segment of customers you want to send Mobile Push to. Remember, a segment should be created in advance in the Segments tab and should contain customers with known Registration token attribute ID.
Warning: if a single entity is present in multiple segments, there is a possibility that the customer receives multiple notifications. Try to avoid spamming your customers.
Remember: each segment can have only one active Mobile Push and each Mobile Push can be sent only to one segment.
|
|
Schedule selection
(optional)
|
It is possible to schedule a specific time for sending Mobile Pushes. Time is scheduled in the UTC timezone.
Currently, it is possible to set a schedule:
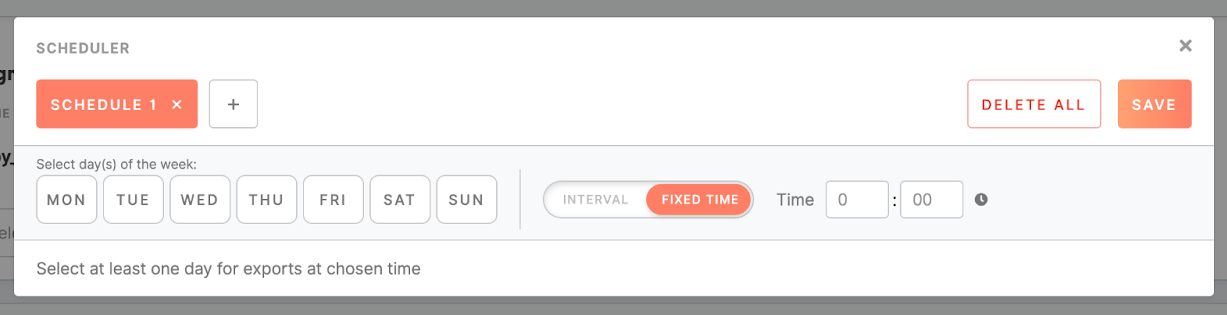
It is possible to set multiple schedules for one segment.
It is possible to schedule sending mobile pushes to different segments independently.
|
Use the "Send now" button to send the push notification to the audience with immediate effect. If the schedule was set to the segment, then users from the segment will receive notifications on their mobile phones on selected days and time.
2.2 Activation history
|
Activation history
|
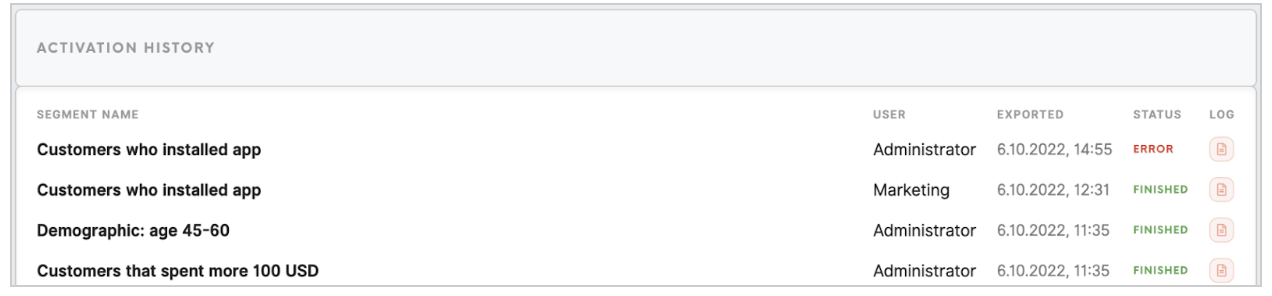
Activation history lists all Mobile Pushes sent for the last 30 days.
It contains information on the segment's name, date when the segment was exported, user, and status (waiting, running, error, finished) of rendering the push notification.
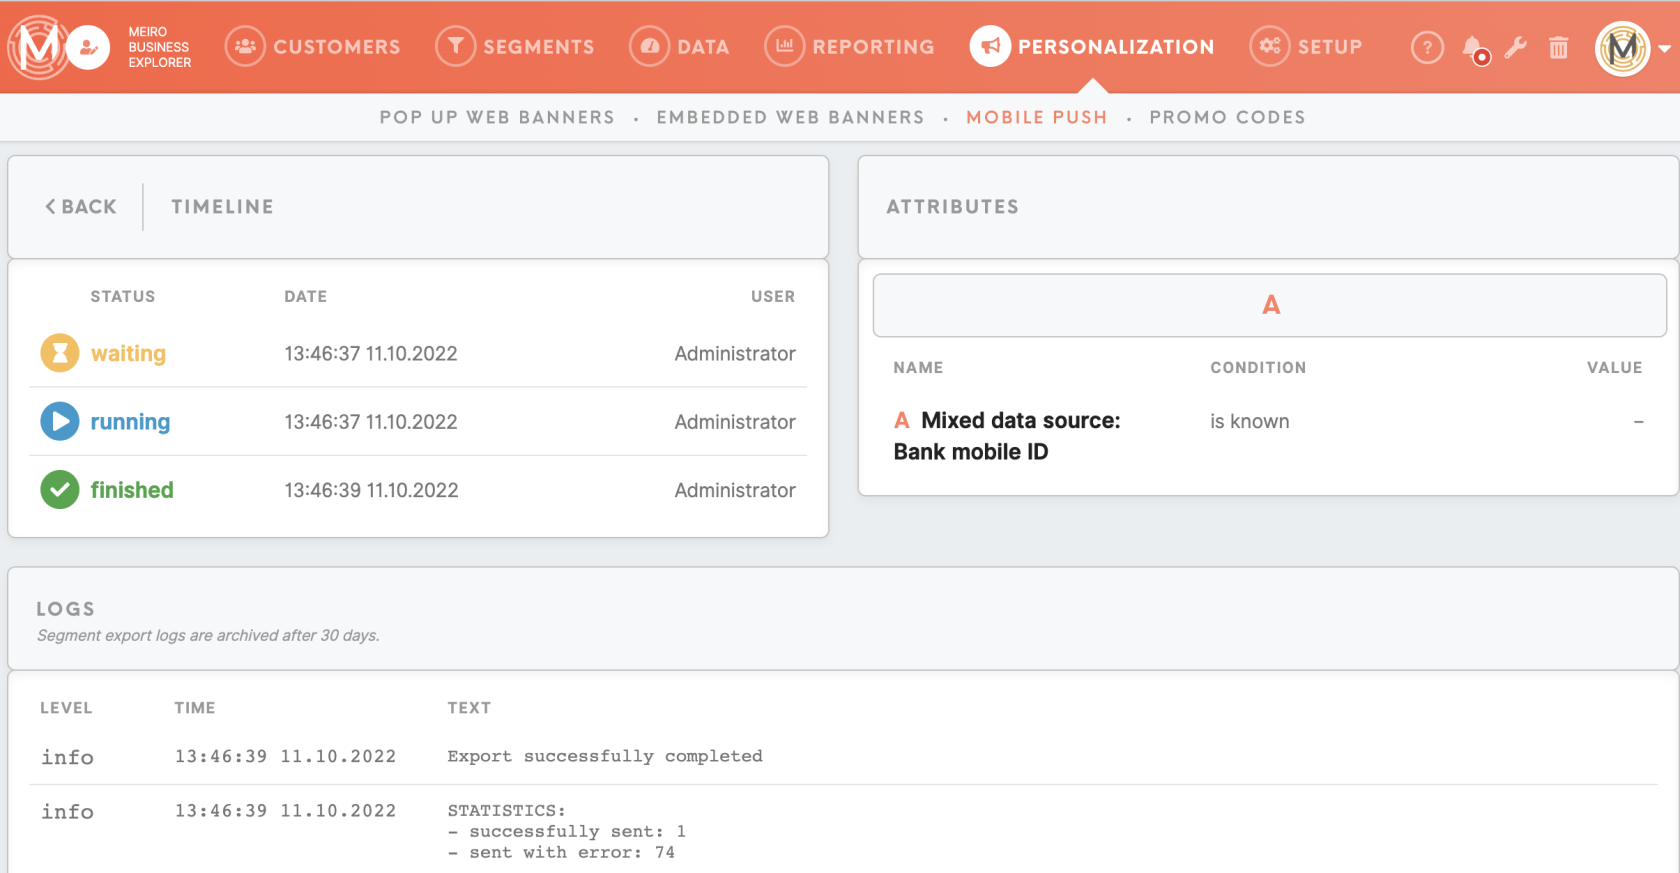
The ‘Log’ button redirects the user to the logs box that tracks updates made to a Mobile Push and notes about the level of each modification (“info” or “error”), the time it was made, and a comment. The statistics of how many entities successfully received Mobile Push is also visible in the Log box.
The ‘Attributes’ section shows the condition of attributes used in the Mobile Push.
|