Mobile Push: how to configure Mobile Push destination
Generate Firebase JSON file
Before configuring the Mobile Push destination, it is required to set up a Firebase account and generate a Firebase JSON file. Below is the sequence of steps to follow for setting this up:
-
Once you have created a Firebase project, you can set up an app in Firebase for iOS or Android.
-
In the Firebase console, open Settings -> Service Accounts -> click ‘Generate new private key’.
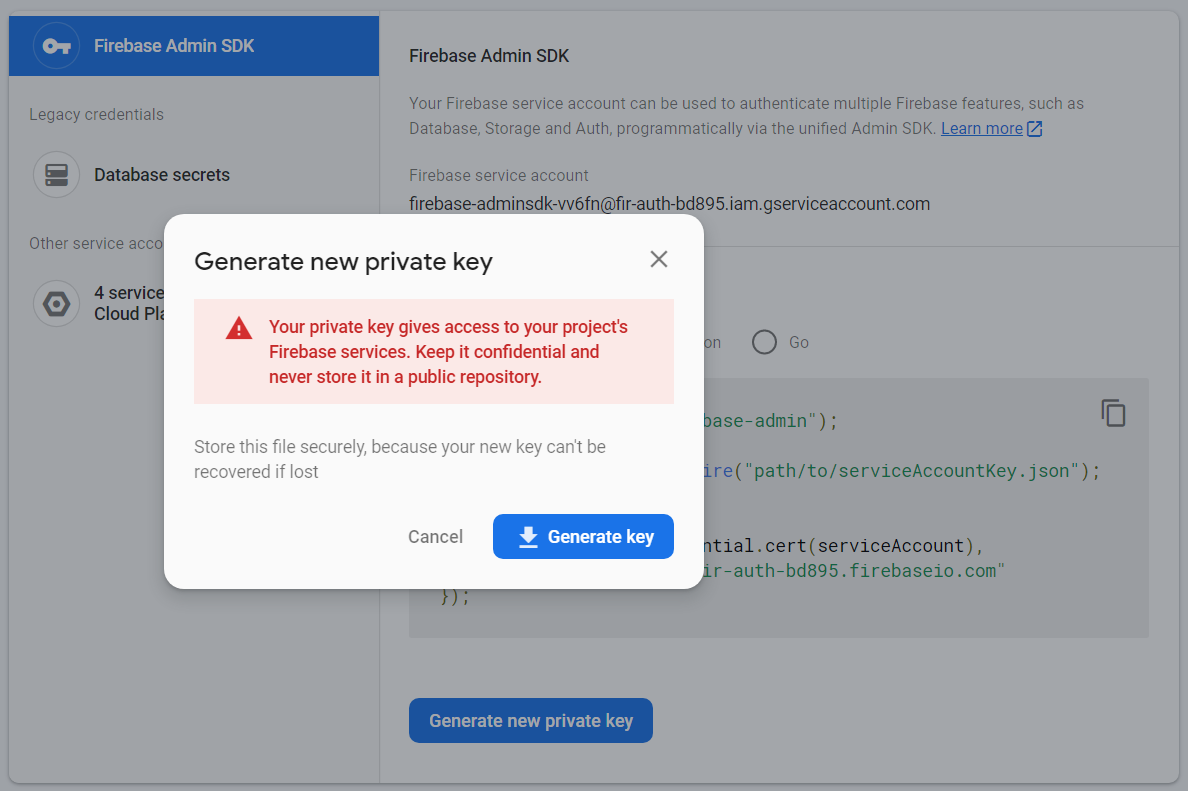
-
Click on the ‘Generate key’ to download the ServiceAccount.json file. This file is required to allow Meiro Business Explorer to access your Firebase project.
Configure Firebase account on Meiro Business Explorer
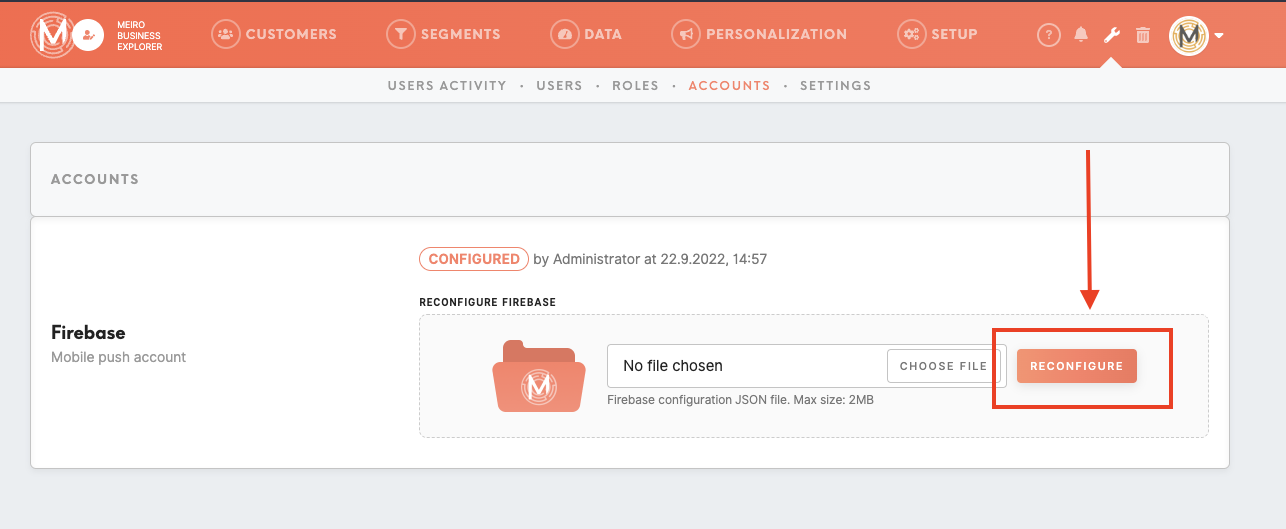
To set the Mobile Push destination, the user must first configure the Firebase account under the Administration/Accounts tab. To configure the Firebase account please upload the ServiceAccount.json file from the previous step.
Set Mobile Push destination
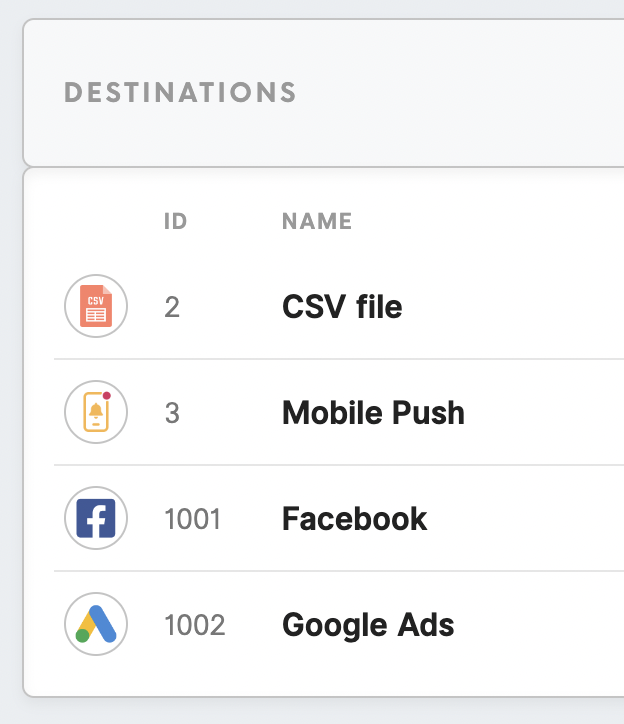
Once the Firebase account is configured on the CDP instance, the Push Notifications destination is automatically created in the Setup/Destinations tab.
Go to the editing of the Mobile Push destination and configure the Registration Token Attribute ID with the source attribute, which is customized with the help of the Meiro team. When the Push Notifications destination is configured, but the attribute in the Registration Token Attribute ID is not set, the execution of the destination will fail with an error message.

The Mobile Push destination has Exported Attributes disabled, as a list of exported attributes is determined dynamically from a Mobile Push.