Email channel configurations
The Administration/Configurations/Channels tab in Meiro Business Explorer enables businesses to configure channels for running campaigns. This guide provides a step-by-step tutorial on configuring the Email channel in Meiro Business Explorer.
|
Prerequisites for Emails
|
- Email provider settings
- Emails channel’s attribute settings
- Available SMTP Integrations
- Verified senders

Email provider
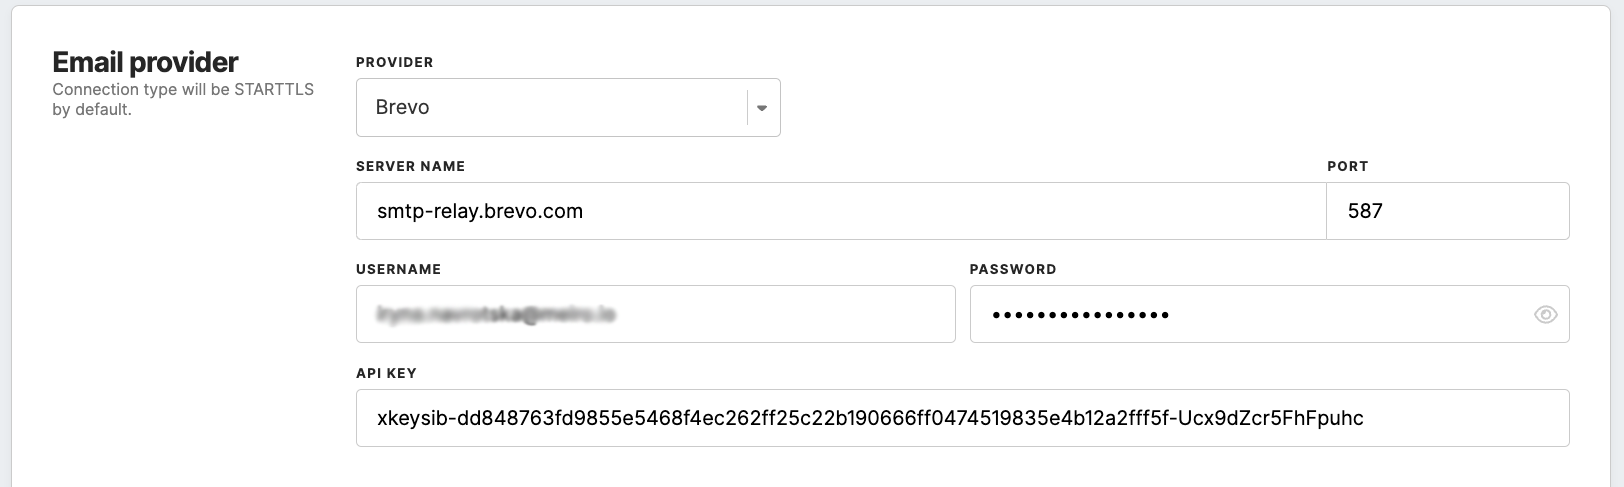
Remember: different email service providers may have slightly different processes for obtaining this information, so it's best to consult the documentation for the specific email service provider being used, e.g., on Gmail, Microsoft Outlook, Zoho Mail.
By default, the connection type is STARTTLS, which means that the CDP uses this protocol to encrypt the connection. STARTTLS is a security protocol used to encrypt the connection between the CDP and the SMTP server. This helps to ensure the privacy and security of the email messages being sent.
Configuration of email stitching category
At the next stage, you need to select the stitching category related to emails, keep in mind it cannot be changed later on. If there is no suitable stitching category yet, proceed with creating it first through the 'add stitching category' button.

Available SMTP Integrations
This section presents a selection of SMTP providers suitable for email communication, including Mailjet, MessageBird, Brevo, MailerSend, Infobip, Mailgun, SendGrid, and Omnivery.

Verified Senders
In the "Verified Senders" section, you need to configure the email addresses that will be available for use as sender and reply addresses in your email campaigns. When creating an email, you can select from a list of email addresses you have previously verified in the configuration section. If you have marked a default email address, it will automatically fill in the email creation form.

To add a new email address to your list of verified senders, fill in the email address in the designated field and click the 'add address' button. Every email address you add must be verified by following a link sent to that email address.
Remember: you can remove an email address from the list of verified senders if it is not currently being used in any email campaign. Additionally, at least one email address must be configured in the "Verified Senders" section. Setting Stitching Rule
To enable the inclusion of email events in the profile identity graph, the analyst must establish a stitching rule for the Meiro Email Message ID attribute and associate all pertinent email events with it.
e events loader. This ensures that the email bounce data is properly captured and available for analysis.