Channel configurations
The Administration/Configurations/Channels tab in Meiro Business Explorer enables businesses to configure channels for running campaigns. This guide provides a step-by-step tutorial on configuring the Email and Mobile Push channel in Meiro Business Explorer.
Configuring Email channel
- SMTP account settings
- Emails channel’s attribute settings
- Verified senders
- Setting stitching rule
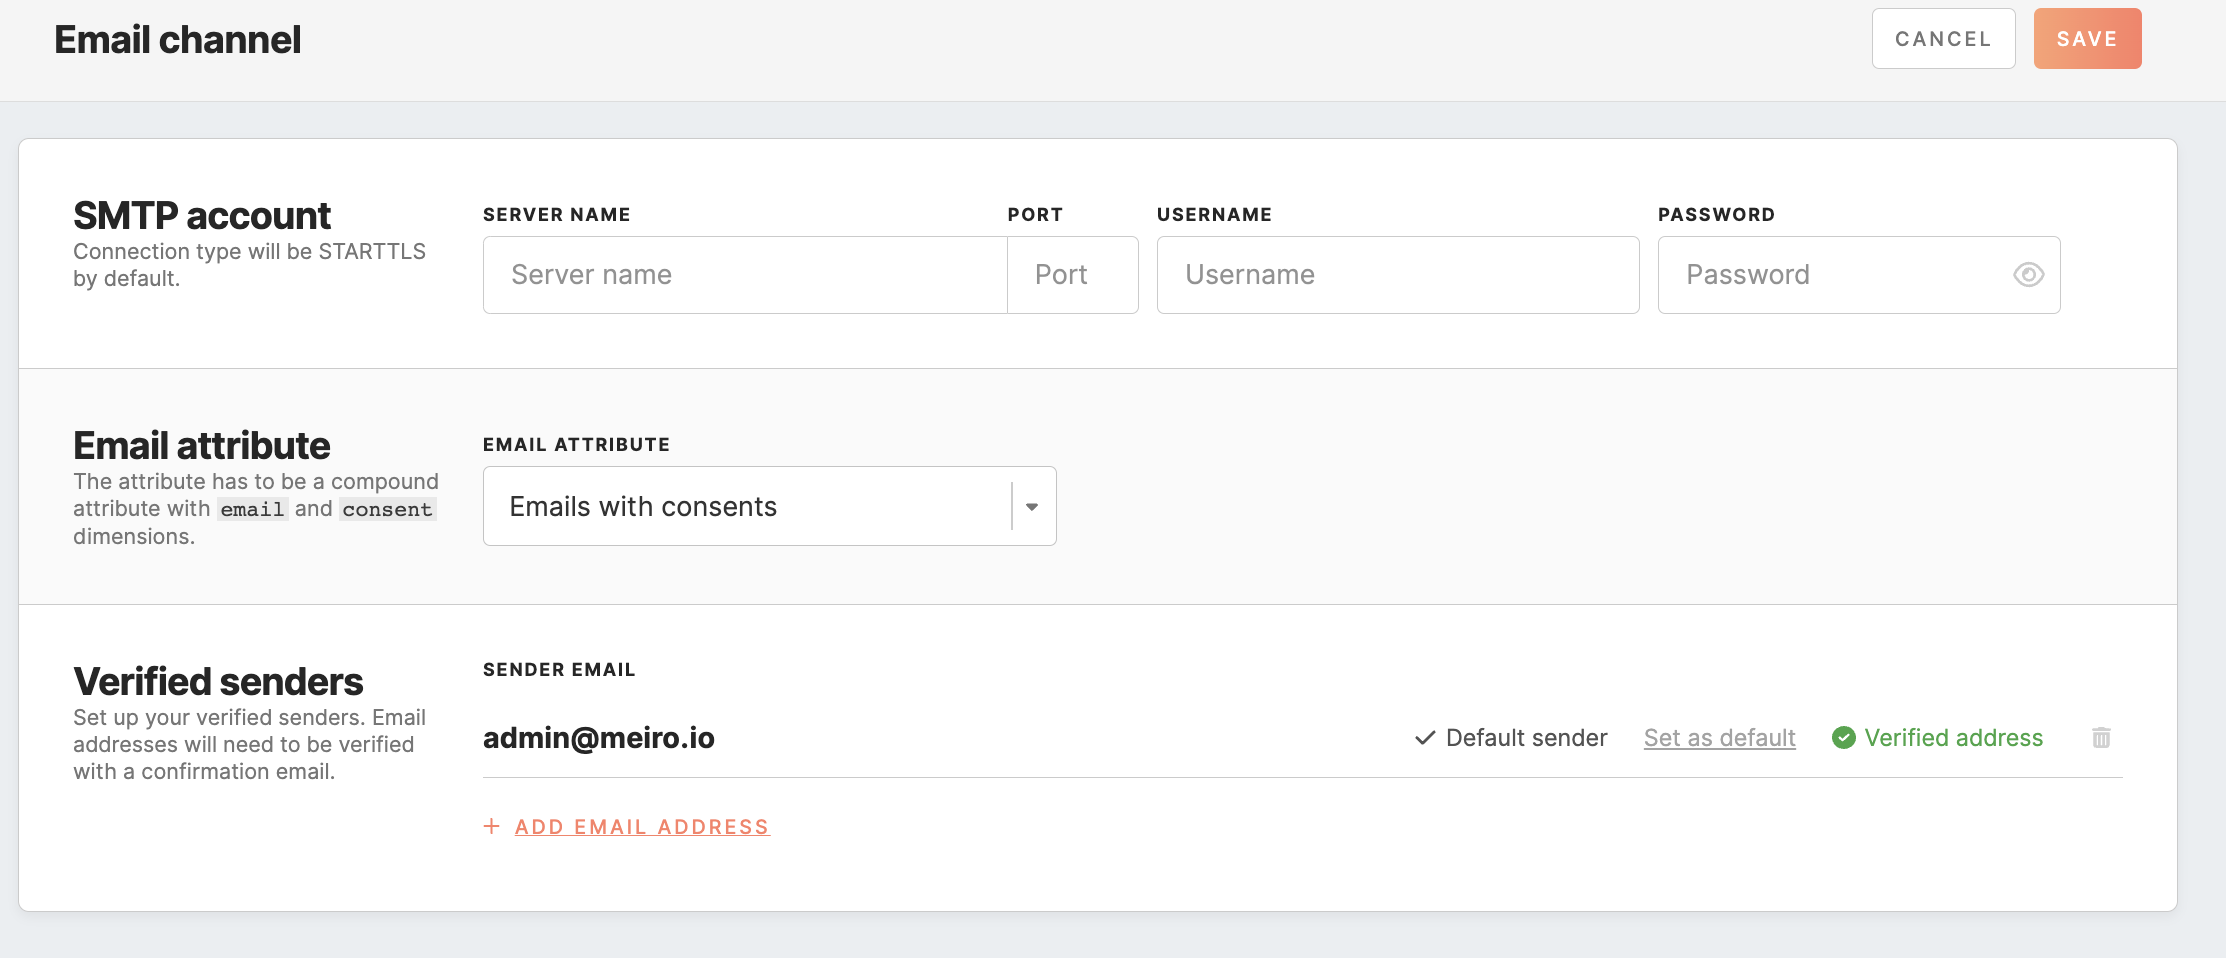
SMTP account settings
SMTP is the standard protocol used for sending email messages over the Internet. To enable email delivery, you need to specify the SMTP account settings. The SMTP account information, including the server name, port, and credentials, can typically be obtained from the email service provider.

Remember: different email service providers may have slightly different processes for obtaining this information, so it's best to consult the documentation for the specific email service provider being used, e.g. on Gmail, Microsoft Outlook, Zoho Mail.
By default, the connection type is to STARTTLS, which means that the CDP uses this protocol to encrypt the connection. STARTTLS is a security protocol used to encrypt the connection between the CDP and the SMTP server. This helps to ensure the privacy and security of the email messages being sent.
Configuration of email attribute
At the last stage, you need to select the attribute, which is customized with the help of the Meiro team. Only compund attributes (single or multiple), holding both email and consent of emails can be selected.

Warning: changing the attribute may result in a delay in the update of segment counts under the Activation tab. It may take some time for the changes to be reflected in the system.
Verified Senders
In the "Verified Senders" section, you need to configure the email addresses that will be available for use as sender and reply-to addresses in your email campaigns.
When you create an email, you can select from a list of email addresses that you have previously verified in the configuration section. If you have marked a default email address, it will be automatically filled in the email creation form for you.
Remember: at least one email address must be configured in the "Verified Senders" section.
To add a new email address to your list of verified senders, fill in the email address in the designated field and click the 'add address' button. Every email address you add must be verified by following a link sent to that email address.
You can remove an email address from your list of verified senders, but only if it's not currently being used in any email campaign. Also, remember that you can't delete the last remaining email address in the list.

Setting Stitching Rule
To enable the inclusion of email events in the profile identity graph, the analyst must establish a stitching rule for the Meiro Email Message ID attribute and associate all pertinent email events with it.
Enabling of emails bounce rate
Email bounces are typically obtained by email service providers and can be accessed via their REST API. In order to collect email bounce rates, it is necessary to establish a MI workspace that can extract the bounce information from the email service provider.
Once the workspace is set up, the customer events can be constructed based on the extracted email bounces data
The payload should include the unique message ID and email address as mandatory fields, while other optional fields like campaign ID, bounce type, reason, and subject can also be included. The message ID serves as a unique identifier for each email message and is generated on our end before sending out the email. The example of payload:
{
"id": "7ac8ba56-9d43-4a9e-8057-1b3e73890e80",
"email": "example@meiro.io",
"campaign": {
"id": "7dac66f2-0300-495b-bb4e-72d7fa883f81",
"name": "Abandoned Basket"
},
"bounce_type": "soft_bounce",
"reason": "spam",
"subject": "You forgot to park your shopping cart",
"utm_parameters": {
"campaign": "abandoned_basket",
"content": "",
"medium": "email",
"source": "",
"term": ""
}
}
After constructing the customer events, they should be sent to CDP via the events loader. This ensures that the email bounce data is properly captured and available for analysis.
Configuring Mobile Push channel
Generate Firebase JSON file
Before configuring the Mobile Push channel, it is required to set up a Firebase account and generate a Firebase JSON file. Below is the sequence of steps to follow for setting this up:
- Once you have created a Firebase project, you can set up an app in Firebase for iOS or Android.
- In the Firebase console, open Settings -> Service Accounts -> click ‘Generate new private key’.

3. Click on the ‘Generate key’ to download the ServiceAccount.json file. This file is required to allow Meiro Business Explorer to access your Firebase project.
Configure Firebase account on MBE
To set the Mobile Push channel, the user must first configure the Firebase account under the Administration/Configurations/Channels tab. To configure the Firebase account, please upload the ServiceAccount.json file from the previous step.
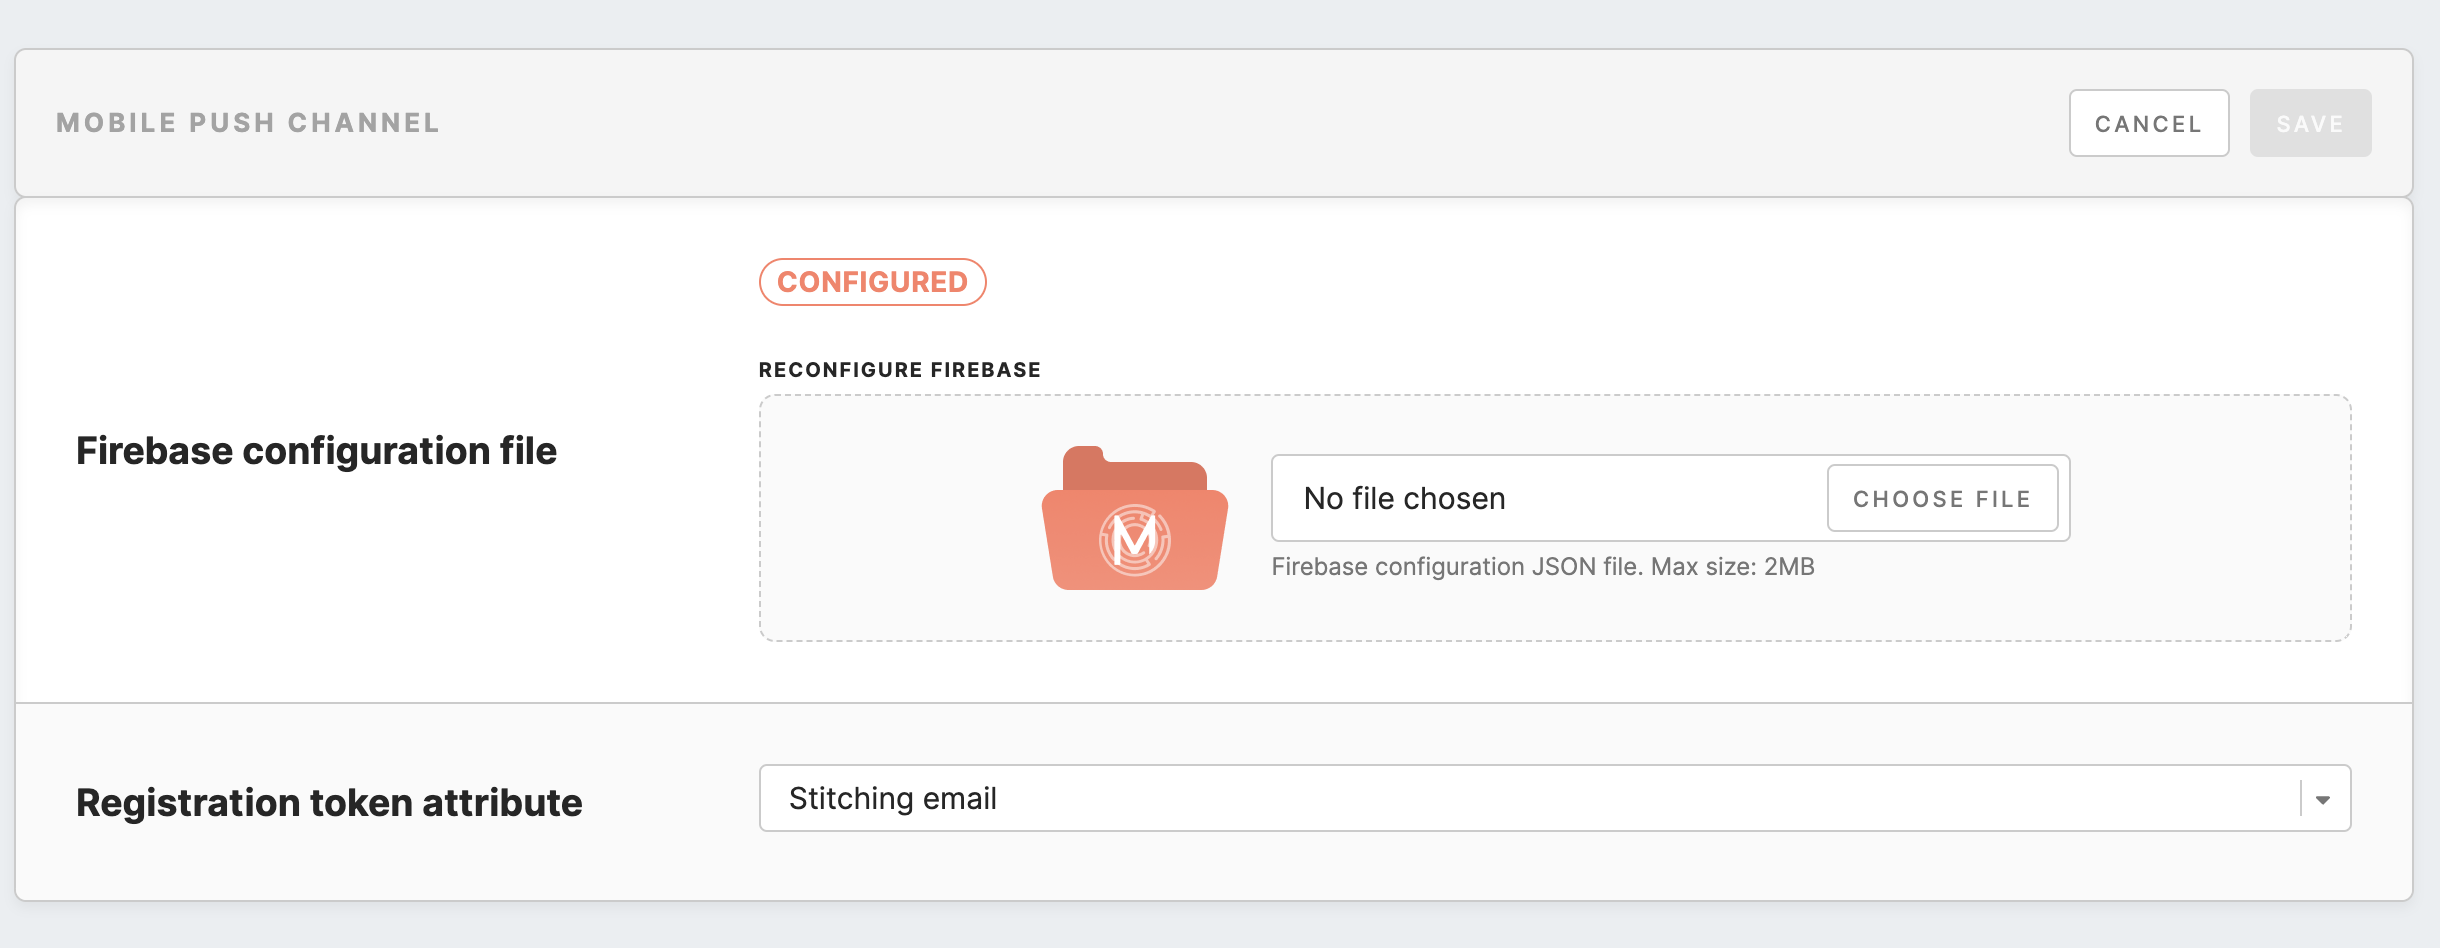
Set Registration token attribute
Once the Firebase account is configured on the CDP instance, you need to select the attribute that will be used as the registration token of the Mobile Push channel.
Configure the registration token attribute with the source attribute, which is customized with the help of the Meiro team. When the Mobile Push Channel is configured, but the attribute in the Registration Token is not set, the execution of the campaign will fail with an error message.
Warning: changing the registration token attribute may result in a delay in the update of segment counts under the Activation tab. ItThe changes may take some time for the changes to be reflected in the system.
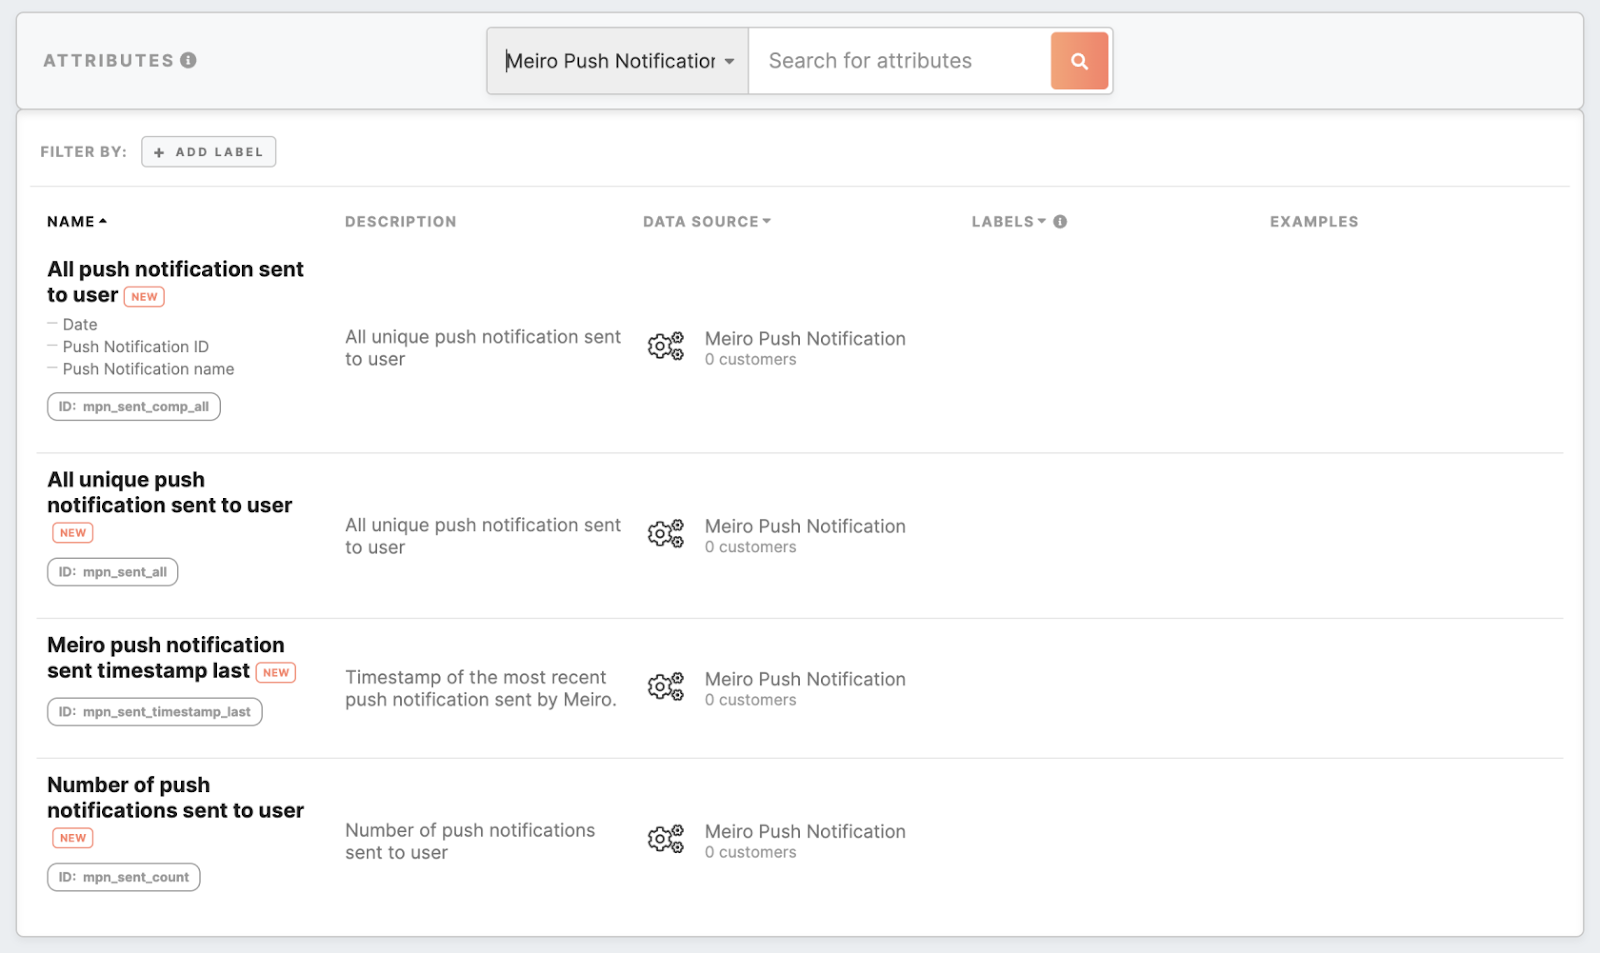
Attributes for Mobile Push channel
After you set up the Firebase account, the list of attributes for Mobile Pushes is generated automatically. They are visible under the Data library/Library/Attributes tab and may be used in the segment builder to limit the frequency of sending push notifications.